Assigning cash drawers ensures smooth cash management by restricting access to specific users. This guide explains how to assign a drawer, restrict access, and understand what users will see once a drawer is assigned.
Table of Contents
1. Navigate to Register Actions
- From the Main Menu, click on Register Actions.
- Select the Assign Drawer tab.
- Click Assign to begin the process.
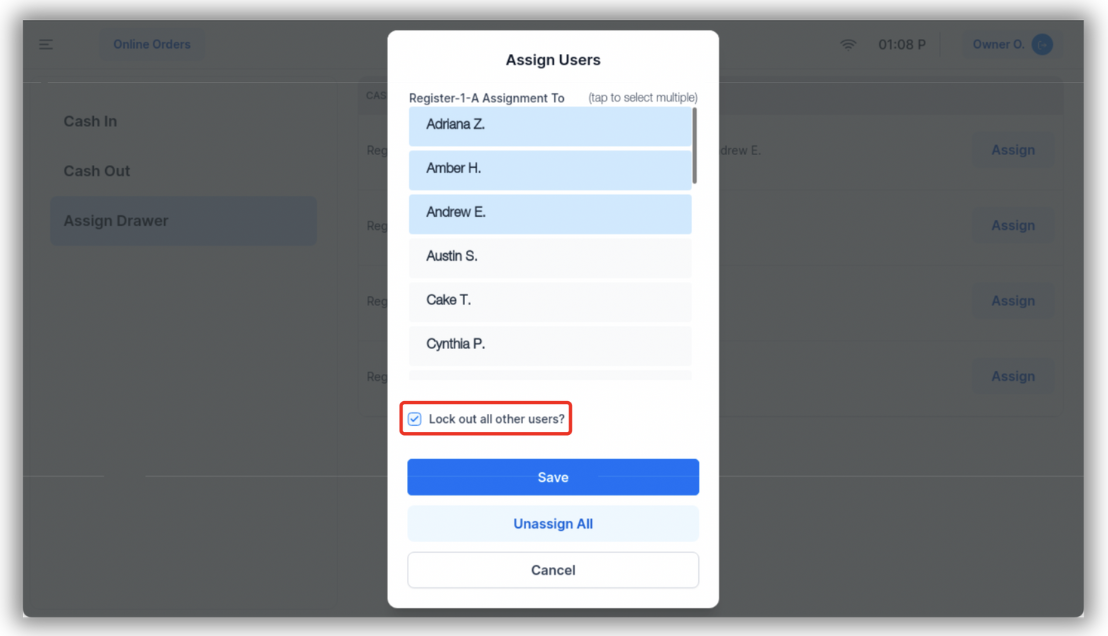
- Select the user(s) you wish to assign to the drawer.
- Click Save to finalize the assignment.
Optional: Restrict the POS to Certain Users
- To restrict the POS to only the assigned users, check the box next to Lock out all other users and then click Save.
- This ensures other employees cannot log in and accidentally attempt a cash transaction without access to the assigned drawer.
- If another user tries to log in on a restricted POS, a message will notify them that only the assigned user or a manager/owner can access the POS.
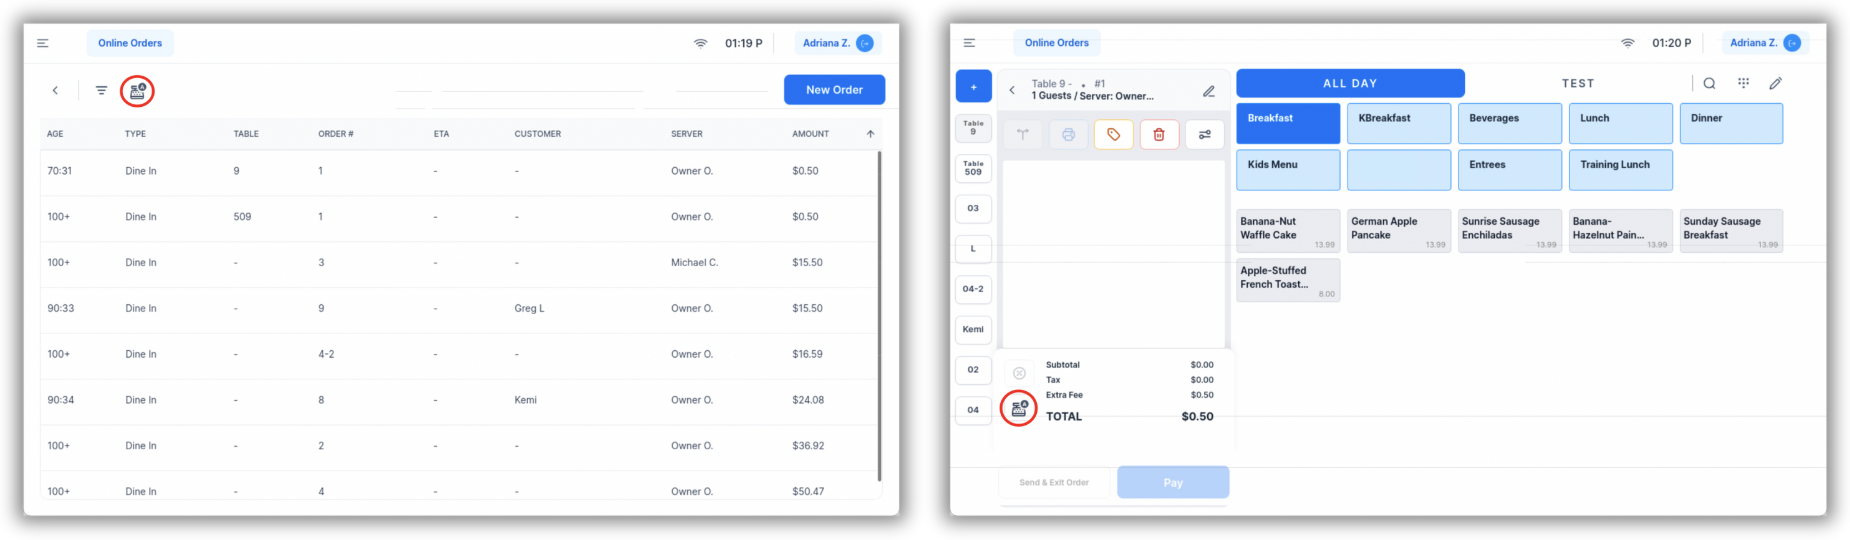
- When the assigned user logs in, a 'Register' icon will appear next to their name on the login screen.
- The cash drawer icon will also be visible:
- On the Order Queue for that user.
- At the bottom of the guest check.
- These indicators confirm the cash drawer is properly assigned.

By following these steps, you can securely assign and manage cash drawers, ensuring efficient cash handling and clear accountability for your team.
For additional training tools, we recommend reviewing the next article: POS Training Mode.