Discount settings in your POS system enable you to create and manage discount and comp reasons, ensuring streamlined order adjustments and accurate reporting. This guide walks you through the steps to configure and organize your discounts effectively.
Table of Contents
- Accessing Discount Settings
- Configuring Discount and Comp Reasons
- Best Practices
- Quick Summary Table
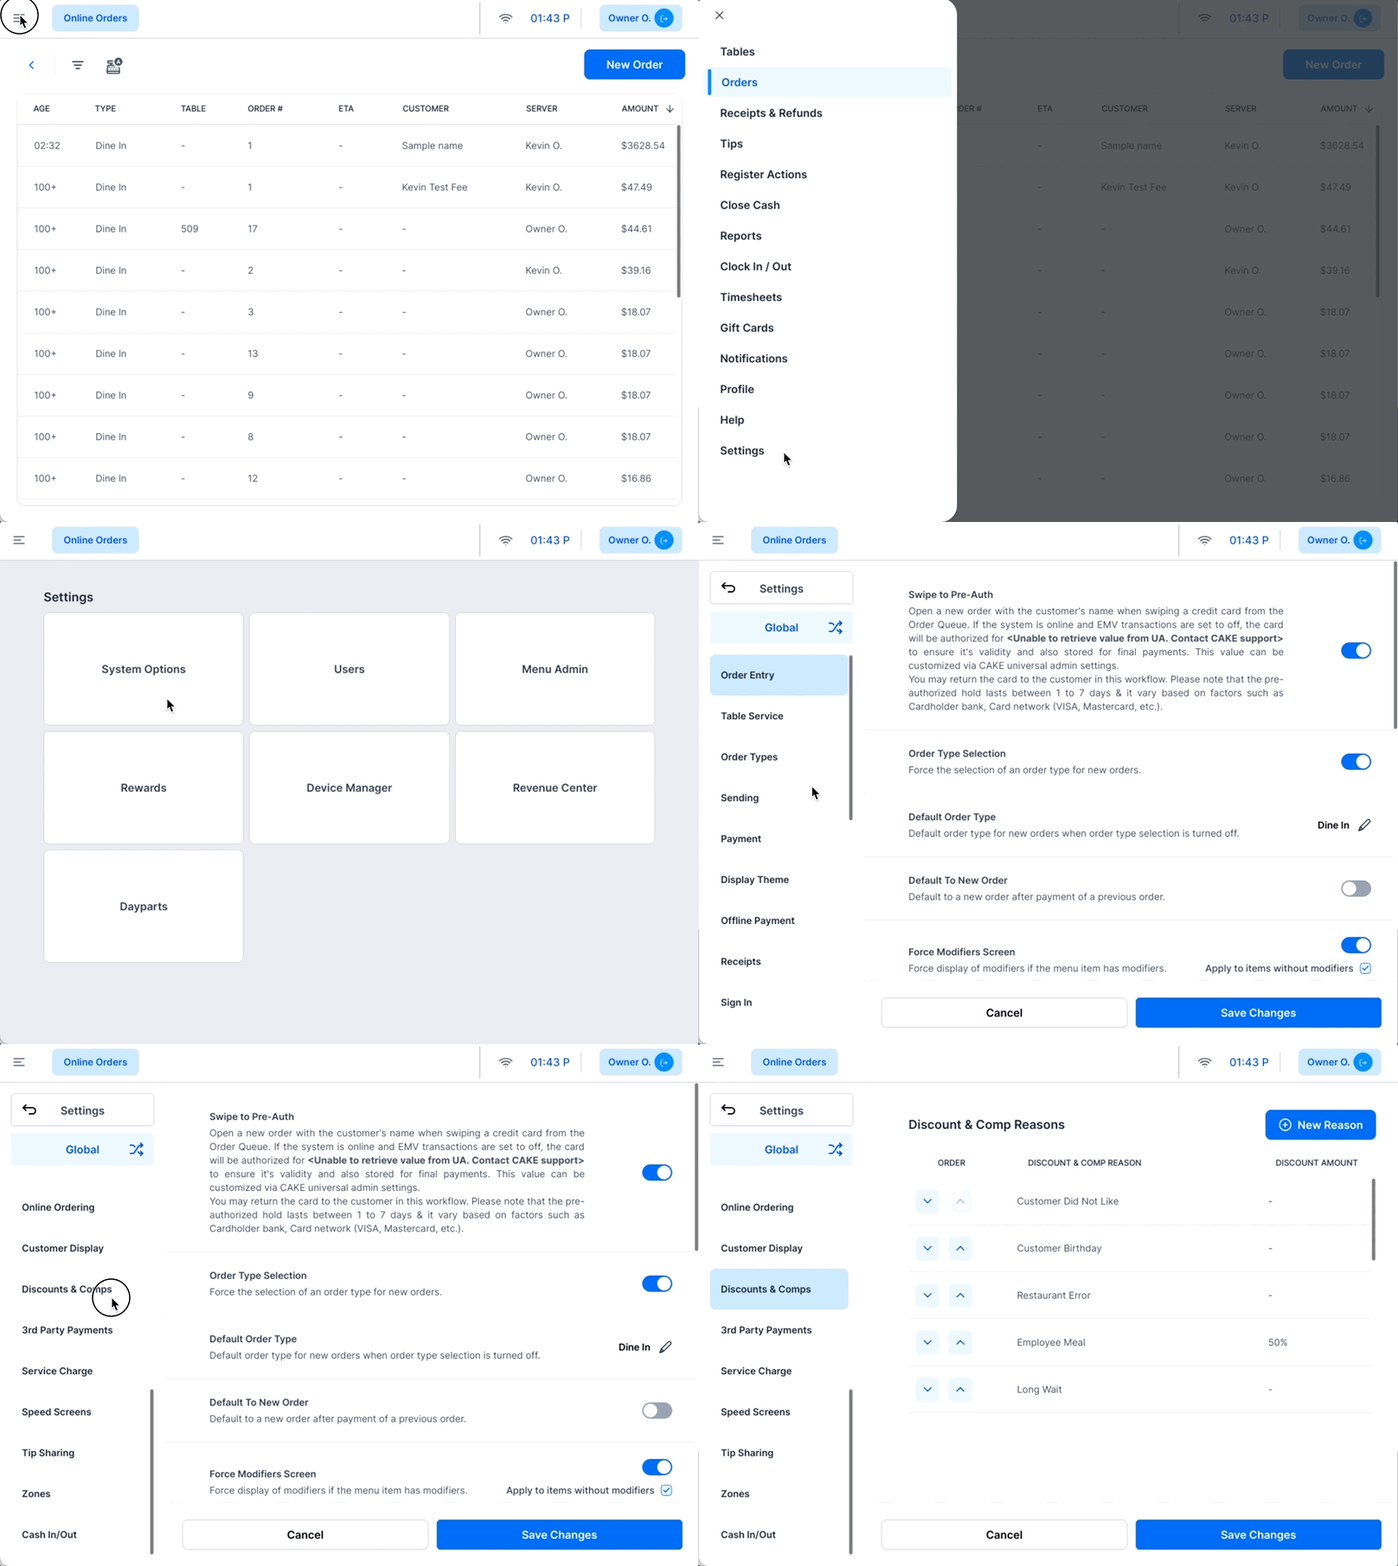
To access and modify discount settings:
- Navigate to Main Menu > Settings > System Options > Discounts & Comps.
- From here, you can add, edit, or organize discount and comp reasons.

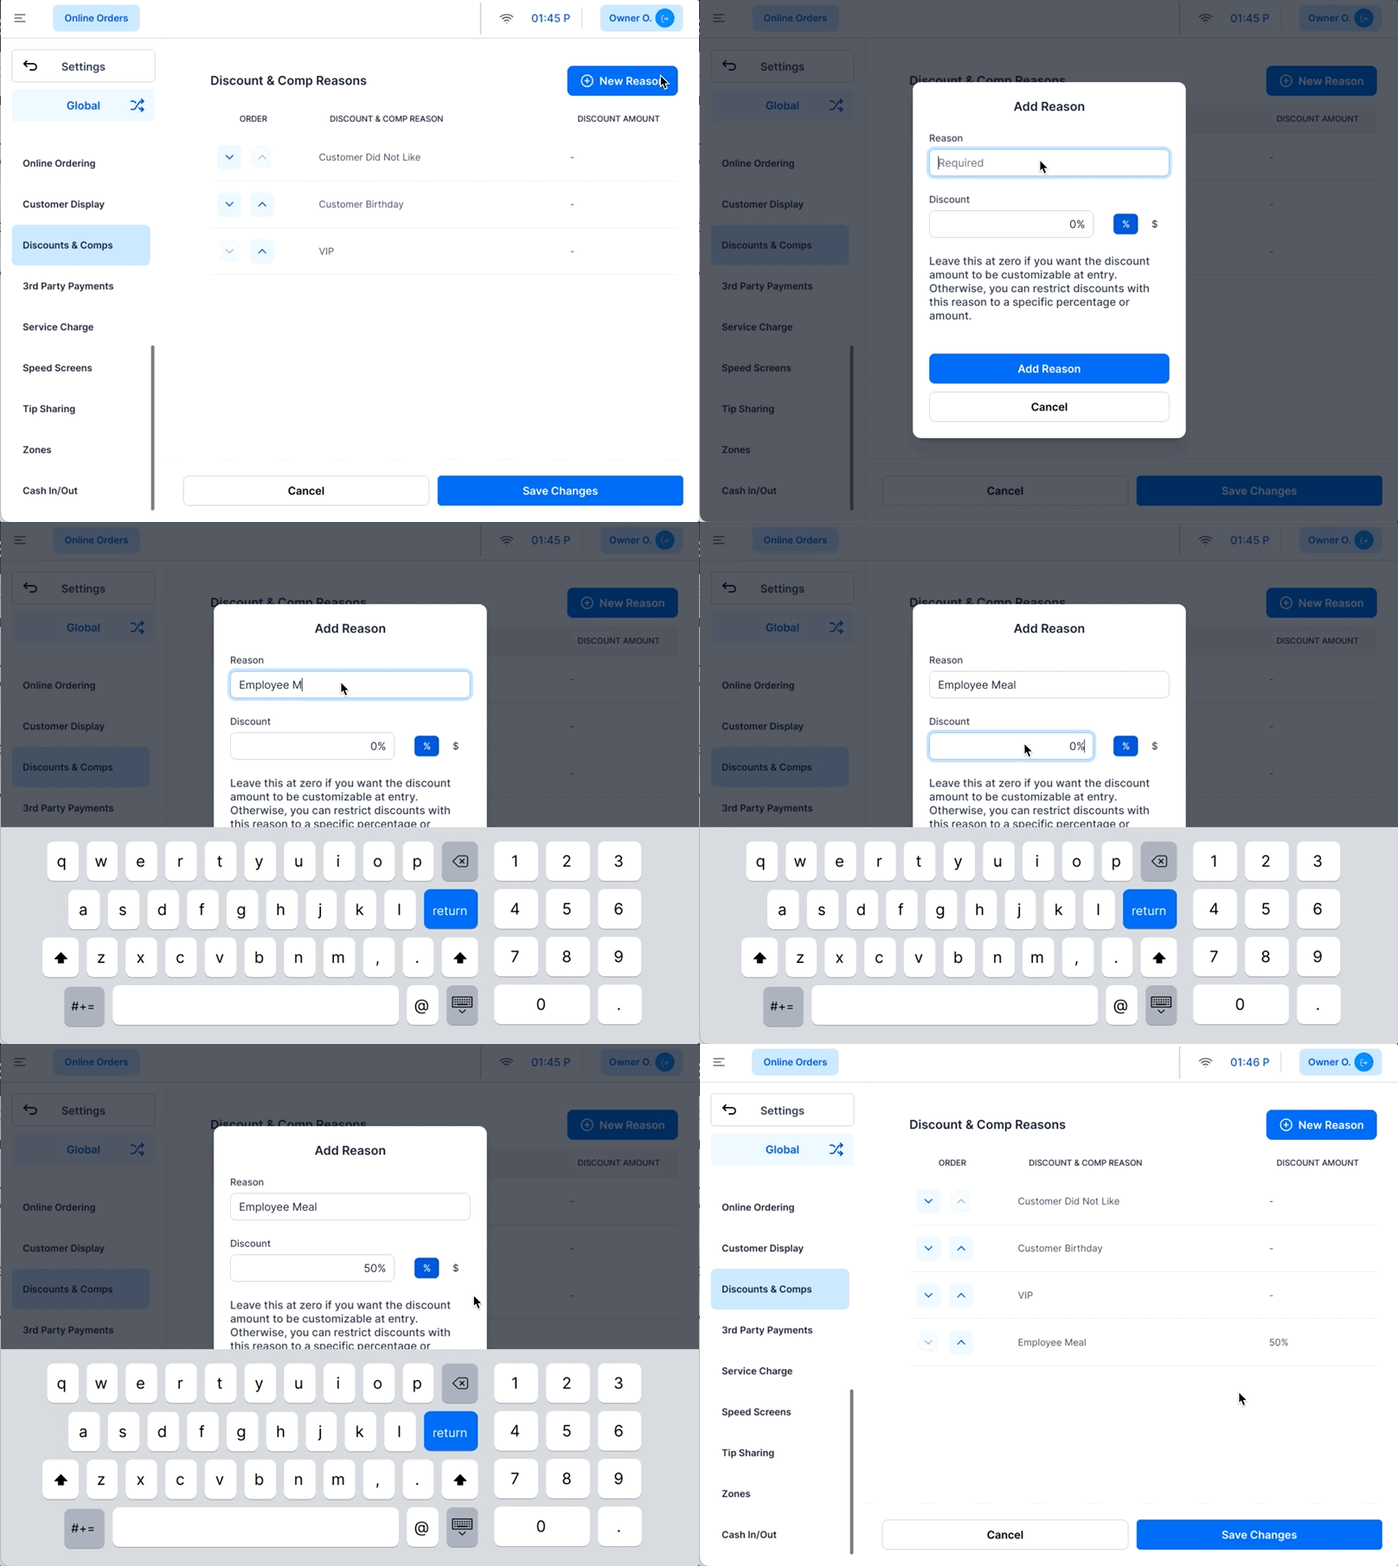
1. Adding a New Discount or Comp Reason
- Steps to Add:
- Click + New Reason in the top-right corner.
- Fill in the required fields:
- Reason: Enter a descriptive name for the discount or comp (e.g., "Happy Hour" or "Customer Complaint").
- Discount Amount: Enter a specific percentage or dollar amount for the discount.
- Leave this field at 0 if you want the amount to be customizable at the order screen.
- Click Add Reason to save.
- Result:
- The new reason will appear in the Discounts & Comps list.

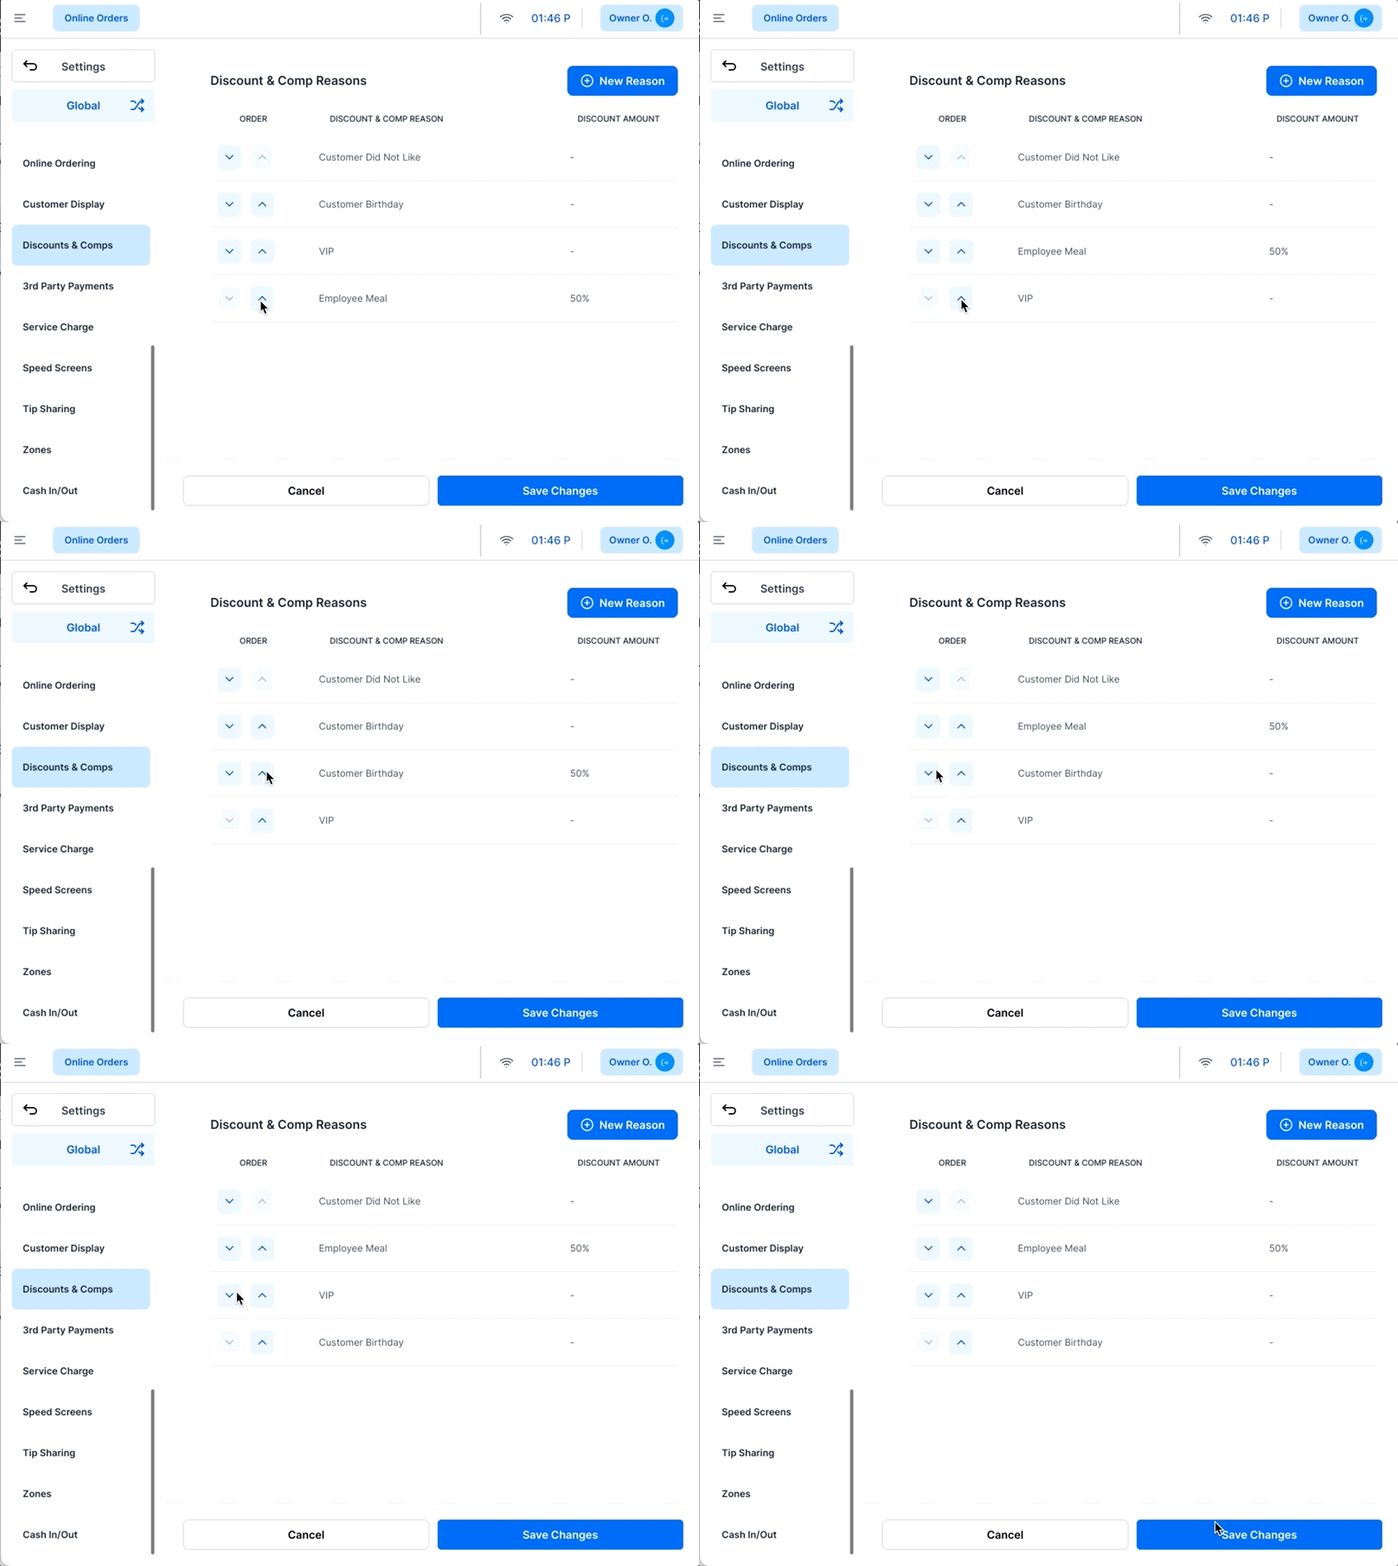
2. Organizing Discount and Comp Reasons
- Adjust Order:
- Use the up/down arrows to rearrange the order in which reasons appear on the POS for employees and managers.
- This allows you to prioritize frequently used reasons for quick access.

- Create Clear and Descriptive Reasons:
- Ensure discount reasons are easily understood by staff to minimize errors.
- Restrict Amounts When Necessary:
- Set specific dollar or percentage limits to prevent excessive discounts.
- Use Customizable Discounts Sparingly:
- Allow customizable amounts only for trusted staff or specific scenarios.
- Organize by Frequency:
- Arrange reasons so that the most commonly used options are at the top of the list.
| Action | Description | Recommendation |
|---|
| Add New Reason | Create a new discount or comp reason. | Use clear, descriptive names. |
| Set Discount Amount | Define a percentage, dollar value, or leave as customizable. | Restrict values unless flexibility is essential. |
| Organize Reasons | Use up/down arrows to prioritize frequently used reasons. | Place most-used reasons at the top for quick access. |
| Save Changes | Save adjustments to discount and comp settings. | Always click Save Changes after modifications. |
Configuring discount settings on your POS helps streamline order adjustments and improve staff efficiency. Customize and organize discount reasons to align with your operational needs, and always Save Changes after making updates. For further help, contact CAKE support via phone at (352)722-2253.

Review 3rd Party Payment Settings Next
Return to System Options Overview


