In this article:
- KDS Behavior with CAKE Point of Sale
- Printer Configuration with CAKE POS
- Void Tickets
- Required Seat Assignments
- Key Epson KDS Behaviors
- Bump Status Sync
- Sending Additional Items
- Expeditor Mode
- Rush & Priority Times
- Custom Formatting
- Summary Tile
- KDS Configuration Tool
- First Time Use
- Updating Firmware
- General Setup
- Tiles
- Displays
- Devices
- Menu & Recipes
KDS Behavior with CAKE Point of Sale
Printer Configuration with CAKE POS
You can configure your printers on the POS is one of two ways when using a multi-station setup:
-
Directly to the IB01 expansion boxes. This is the preferred method. If you have a Salad station, the CAKE POS is configured to print to that station. All other items should be configured to print to their respective stations.
-
KDS Filtering. You can send all items to the U220i and all items will show on the IB01 expansion box displays. You can configure the KDS to filter for only certain items or modifiers.
Note: You may use a combination of the above, but it is recommended to keep complexity to a minimum by only using the first method as much as possible.
Void Tickets
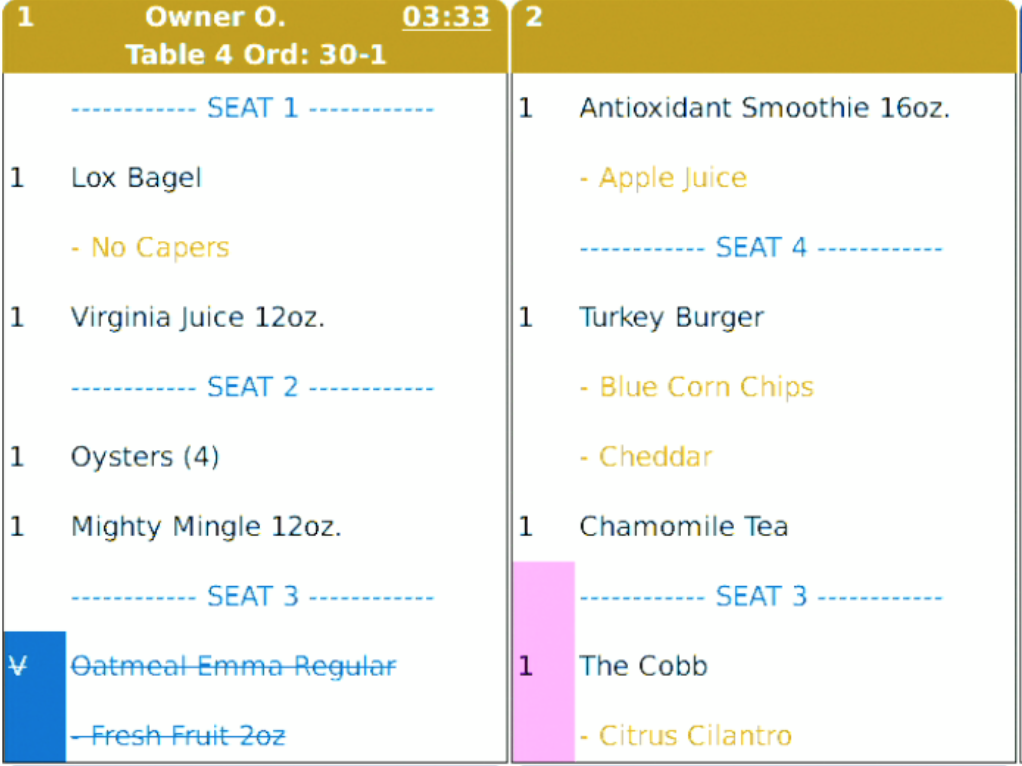
If you have your CAKE POS system configured to send Void Tickets, the items will notate as such on the KDS display. It will notate with strikethrough formatting.
Required Seat Assignments
If you have 'Group Prep Ticket by Seat Assignments' enabled on the CAKE POS, the Epson KDS will show a sub-header for the seat's items just as it would show on a paper ticket. The KDS supports both optional and required seat assignment behaviors on the POS.
Key Epson KDS Behaviors
Bump Status Sync
If an item is sent to more than one display, the bump statuses will sync
Sending Additional Items
Anything sent after the original ticket will notate with the 'appended item' color. Orders are related via the order number on the ticket. Default color is magenta. You can override this behavior with the KDS configuration tool.
Expeditor Mode
You may configure displays to act as an expeditor. An expo screen will show all items sent to all stations. The expo can only bump an order, when all items have been bumped for that order on all stations. The user can override this if need be by pressing the 'bump' button on the bump bar and then pressing the number for the order.
Rush & Priority Times
Configure the KDS to show the orders header in a different color in when a time threshold is met.
Custom Formatting
Text sizes, linespacing, grid size (number of tickets on the display), colors of certain behaviors, can all be customized in the configuration tool.
Summary Tile
Have an aggregate count for the number of items which need to be made. To use this, you need to configure menu items to show.
First let's go over a few important parts about the software of the KDS.
- In order to configure the KDS, you need a Windows machine to use the configuration software. The configuration software is not only used to make the KDS behave one way of the other, it also loads new firmware or parsers to the KDS (context below).
- The KDS has something called 'Firmware' which essentially is the KDS application loaded onto the U220i and IB01 devices.
- The KDS also requires a 'Parser' in order to know which type of POS is sending receipts to the KDS.
First Time Use
When you run the Epson KDS Configuration Utility for the first time, you can use the setup wizard to quickly detect and configure any available KDS devices. Please first connect all of your KDS devices and power them on before launching the KDS Utility. Also ensure the computer you're running the configuration utility is connected to the CAKE POS network.
- Download and run the Epson KDS Configuration Utility on the computer that is connected to your KDS network or printer.
- Enter the user name and password, and click Log In. (The default user name is admin and the default password is an empty field.)
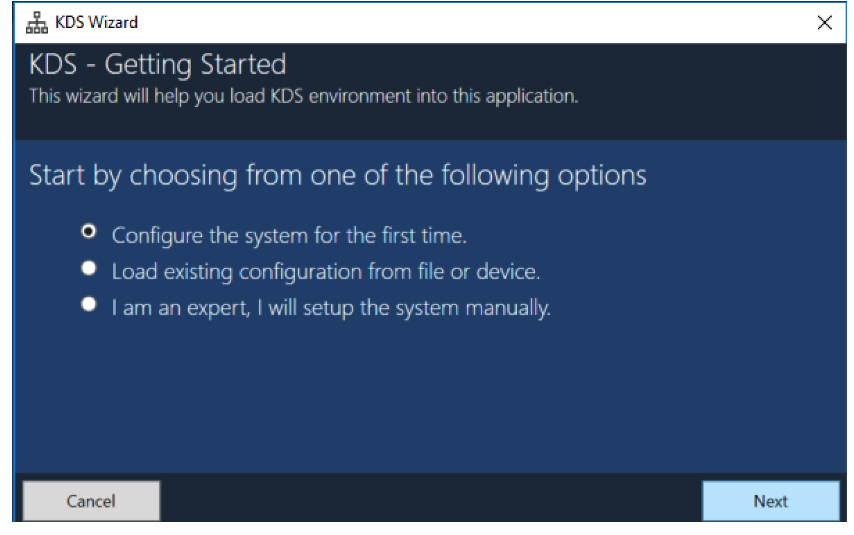
- You'll be prompted with a KDS-Getting Started window. Select 'Configure for the system for the first time' and continue.
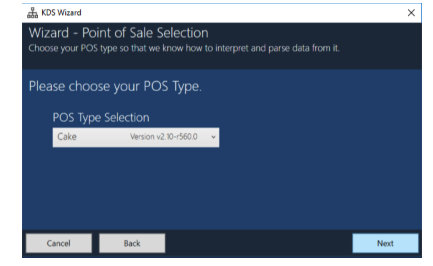
- You'll be prompted to declare the POS type the KDS system should expect to work with. This is the 'parser' we previously mentioned. Select the latest parser available in the downloads page. The current version at the time of the document's creation is v2.10-r560.
- Once you proceed the wizard will ask about IP address assignments. You MUST select one of the first two options, and SHOULD select 'Assign IP to my devices manually' to prevent IP address changes in the future. KDS units ship with a 192.168.192.168 IP configuration and will not work with the POS if left unconfigured. We recommend setting the IP address to 10.10.10.50-59 as CAKE reserves those addressed for KDS equipment. In the below example, if we have four KDS devices, then enter the IP addresses as shown.


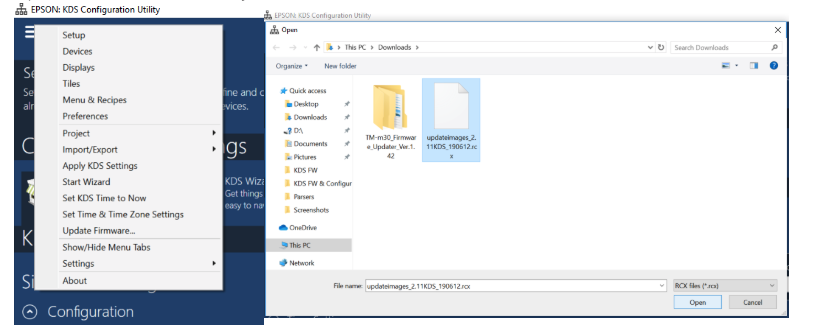
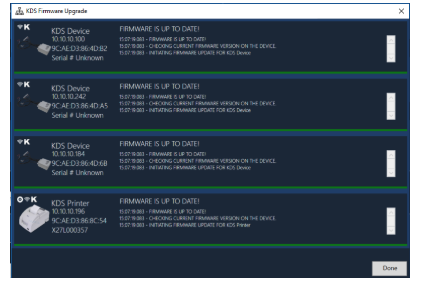
Updating the KDS firmware is easy but takes about half an hour on average. The more devices you have the longer you can expect the process to take. On the Main Menu on the top left of the Configuration Tool, select update firmware, select the .rcx firmware file, and the process should start automatically for all connected devices.
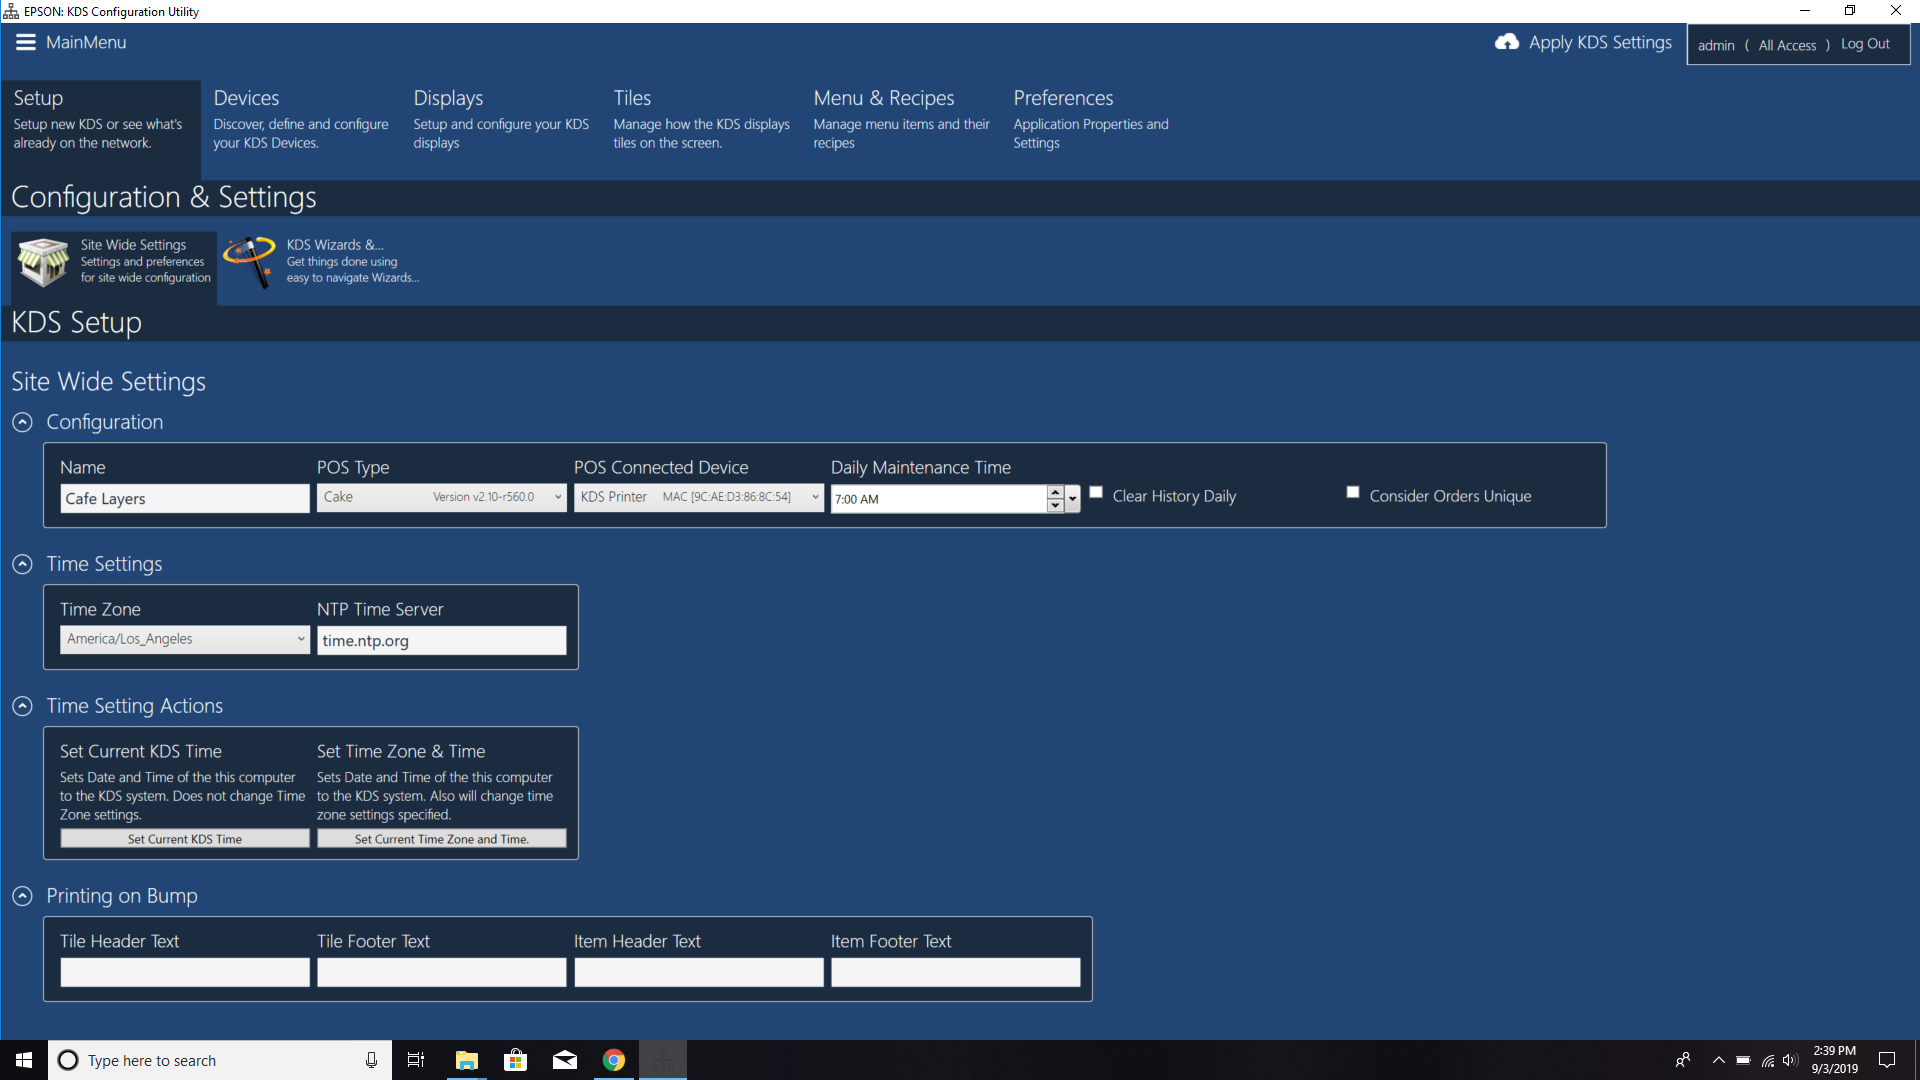
General Setup
General Setup is where we give the KDS a very high level configuration. The wizard handles most of this but there are additional things you may consider for configuration.
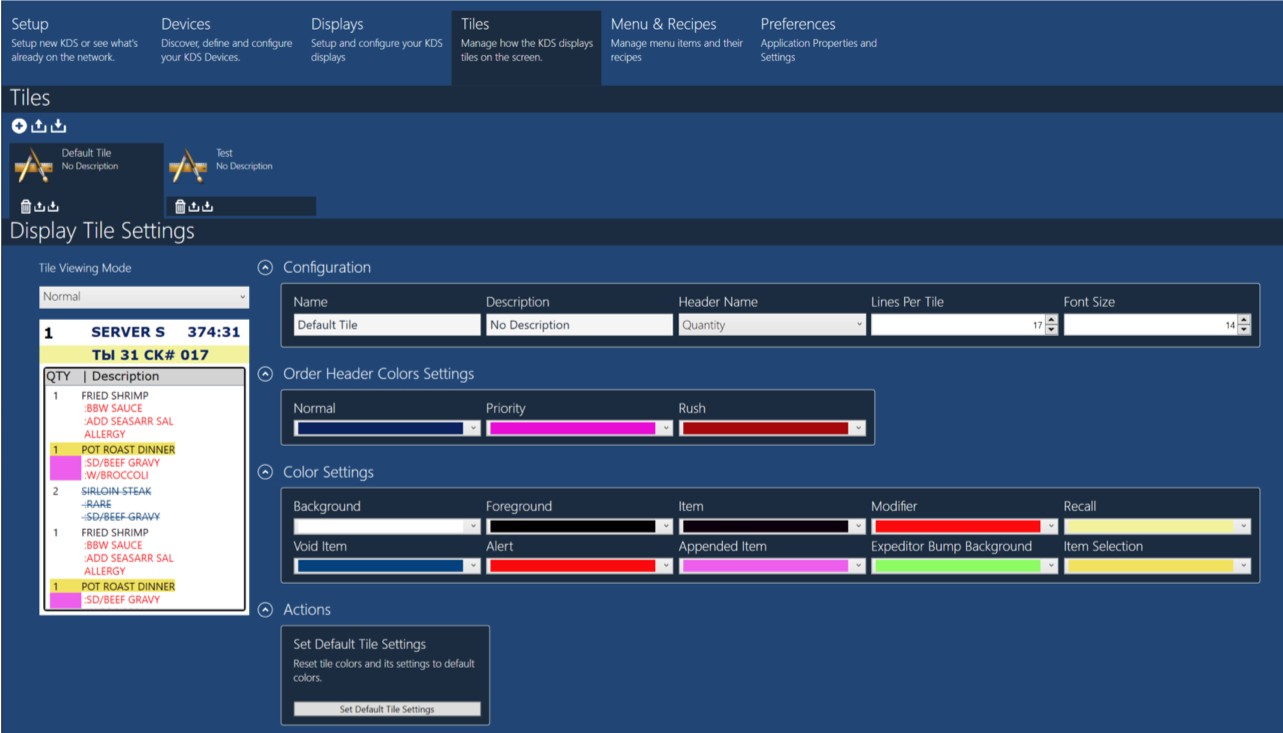
Tiles
When setting up the KDS configuration, it is more logically to work backwards from this point respective to the order on the configuration screen. Tiles are used in Display configurations, and Displays are used in Device configurations.
Most of the time you only need one tile. The tile configuration corresponds to the design and layout of the ticket. If you want alternate line spacing, font size, coloring etc on different display configurations then you have a reason to make multiple tiles.
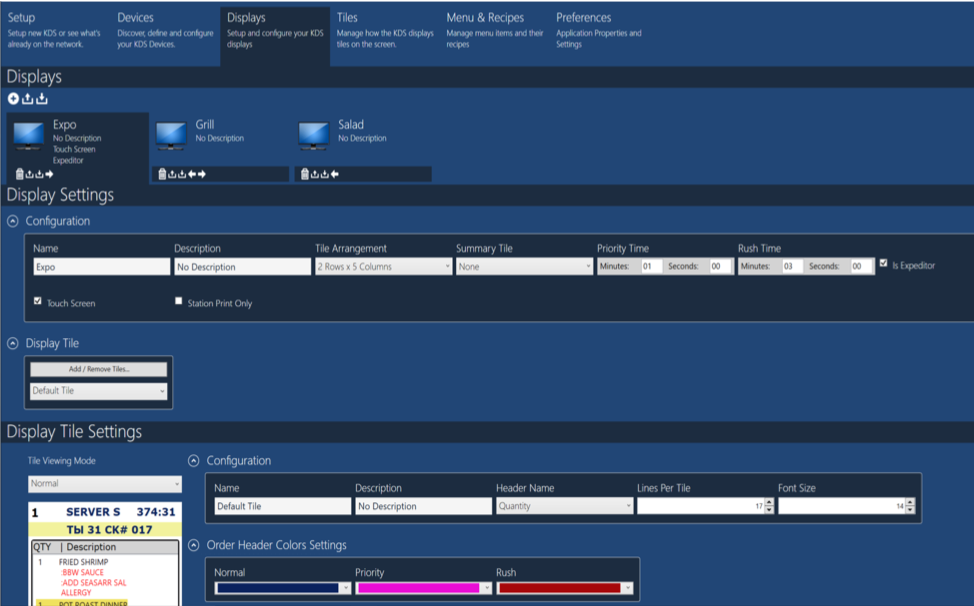
Displays
You typically want a unique display configuration per device so other stations can see bump statuses of items on other displays. If two devices share the same display configuration everything will be synced strictly, so if a ticket gets bumped off one screen it'll be bumped off the other.
This is also where to specify:
- Priority & Rush times: How much time goes by before the ticket changes color?
- Grid Size: How many tickets do you want to show on the screen? Note: if the number of items exceeds the space available in a tile, the items will roll over to the next spot in the grid.
- Summary Tile: If you do you need to select items to summarize from the 'Menu & Recipes' section.
- Expeditor Mode: All items will show on the expo screen regardless of the KDS device it was sent to. An expo can bump an order once all of its items have been bumped from their respective displays.
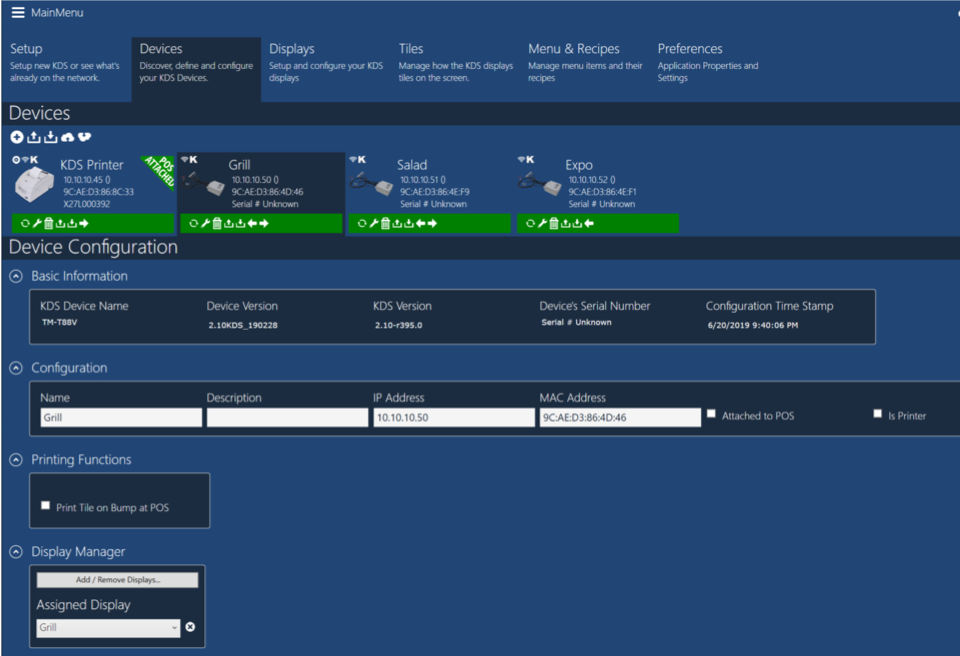
Devices
Devices represent the physical KDS devices: U220i printers & IB01 expansion boxes. You can scan the network to add additional devices. Note that the master U220i needs to be 'Attached to POS' for the system to function. The setup wizard usually handles this.
A handy feature for expo's is a function called 'Print on Bump' where the U220i can print the order information when bumped. This is good for your runners to make sure they have all the order's items as well the seat assignments of those items.
Menu & Recipes
You may want to program menu items to the KDS for a variety of reasons:
- If you need to filter what to be shown on displays.
- If you want to use the Summary Tile feature.
- If you want to enable item recipe/description lookup on the KDS.
Please note that item names need to exactly match the 'Prep Ticket Name' from the CAKE Menu.