Make it easier than ever for guests to book a table at your restaurant! With Self-Service Reservations enabled, diners can reserve directly from your Google listing—whether they're searching on mobile or desktop. No phone calls, no extra steps—just simple, streamlined booking.
Table of Contents
-
What is Self-Service Reservation from Google?
- Step-by-Step Setup
-
Disabling Google Reservations
This feature allows guests to make real-time reservations through the ‘Find a Table’ button on your Google Places listing. Once enabled, the button typically appears on your Google Search and Maps profile within 24 hours, showing your availability instantly to potential guests.


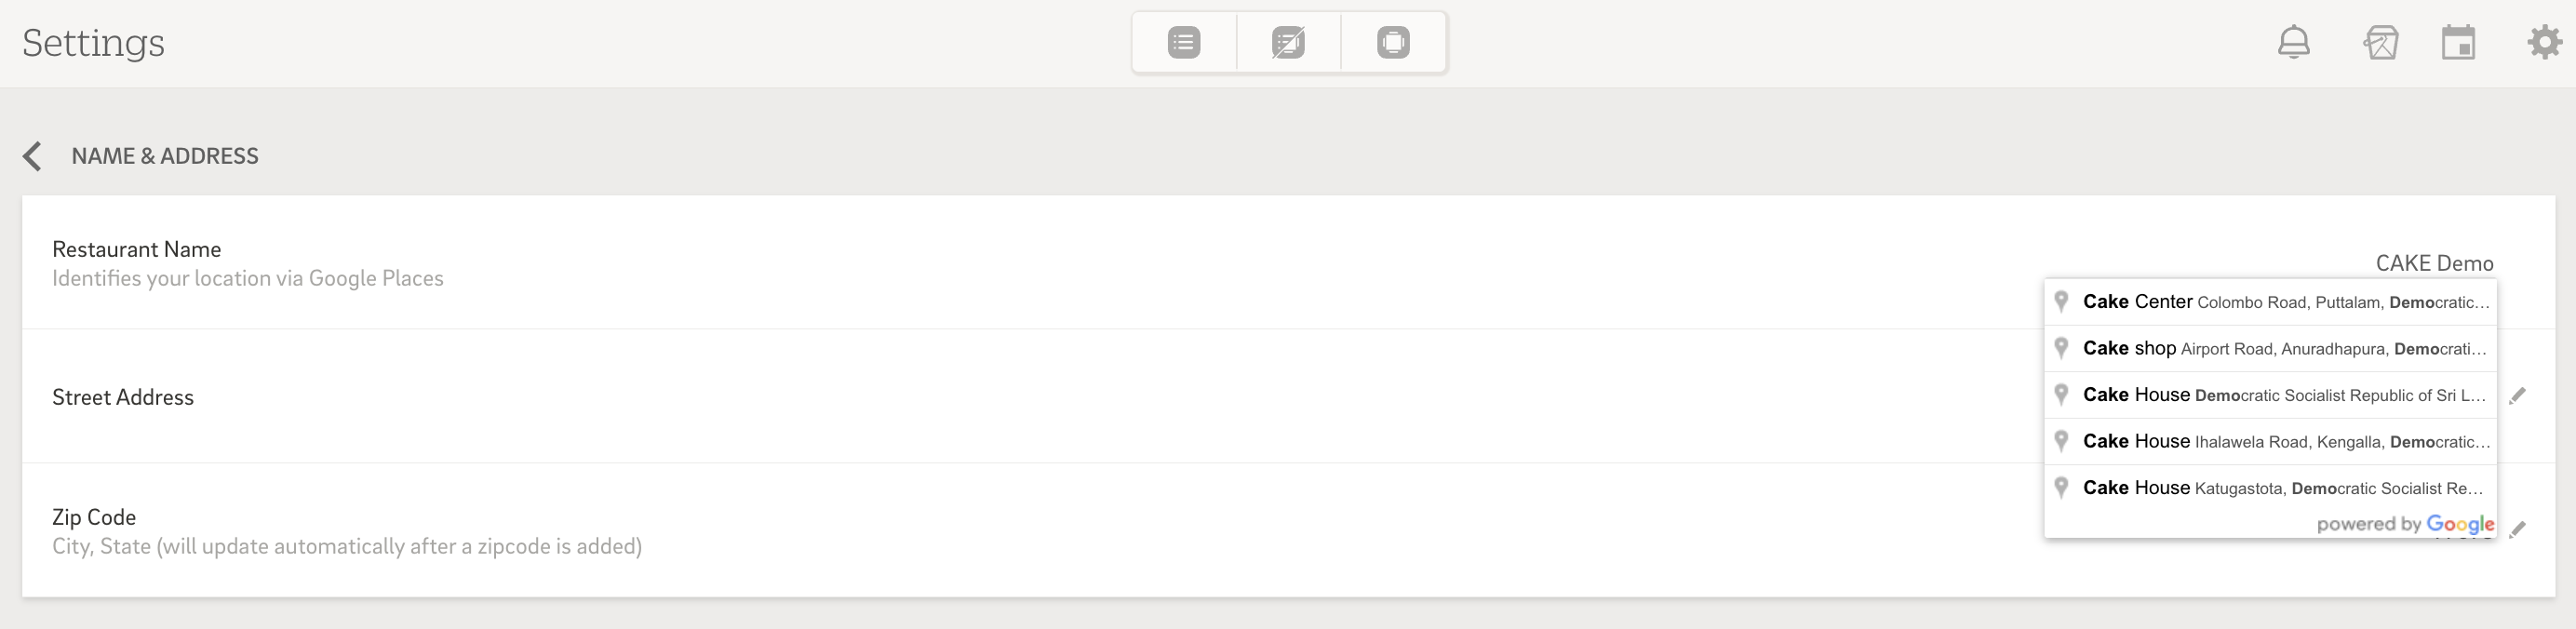
1. Confirm Your Restaurant Name & Location
Confirm your restaurant name is connected to the correct business on Google.
-
In your Guest Manager app, select the gear icon at the top right of the screen, then select Settings.
- Under Restaurant Information, confirm your restaurant name and address is an identified location via Google Places.
-
Select the restaurant name field and start typing your restaurant’s name.
-
A list of matching businesses (powered by Google) will appear.
-
Select your business to link it with your Google Place ID.
Note: If your restaurant isn’t showing up, make sure it’s registered with Google Business. It’s free!
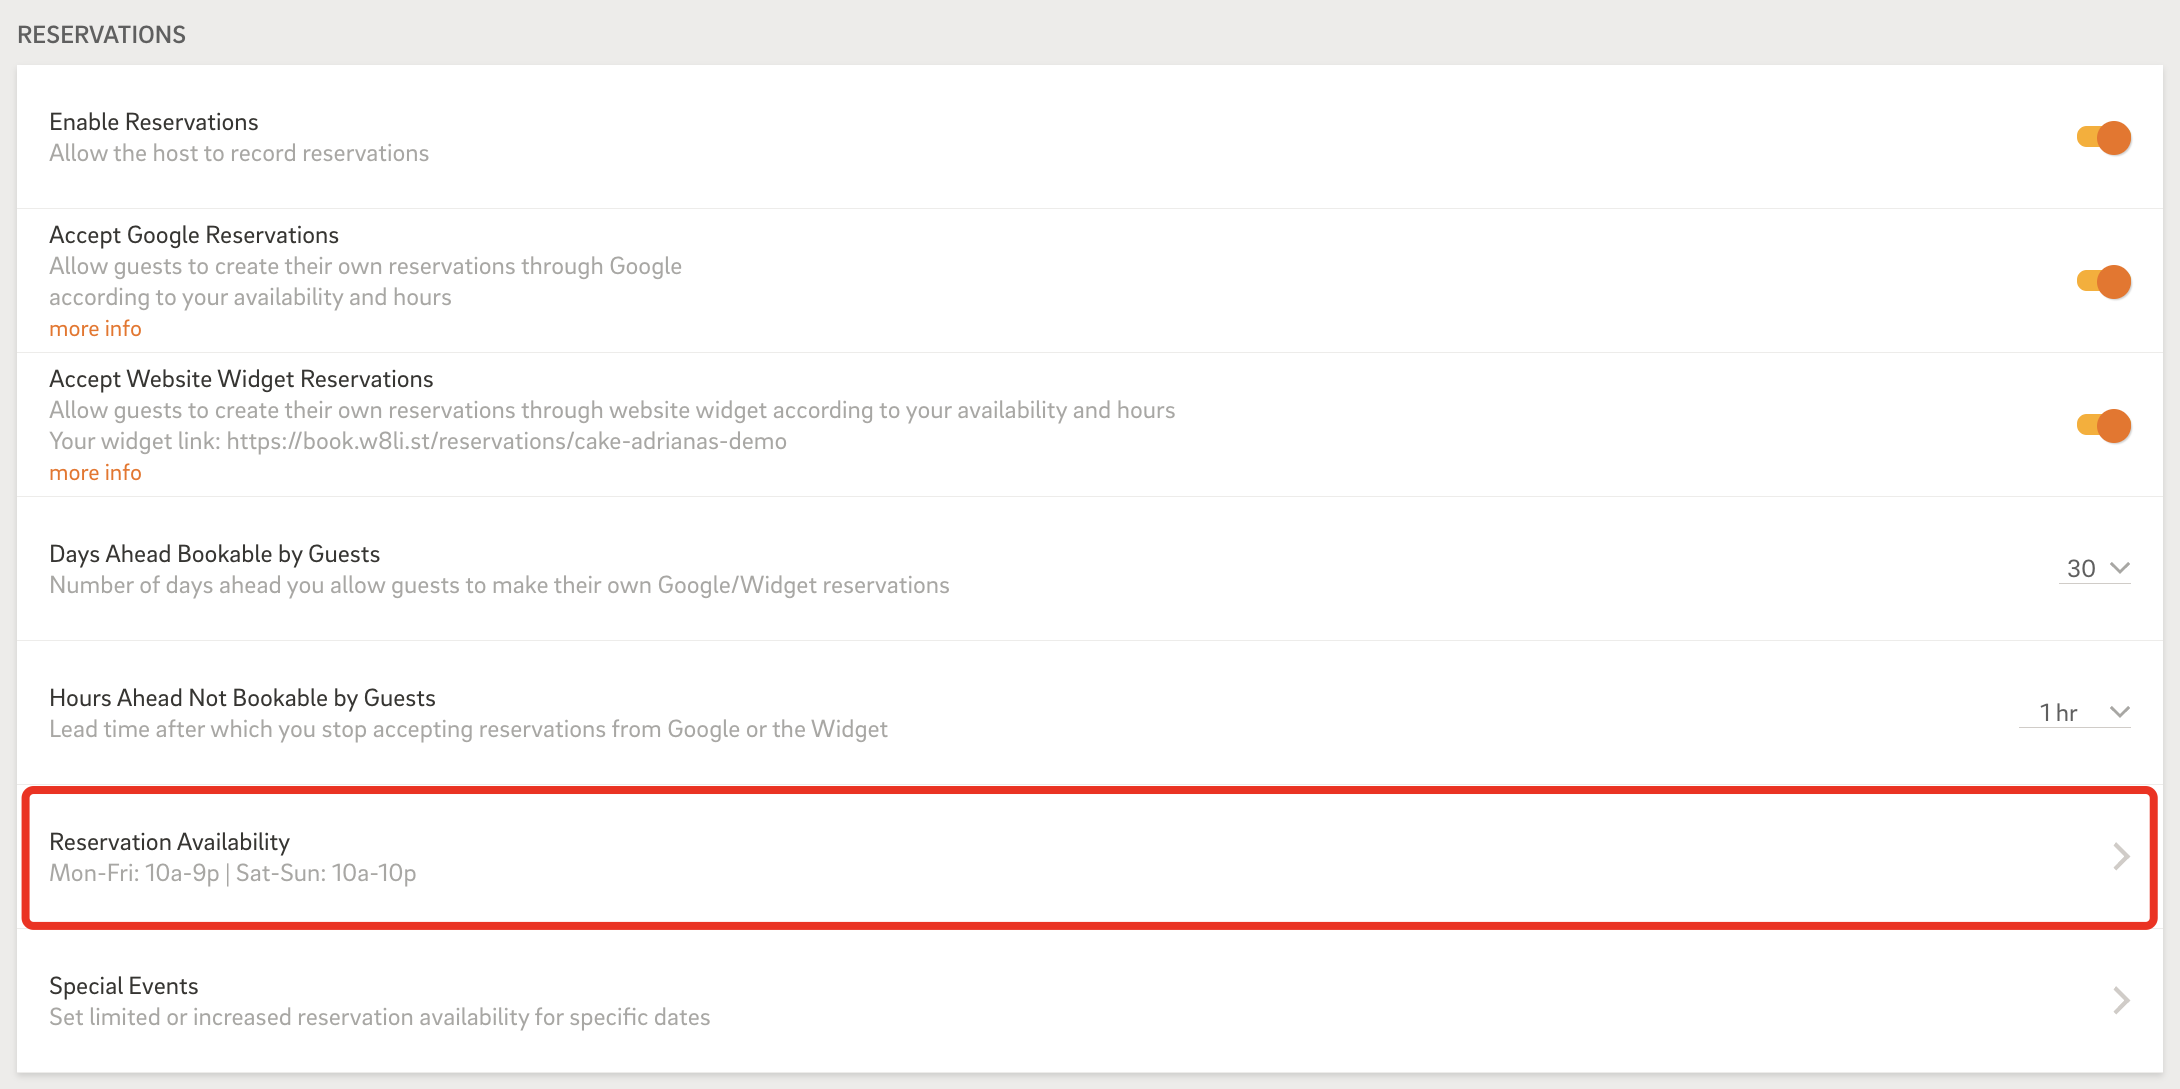
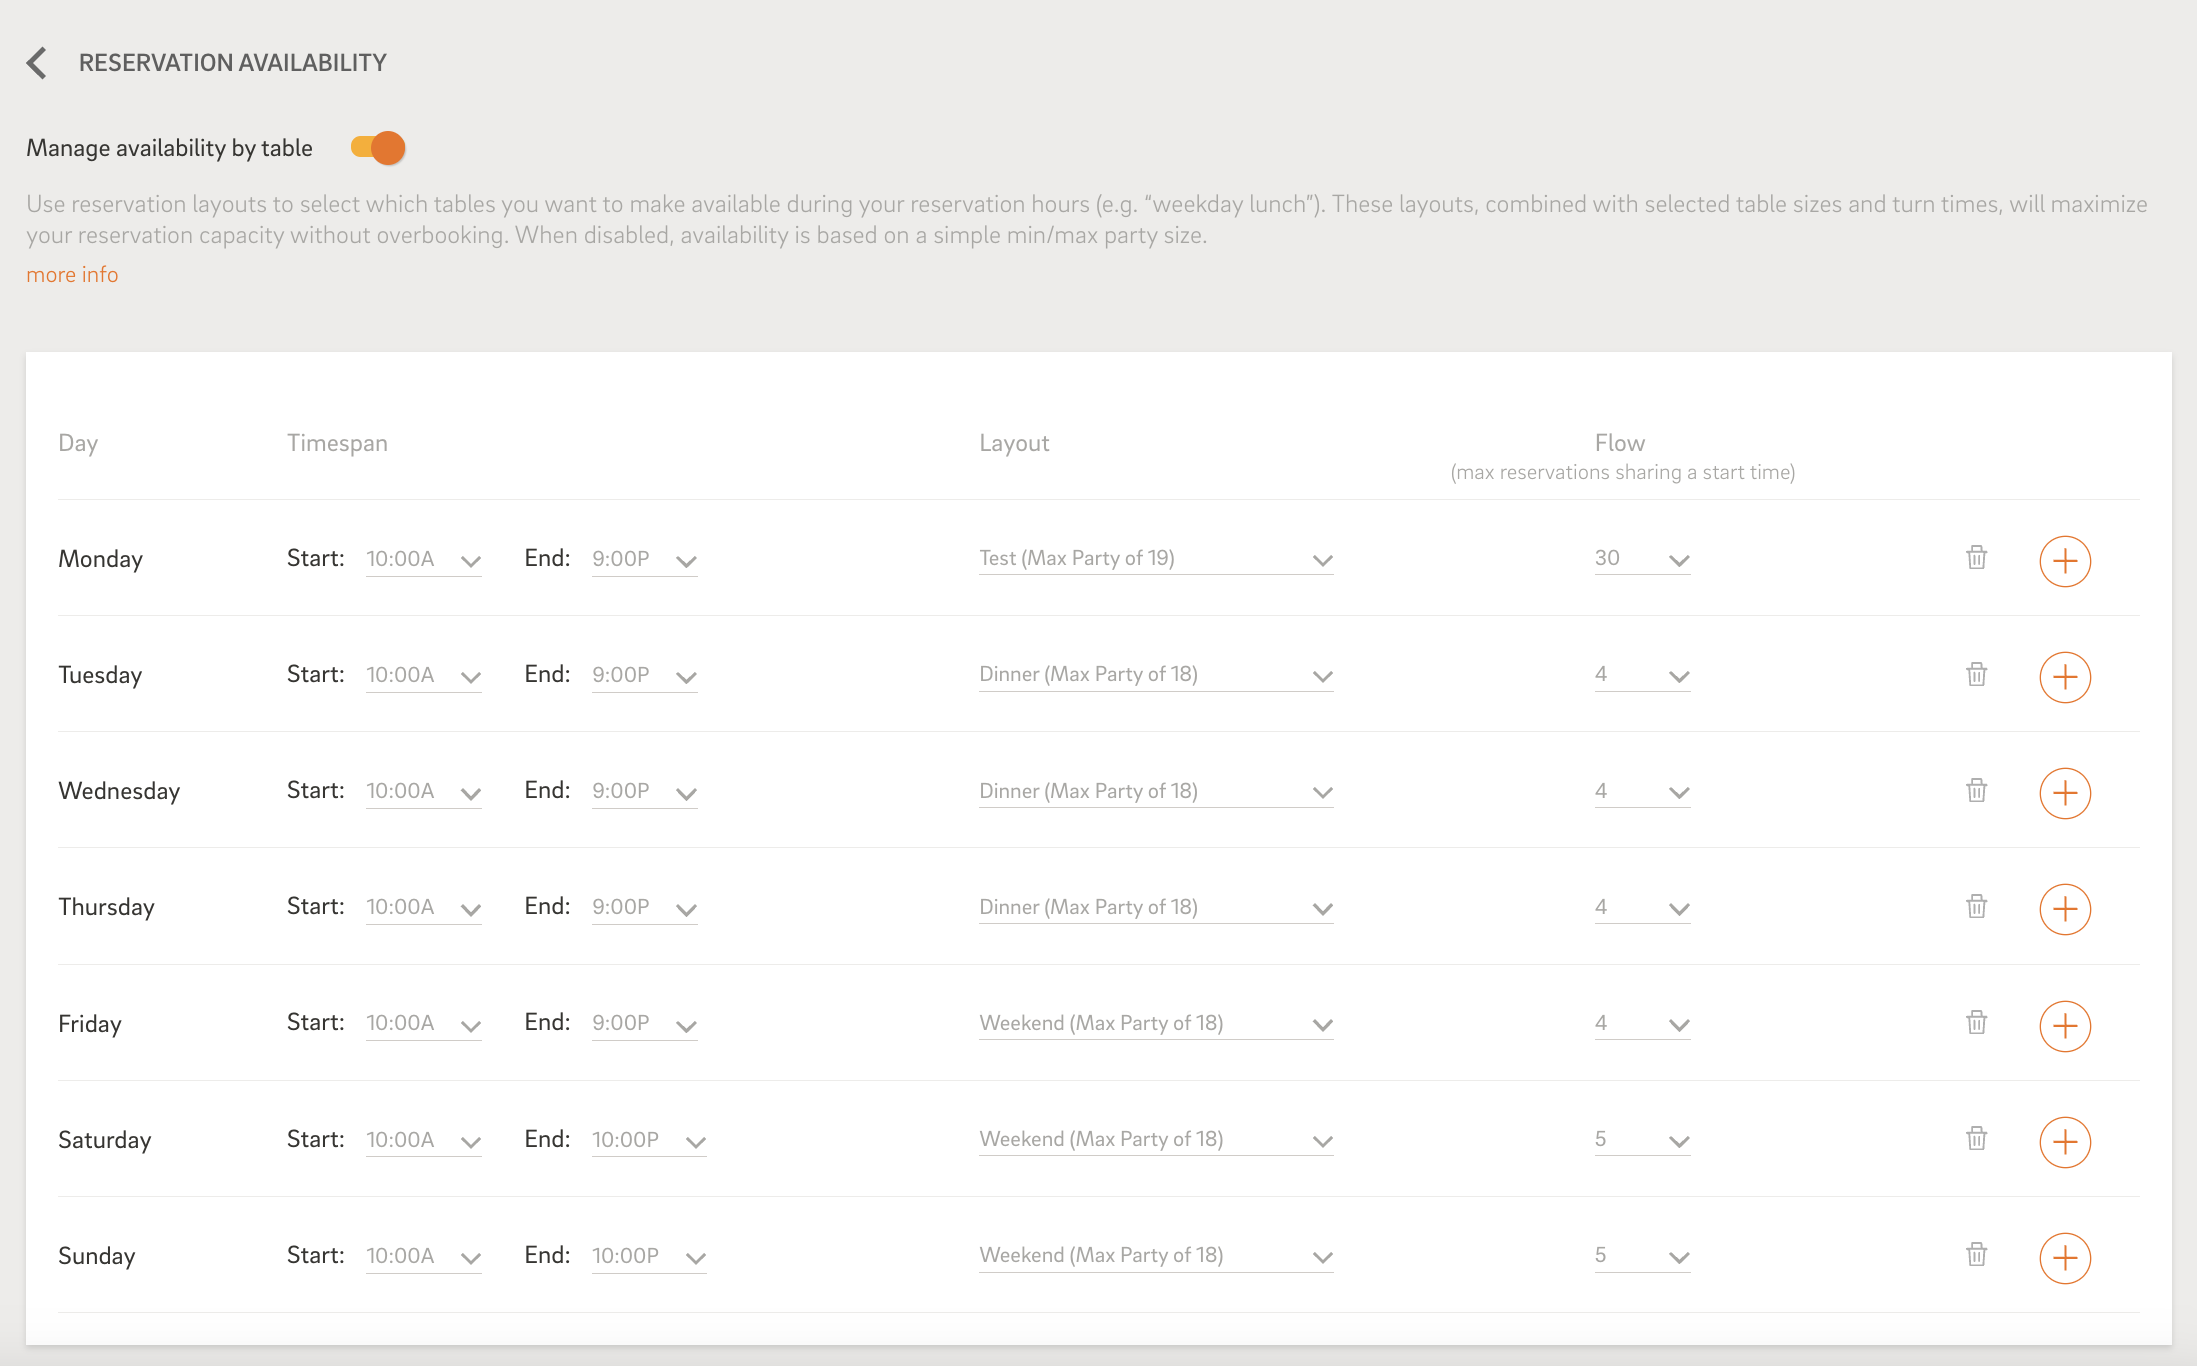
Set up your reservation availability by fixed or live settings. This controls when guests can reserve tables and how many reservations you allow.
Recommendation: We recommend reserving about 30% of your tables for self-service.
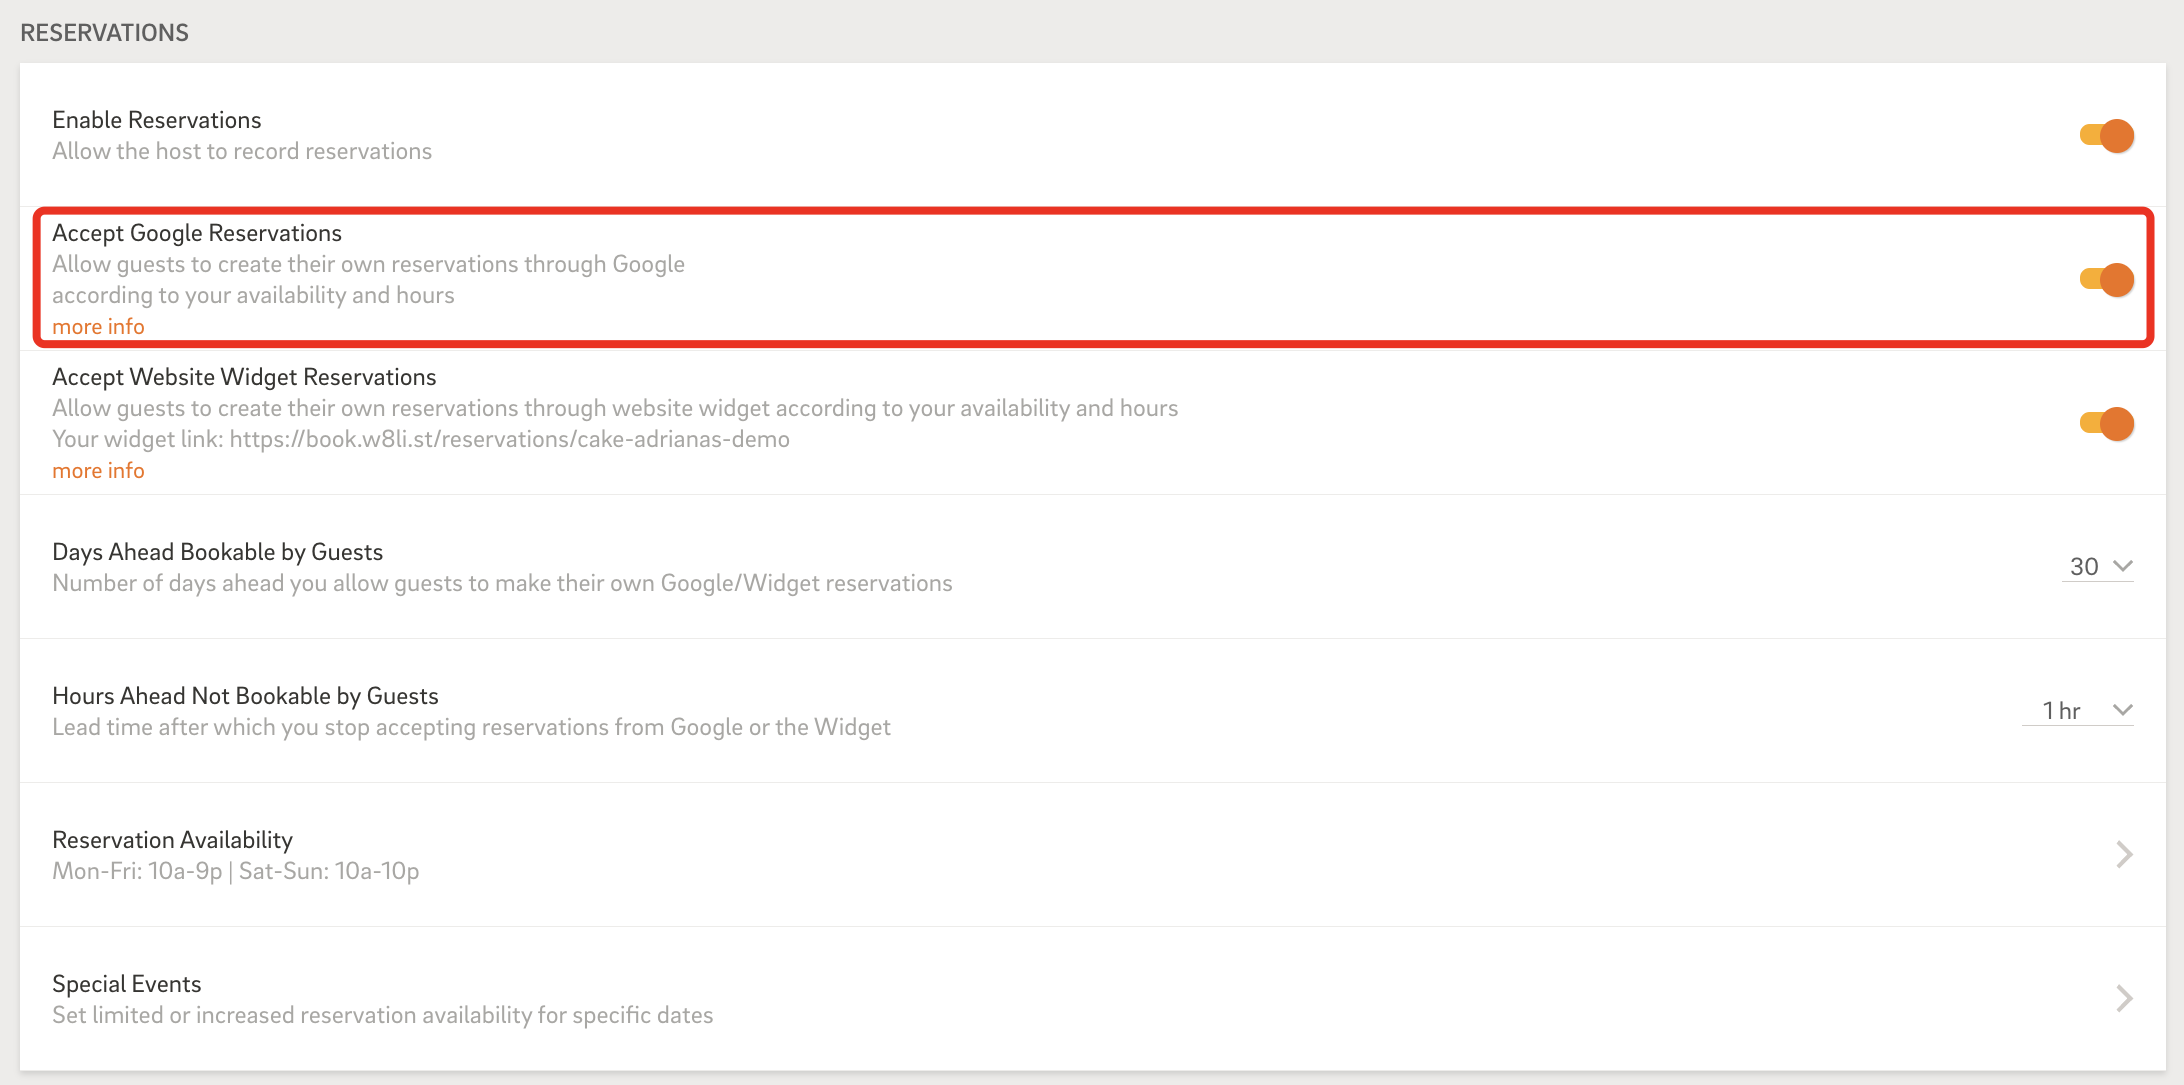
The final step is flipping the switch:
-
Head to your Reservation Settings
-
Toggle ‘Accept Google Reservations’ to ON
-
The ‘Find a Table’ button will go live on your Google listing within 24 hours.
Want to turn it off?
The button will be instantly removed from your Google profile.

Enabling Google Reservations adds convenience for your guests and takes pressure off your staff. With just a few settings, you can drive more bookings and offer a modern guest experience—right where people are searching.
Need help or support? Contact CAKE Support via call at 352-722-2253 or chat with a support rep anytime on CAKE University.