Table of Contents
- Thermal Label Printer Overview
- Product Requirements
- Unboxing and Connecting the Thermal Label Printer
- Configuring the Thermal Label Printer
- Thermal Label Printer Workflow
- Reprinting Labels
- Troubleshooting
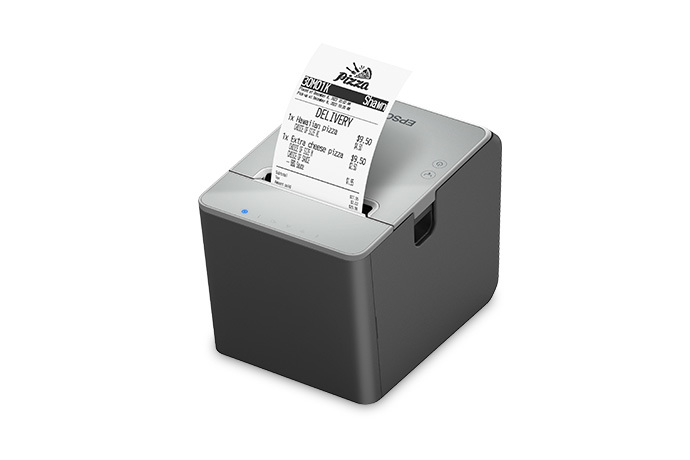
The Epson TM-L100 Thermal Label Printer is designed for fast-paced environments such as coffee shops, boba tea cafes, and frozen yogurt stands, where accurate and efficient labeling is essential. By printing customized labels with order details and modifiers, it helps streamline the preparation process, ensuring staff can quickly and correctly prepare each order. Labels are placed directly on cups or containers, minimizing errors and boosting both speed and customer satisfaction.
What's on the Labels?
Each label generated by the printer contains:
- Order Number for easy tracking
- Customer Name (if provided during order creation)
- Date/Time of the order
- Item Name to indicate what’s inside
- Modifiers (e.g., "extra boba" or "no sugar") for precise fulfillment
This setup ensures that each item receives its own label, making it easy for staff to apply the label directly to the appropriate container, reducing errors during preparation.
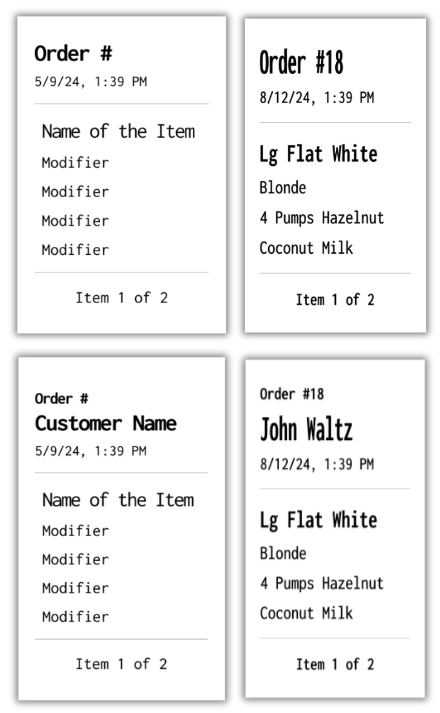
- Single Item Per Label:
Unlike traditional receipt printers, the TM-L100 prints one label per item, making it convenient to place labels on individual cups or containers. - Customizable Setup:
Merchants can assign the printer to specific items or entire categories through CAKE Menu Admin, providing full control over the label printing process. - Perfect for High-Traffic Shops:
This printer is ideal for quick-service restaurants where speed and accuracy are essential to keeping operations running smoothly.
- Menu Admin Version: This product requires the Enterprise Menu version of CAKE's Menu Admin to ensure compatibility with streamlined configuration options.
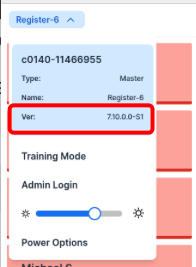
- POS Version: This product requires POS version 7.12.0.0 (v7.12.0.0) or higher.
- To check your current POS version, select the register name at the top left of the sign-in screen on any terminal in your network.
- To request a POS upgrade, contact CAKE Support at (855)696-2253.
Follow these steps to set up the Epson Thermal Label printer:
Printer Set Up:
-
Unbox the thermal label printer and position it in the desired location.
-
Connect the provided AC cable to the AC adapter.
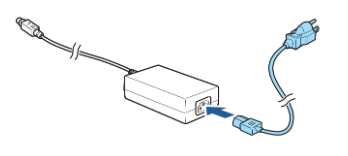
-
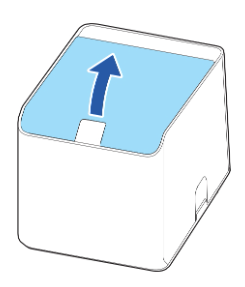
Lay the printer on its side and remove the rear cover.
-
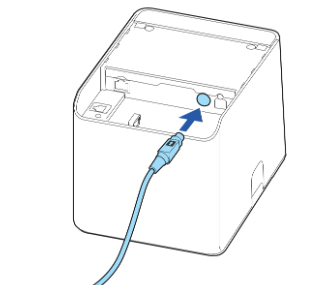
Connect the DC cable of the AC adapter to the power supply connector.
-
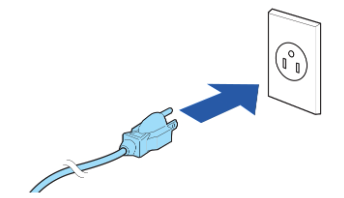
Connect the AC cable plug to a power outlet.
-
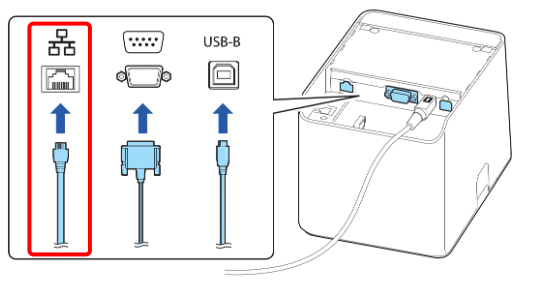
Connect an Ethernet cable from the printer ethernet port to the CAKE router (or connect it via a network switch).
-
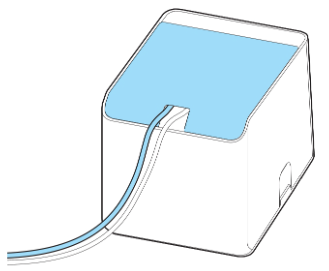
Re-attach the rear cover and pull out the cables through the cutout of the rear cover.
Installing/Replacing Roll Paper:
-
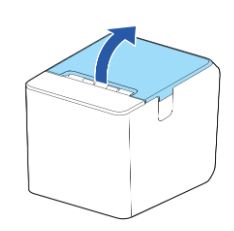
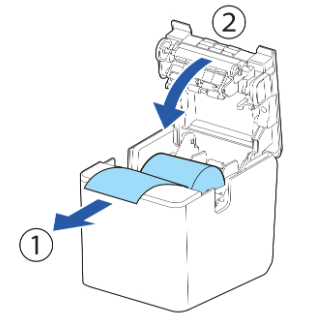
Open the paper roll cover.
-
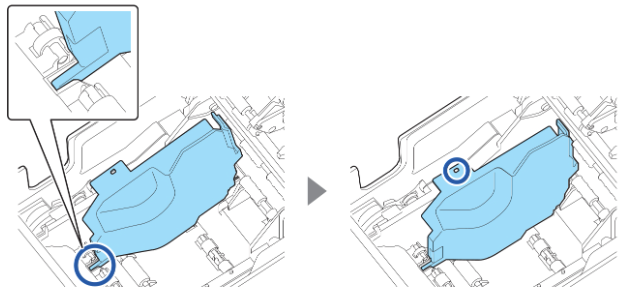
Install the 40mm width roll paper guide. Tilt the guide and insert its protrusion into the groove inside the printer, and then fit it into place.
-
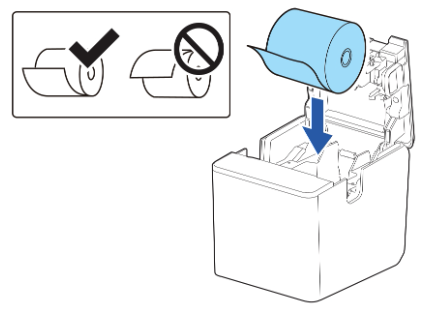
Install the 40mm roll paper in the correct direction. Make sure that the roll paper is not slack. If the roll paper is slack, take up the slack before installing it.
-
Pull out some paper, and close the roll paper cover.
For detailed printer and set up information, refer to the TM-L100 User Manual.
Select your desired set up scenario below to get steps on how to configure the Thermal Label Printer on your CAKE POS:
This scenario applies if you are adding the thermal label printer as an additional printer on your CAKE network.
-
- Log in to the CAKE Admin Portal at dashboard.cake.net.
- Select Menu Admin from the left-hand navigation menu.
- Navigate to the Stations tab.
- Click on Add New Station and enter the desired name for the thermal label printer.
- Click Save to finalize the setup.
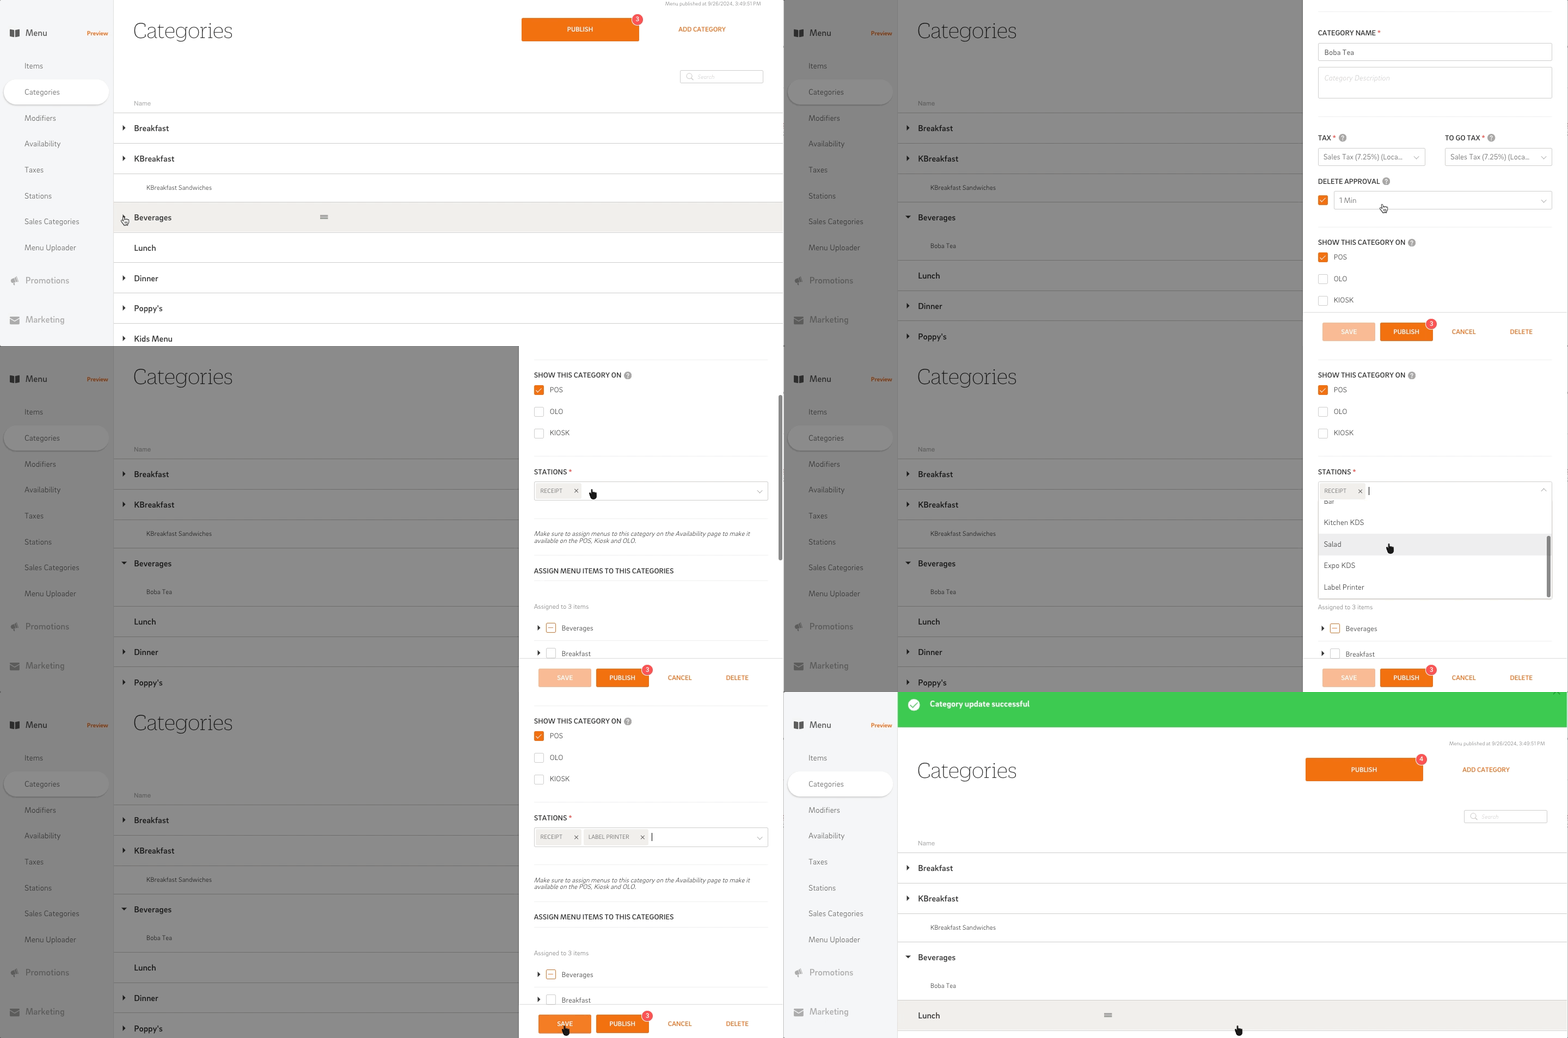
To ensure items print, assign the printer to them within Menu Admin. You can either assign the printer to an entire category (so all items in that category will use the assigned printer) or to specific items individually in Menu Admin.
-
- Go to the Category tab in Menu Admin.
- Select the desired category.
- Locate the "Stations" field and select the thermal label printer from the drop-down menu.
- Click Save/Publish. All items within the category will now be sent to the Thermal label printer.
Note: When assigning a station to a category, any previous stations assigned to those items will be removed upon saving. Several stations can be assigned to a category.
-
- Go to the Items tab within Menu Admin.
- Select the desired item.
- Locate the "Stations" field and add the thermal label printer name from the drop-down menu.
- Click Save/Publish.
To configure the thermal label printer on your CAKE POS for printing, follow these steps:
-
- Go to the Main Menu on your POS device.
- Navigate to Settings > Device Manager.
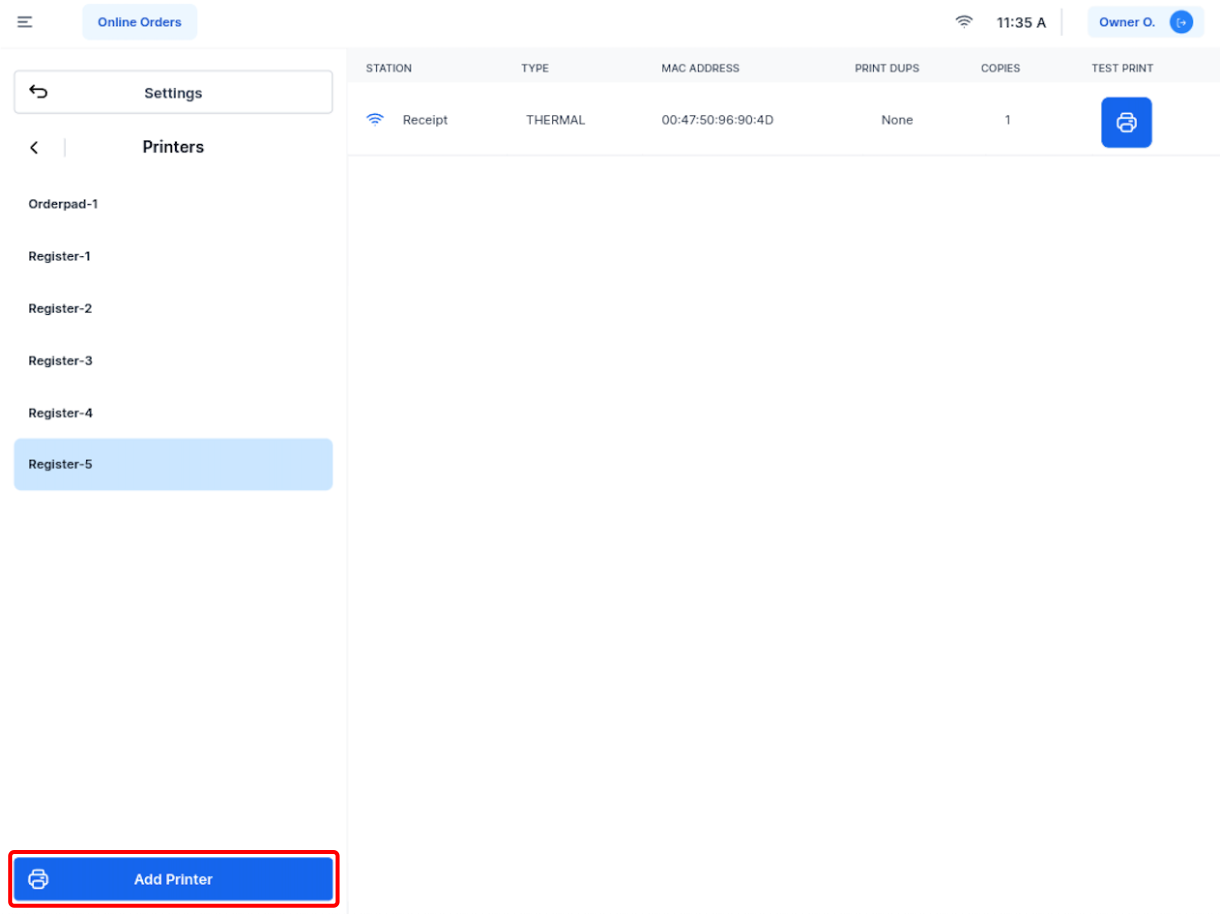
- Select the Printers tab on the left-hand side.
- Choose the Register you want to set up the printer for.
- Click on Add Printer.
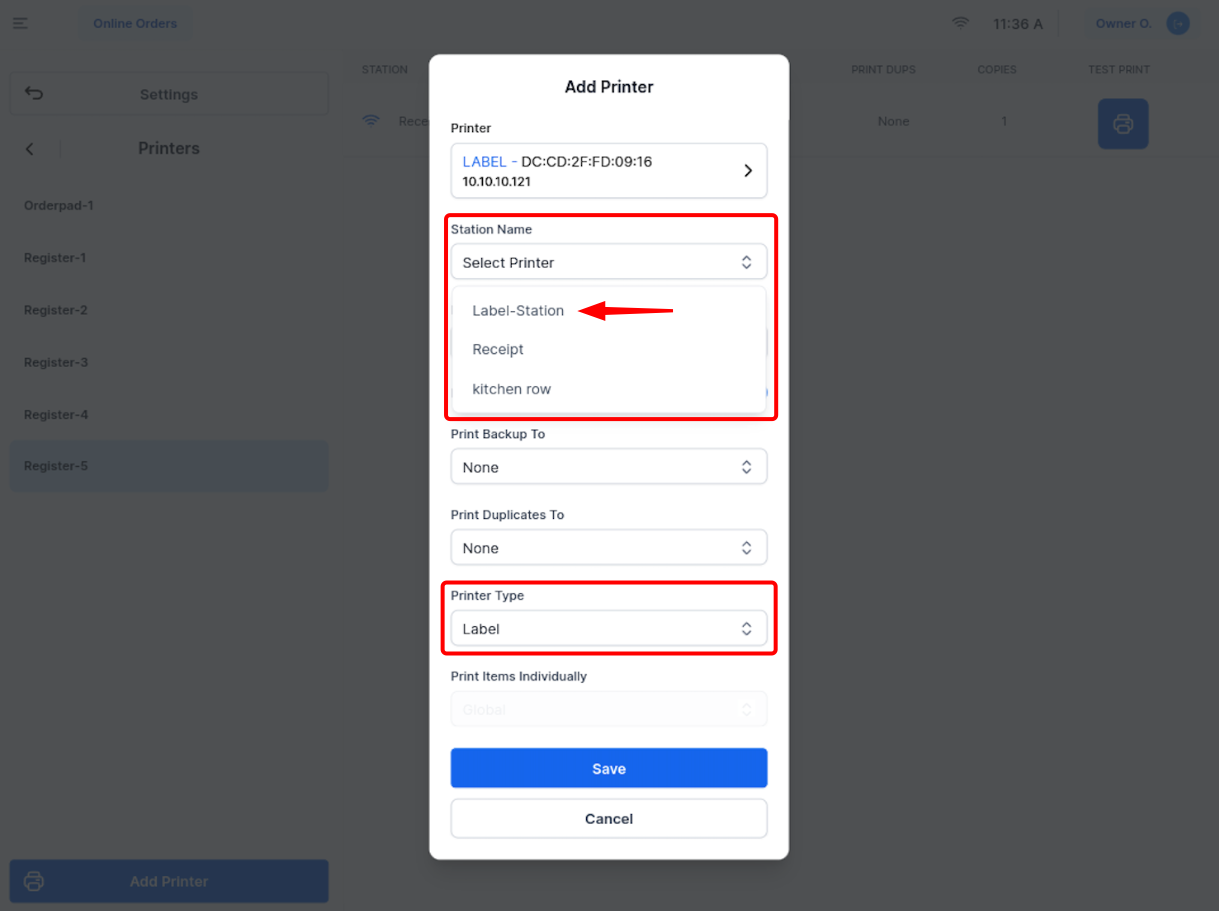
- Fill out the "Add Printer" menu:
- Printer Field: Enter the printer’s IP address (found on a receipt slip that came with the printer or reprinted by turning the printer off and on).
- The IP address should be in a 10.10.10.xx format.
- Station Name: Select the thermal label printer from the list.
- Printer Type: Confirm the printer type is set to Label. This setting ensures that the printer will automatically print each item individually, so that the labels print correctly with one item per receipt.
- Select Save.
- Repeat these steps for other registers if needed.
Scenario 2: Replacing an Existing Printer with the Thermal Label Printer
This scenario applies if you are replacing an existing printer on your CAKE network with the new thermal label printer.
- Step 1: Go to Device Manager on the POS
- On the POS device, go to Main Menu > Settings > Device Manager > Printers.
- Select the register where the replacement will occur.
- Step 2: Select the Printer to Replace
- From the list of printers, click the existing printer you want to replace.
- Step 3: Update the Printer IP Address
- In the Edit Printer menu, select the Printer field.
- Replace the existing IP address with the thermal label printer’s IP address (found on the receipt slip or printed by restarting the printer).
- Step 4: Send a Test Print
- Click the magnifying glass icon next to the entered printer IP address.
- Click the printer icon to send a test print and verify that everything works.
- Step 5: Save Changes
- Click Save to finalize the replacement.
- Repeat these steps for other registers if needed.
Once the label printer is configured, the workflow operates as follows:
- Order Process: When a server sends an order to the kitchen for preparation, the label printer will print individual labels for each item in the order.
- Kitchen & Label Printing:
- If both a kitchen printer and a label printer are configured at the same station, the label printer will print the labels, and the kitchen printer will print the full order ticket.
- This separation of duties allows kitchen staff to focus on order preparation while front-line staff handle packaging and labeling.
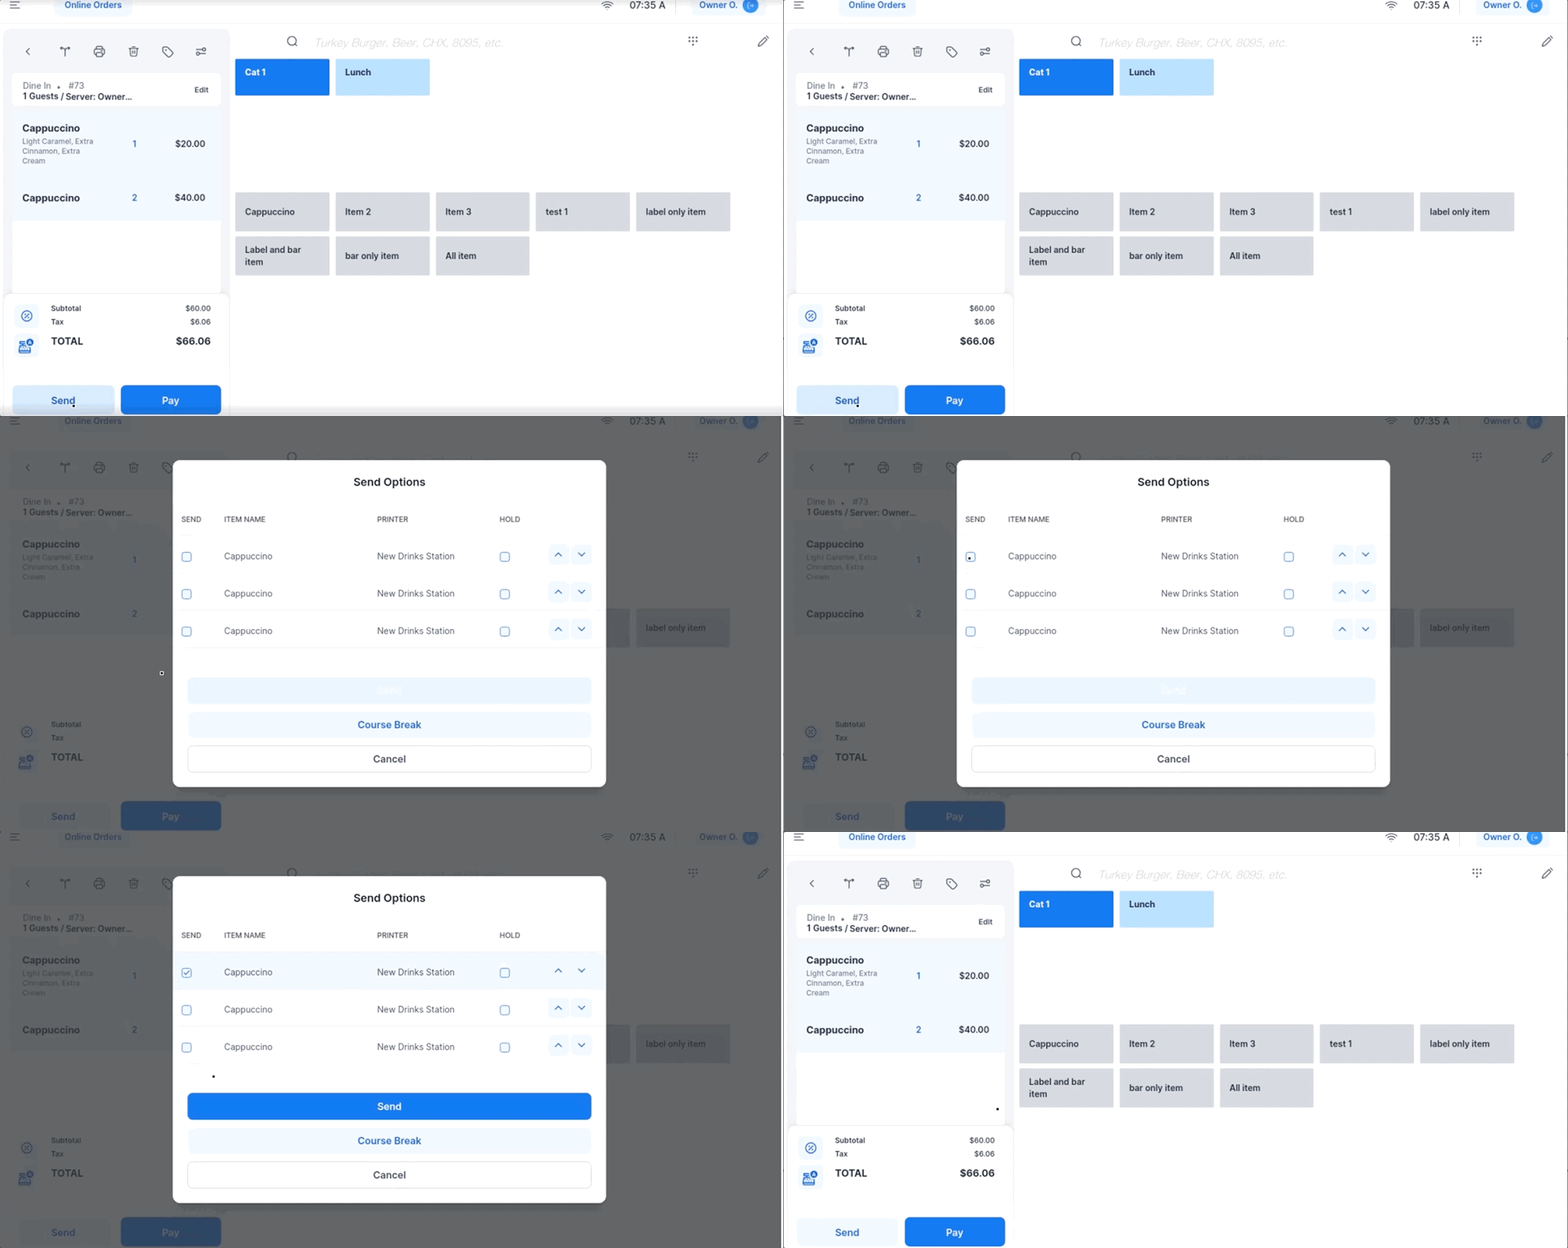
There may be times when a label needs to be reprinted due to issues like damage, smudging, or operator error. Follow these simple steps to reprint a label:
- Locate the Order: In your POS system, find the order that needs the label reprinted.
- Hold the Send Button: Press and hold the Send button until the 'Send Options' pop-up appears. Check the box for the item(s) you want to reprint in the 'Send' column.
- Select Send: Once the correct items are selected, select Send, and the label(s) will be reprinted.
Troubleshooting
Changing the Paper Width to 40mm
The default label size for the TM-L100 printer is set to 58mm. To change the printer width to 40mm, follow these steps:
- Print the Status Sheet:
- Turn the printer off.
- Press and hold the feeder button.
- While holding the feeder button, turn the printer on by holding the power button.
- Continue holding the button until the status sheet prints.
- Enter Mode Selection:
- After the status sheet prints, press and hold the feeder button for 2 seconds.
- The Mode Selection sheet will printer.
- Access Customize Value Settings:
- Press the feeder button 3 times, then press and hold it for 2 seconds.
- The Customize Value Settings sheet will print.
- Set Paper Width:
- Press the feeder button 6 times, then press and hold it for 2 seconds.
- The Paper Width with Paper Guide sheet will print.
- Confirm and Save:
- Press the feeder button once, then press and hold for 2 seconds.
- The next sheet will confirm that the settings have been saved.
- Restart the Printer:
- Turn off the printer, then turn it back on.
- The printer will now be set to print on 40mm width paper.
Disabling the Buzzer
To disable the buzzer sound on the TM-L100 label printer, follow these steps:
- Print the Status Sheet:
- Turn off the printer.
- Press and hold the feeder button.
- While holding the feeder button, turn the printer on.
- Keep holding the button until the status sheet prints.
- Enter Mode Selection:
- After the status sheet prints, press and hold the feeder button for 2 seconds.
- The Mode Selection sheet will print.
- Access Customize Value Settings:
- Press the feeder button 3 times, then press and hold it for 2 seconds.
- The Customize Value Settings sheet will print.
- Access Buzzer Sound Settings:
- Press the feeder button 11 times, then press and hold for 2 seconds.
- Turn Off Buzzer Sound:
- Press the feeder button 3 times, then press and hold for 2 seconds.
- The buzzer will now be set to "No Sound."
- Confirm and Save:
- The next sheet will confirm that the settings have been saved.
- Restart the Printer:
- Turn off the printer, then turn it back on.
- The buzzer sound will now be disabled.
With the Epson TM L100 Thermal Label Printer, your shop can boost efficiency, reduce errors, and keep orders organized. By printing one label per item, your team can easily place labels on cups or containers, ensuring each order is correct and ready for your customers.


