Effectively managing your menu items is essential for smooth operations. The Items section in the Enterprise Menu offers various features to help streamline item management, from viewing and editing items to setting up featured items and utilizing new menu features.
Table of Contents
- Navigating the Items Section
- Adding & Editing Items
- Copy Item Feature
- Featured Items Setup
- New Enterprise Menu Features
- Multi-Location Features - Do you have multiple locations on EMS? Start here!
Pro-Tip: When building your menu, remember that items are the last components to be added. Click here to be guided through the steps of building your menu and learn how to create the other necessary components before adding your items.
Within the items section, a plethora of features awaits to streamline your item management. Here's what you need to know about the items section to effectively oversee your items: Viewing Options:
Menu Admin will launch on the Items section and display your items list with two viewing options:
- Grid View: Lists all items in alphabetical order.
- POS View: Lists all items within their assigned category.
- Any category that does not have items assigned to it will NOT show in this view.
Item List Details:
Item Name, Item Code, Price, & Display settings are available at first glance.

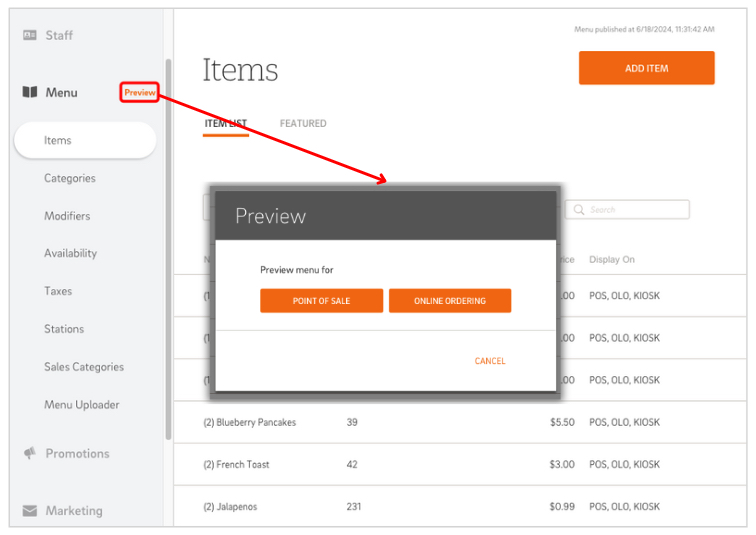
Preview:
The orange ‘Preview’ button on the left-side navigation bar lets you view what your POS and/or Online Ordering website looks like after saving changes.
Items Sort Order:
Within the POS View, you can change the order items display within your categories. To customize the sort order follow these steps:
- Select the black arrow to the left of a category name to reveal the items within it.
- Hover over an item with your mouse, you will see 3 lines appear to the right of the item.
- Click and drag the lines to change the sort order of the item.
Step-by-Step Guide for Adding Items:
- Navigate to Items Section:
- Access Menu Admin and navigate to the Items section.
- Create New Item:
- Click the orange Add Item button at the top right of the screen.
- Fill Out Add Item Menu:
- Fill out the required fields within the Add Item menu, including item name, description, category, price, tax, etc.
- Save or Publish:
- Select Save to apply the changes in Menu Admin, or select Publish to save and translate the changes to the live menu.
- NOTE: If you are making multiple edits in Menu Admin, select Save to apply & queue the changes within Menu Admin. Once you are done editing your menu, select Publish to translate all the queued saves to the POS, Online Ordering, and/or Kiosk.
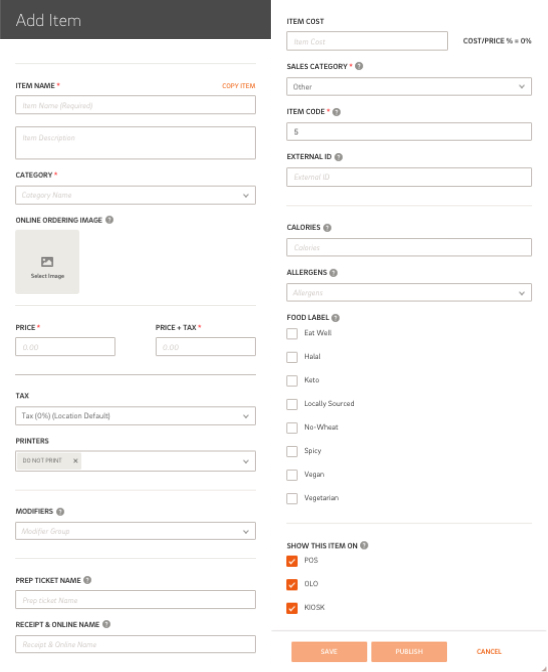
Add/Edit Item Menu:
Below is a breakdown of the various fields available when adding or editing an item.
- When editing, view details on each field by hovering over the
 icon to gain further insight.
.
| Item Field | Description |
| Item Name | Name of the item. |
| Item Description | Description of the item - this will only be displayed on Online Ordering and Kiosk. |
| Category | Select the menu category this item belongs to. |
| Online Ordering Image - NEW FEATURE! | Upload an item image to be displayed on the Online Ordering (OLO) and Kiosk menu.
- The supported file formats are .jpg and .png.
- The maximum allowed file size is 5MB.
|
| Price | Price of the item. |
| Price + Tax | Unit price of this item after applying post tax.
The Price + Tax field is automatically generated once a tax rate is set via the Tax field below. |
| Tax | Select a tax rate from the available list to assign to the item.
Tax rates must be added within the 'Taxes' tab of Menu Admin to see them as an option. |
| Stations | Assign the Printer(s) or Kitchen Display System(s) this item will be sent to.
Station names must be added within the 'Stations' section of Menu Admin to see them as an option. |
| Modifiers | Select the modifier group(s) you would like to assign to the item.
- For each modifier group assigned to the item, set whether a modifier selection is required, set the minimum and maximum number of modifiers that a customer can select, and set whether the modifier group shows on the POS, Kiosk, and/or Online Ordering.
- Re-arrange the sort order of the modifier groups by clicking & dragging the adjacent lines to the right of the modifier groups.
Modifier groups must be added within the 'Modifiers' section of Menu Admin to see them as an option. |
| Prep Ticket Name | Specify a name for the item on the kitchen prep ticket. |
| Receipt & Online Name | Specify a name for the item on the customer receipt & Online Ordering and Kiosk platform.
This field will automatically be filled with the item name at the point of creation but can be edited if needed. |
| Item Cost | Enter the cost of the item for internal reference, if necessary. |
| Sales Category | Select a Sales Category for reporting.
Sales Categories must be added within the 'Sales Categories' section of Menu Admin to see them as an option. |
| Item Code | This field will auto-populate and can be used as a generic code used to look up items in the POS or can be used to enter a barcode if you are using a barcode scanner. Click here to learn how to set up a barcode with your barcode scanner. |
| External ID | This field is currently inactive. |
| Calories - NEW FEATURE! | Set calories of the item to reflect on Online Ordering and Kiosk. |
| Allergens - NEW FEATURE! |
Select allergens from the drop-down menu for the item. This will reflect on Online Ordering and Kiosk.
Allergen Options:
- Coconut
- Dairy
- Eggs
- Fish
- Peanuts
- Shellfish
- Soy
- Tree Nuts
- Wheat
|
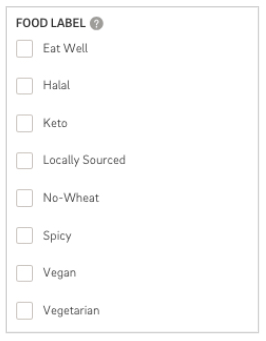
| Food Label - NEW FEATURE! |
Select food labels for the item. This will reflect on Online Ordering and Kiosk.
Food Label Options:
- Eat Well
- Halal
- Keto
- Locally Sourced
- No-wheat
- Spicy
- Vegan
- Vegetarian
|
| Show This Item On | Choose where the item will be visible - POS, Online Ordering, and/or Kiosk. |
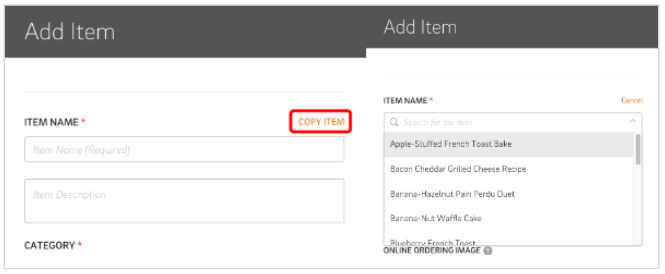
Simplify your item setup by using the Copy Item feature. This handy tool allows you to create a new item with the same settings as an existing one, excluding the price, tax, and online image. Follow these steps to use the Copy Item feature:
-
Access the Copy Item Tool:
- Navigate to the Add Item edit menu and locate the orange "Copy Item" button in the top right corner.
-
Select the Item to Copy:
- Click the "Copy Item" button. A magnifying glass icon will appear in the item name field.
- Type in the name of the item you wish to copy and select it from the list.
-
Review and Adjust:
- The new item will inherit all the settings from the original item, excluding the price, tax, and online image.
- Note that the new item is entirely independent from the original, so you can make any necessary adjustments without affecting the original item.
Using the Copy Item feature streamlines the process of adding new items, ensuring consistency and saving time.
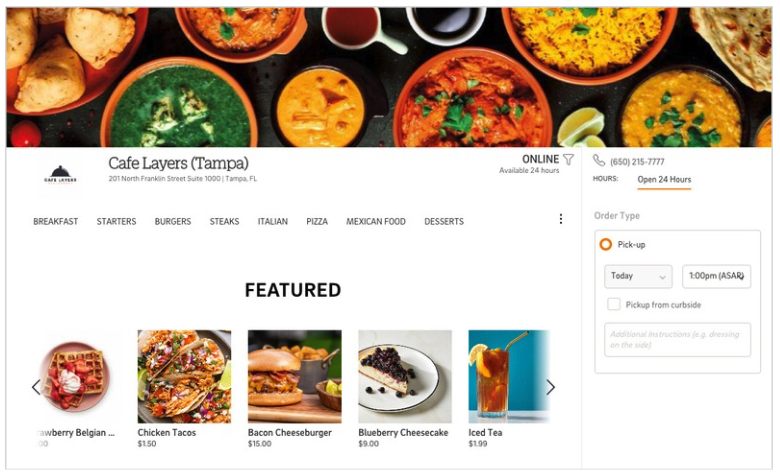
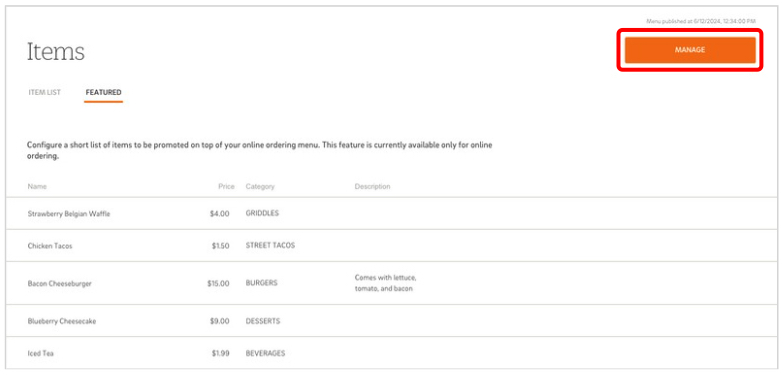
Within the Items section, you'll find two tabs: Items List and Featured.
The Featured tab allows you to create a feature reel at the top of your Online Ordering and Kiosk platforms, showcasing selected items.
How to Set Up a Feature Reel:
- Create Reel:
- Click the orange Manage button at the top right corner.
- Reveal Items:
- Click the black arrow next to a category to reveal its items.
- Select Items:
- Choose the items you want to feature.
- Save Selection:
- Click Save to finalize your feature reel.
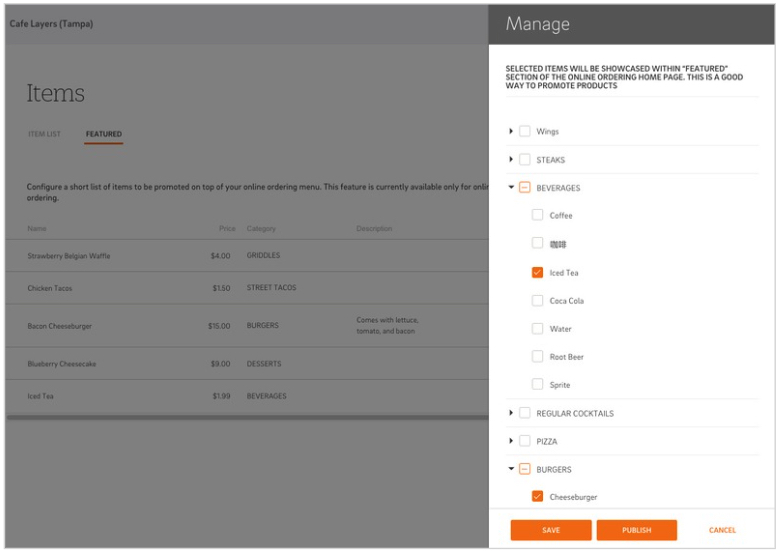
This setup helps highlight specific items to attract customer attention on your online ordering page.
The Enterprise Menu now supports Online Ordering and Kiosk images, as well as the inclusion of calories, allergens, and food labels.

Here is a breakdown on how to set up each feature within the Item Edit menu:
-
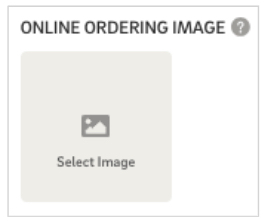
Online Ordering and Kiosk Images
- Access the Item Edit Menu: Select the item you want to edit to access the Item Edit menu.
- Locate the Image Field: Find the Online Ordering Image field.
- Upload an Image: Click on "Select Image" and choose the image you want to display. Ensure the image is in JPEG format, with a maximum size of 5MB and dimensions of 700px by 700px.
- Save Changes: Click "Save" to update the item with the new image.
-
Calories
- Access the Item Edit Menu: Select the item you want to edit.
- Locate the Calories Field: Enter the calorie information for the item.
- Save Changes: Click "Save" to update the item with the calorie information.

-
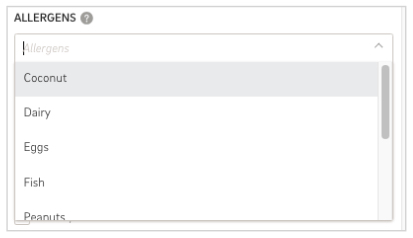
Allergens
- Access the Item Edit Menu: Select the item you want to edit.
- Locate the Allergens Field:
- Click on the drop-down to view pre-set allergen choices.
- Allergen Options: Coconut, Dairy, Eggs, Fish, Peanuts, Shellfish, Soy, Tree Nuts, and Wheat.
- Multiple options can be selected.
- Allergen options cannot be added or deleted from the drop-down menu.
- Save Changes: Click "Save" to update the item with the allergen information.
-
Food Labels
- Access the Item Edit Menu: Select the item you want to edit.
- Locate the Food Labels Field:
- Select one or multiple food labels to add to your item.
- Food Label Options: Eat Well, Halal, Keto, Locally Sourced, No-wheat, Spicy, Vegan, Vegetarian.
- Food label options cannot be added or deleted from the list.
- Save Changes: Click "Save" to update the item with the food labels.
Best Practice: To ensure consistency and streamline updates across all locations, it's crucial to make all menu edits at the Enterprise Level. Editing at the individual location level can cause disconnections between the enterprise and location menus, which can result in future updates not being reflected at the location level. Always edit from the Enterprise Level to maintain consistency and ensure all locations are up-to-date with the latest menu changes.
Features
For businesses with multiple locations, the Enterprise Menu offers additional features to enhance flexibility and control. Here’s a detailed look at these features:
At the top of the Item Edit menu, you'll find an availability field. This allows you to specify which locations should display a particular item, giving you the flexibility to tailor menus according to each location's needs.
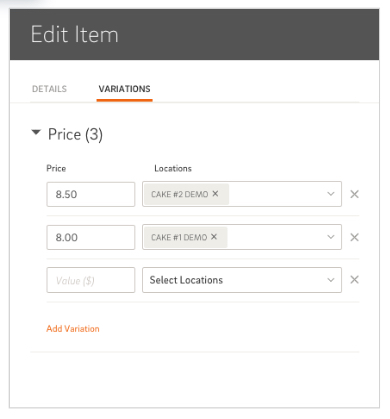
Within the Item Edit menu, there is an additional tab labeled 'Price Variation'. This feature enables you to assign different prices to the same item across various locations, ensuring pricing flexibility that accommodates local market conditions and strategies.
FAQ
Q: How do I access the Enterprise Level?
A: To access the Enterprise Level, follow these steps:
- Log into CAKE Admin Portal: Log into CAKE Admin Portal and select the Menu Admin icon.
- Select the Enterprise Level: You will be prompted to select the location you would like to access. Choose the Enterprise level, identifiable by the arrow to the left of the enterprise name. Selecting the arrow will reveal the locations within the enterprise.
Q: What happens if I make an edit at the location level?
A: Editing at the location level can create inconsistencies between the location menu and the enterprise menu. Future updates made at the enterprise level will not affect fields that were edited at the location level. To maintain a seamless connection and ensure updates are reflected across all locations, always make edits at the enterprise level. If a disconnection occurs, contact support to re-establish the connection.
Q: What if I only need to update the menu for one of my locations?
A: For menu data specific to a single location, it's best to create it at the enterprise level. Use the availability field to designate which location can access it. This approach allows for easy expansion to other locations in the future by simply adjusting the availability settings.
^^Back to top
Enterprise Menu Navigation Page