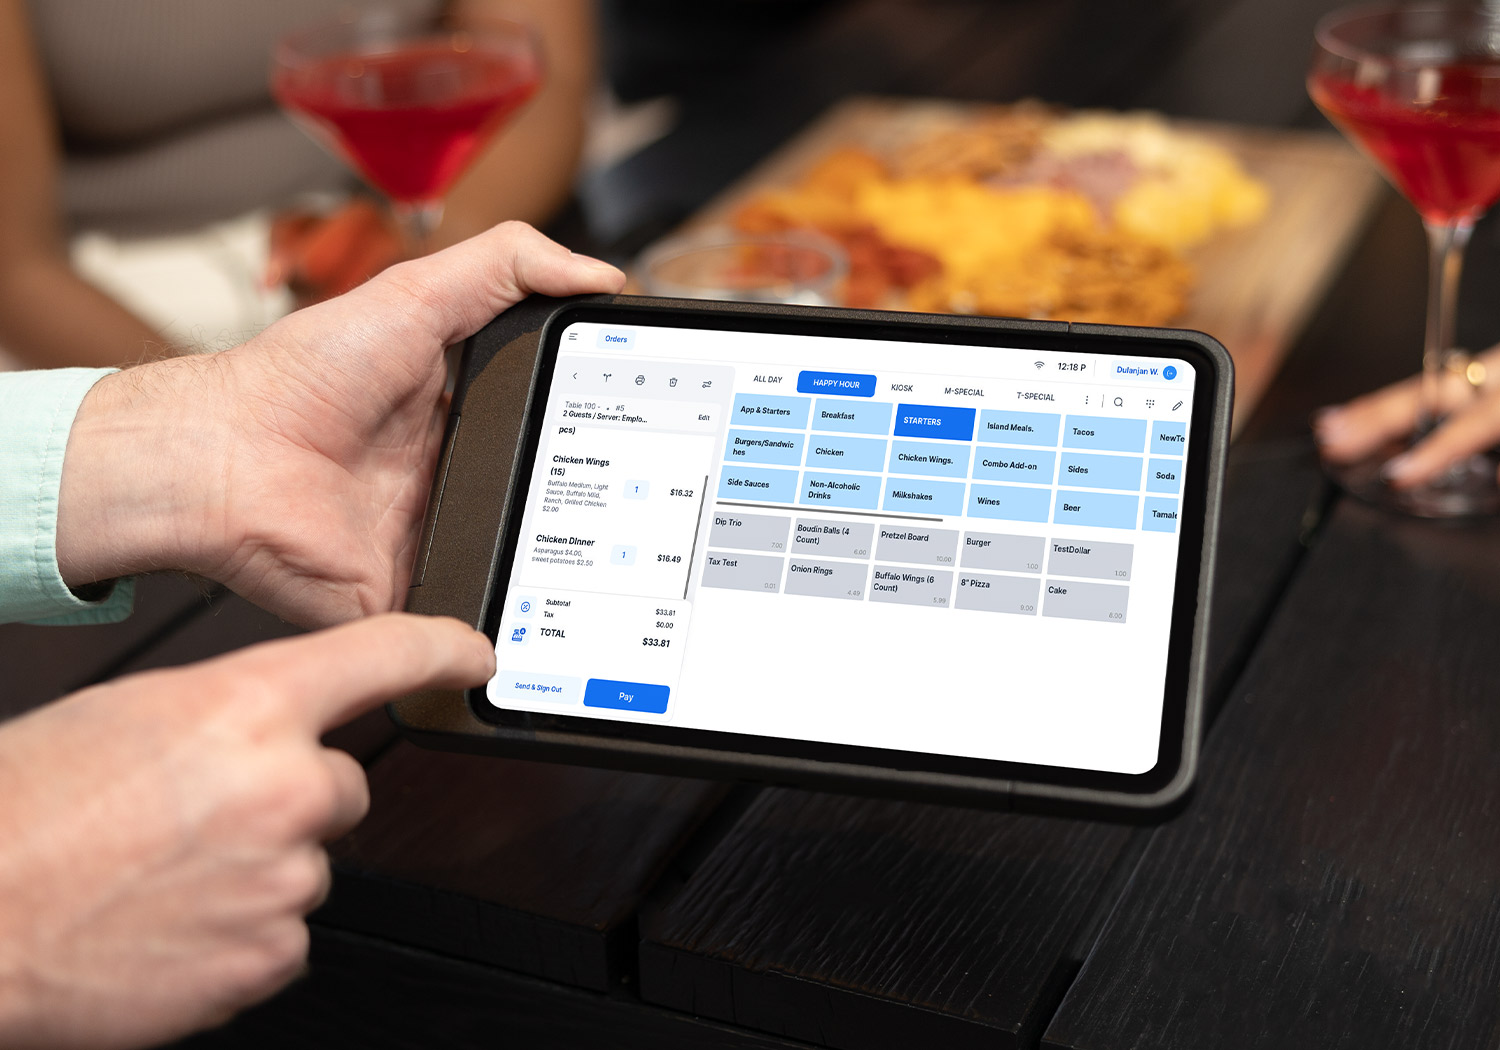
Welcome to the comprehensive guide on how to onboard CAKE Orderpad, the table-side service solution for your restaurant. This guide is designed to help you set up, configure, and use CAKE Orderpad to enhance your restaurant operations. With CAKE Orderpad, you will streamline order taking, reduce order errors, and improve customer satisfaction. Let’s dive in!
Table of Contents
- Pre-Setup Checklist
- Setting up the CAKE Access Point
- Onboarding CAKE OrderPad
- Setting Up Printers for OrderPad
- Enabling OrderPad Payments
Before diving into the setup process, it’s important to ensure that you have all the necessary equipment, software, and credentials ready. This checklist will help you verify everything is in place to avoid interruptions.
What You'll Need:
-
- iPads: Verify that your iPads are compatible (must support the latest iOS version). Recommended models include iPad Mini 2–6 and iPad Air 1–2.
- Bluetooth Payment Reader: Necessary for processing payments directly on the OrderPad.
- iPad nClose Case: Required to house the iPad and Bluetooth Reader for a seamless setup.
- Power-over-Ethernet (PoE) Injector: Ensures a reliable connection for your CAKE Access Point.
- Access Point: Required to extend Wi-Fi coverage across your restaurant.
- For More Information: Visit the CAKE OrderPad Overview & Requirements for detailed hardware specifications and requirements.
- Order Necessary Subscriptions:
-
- OrderPad Subscriptions: Purchase one subscription per OrderPad via the CAKE Shop.
- Activation Fee: Ensure you’ve purchased this to start using OrderPad and get an Access Point.
- For More Information: Visit the CAKE OrderPad Overview & Requirements for detailed subscription information.
-
- Apple ID: Create or confirm an Apple ID to download the CAKE OrderPad app
Before setting up CAKE Orderpad, ensure all activation steps and requirements are completed. For detailed information, refer to our CAKE OrderPad article.
To ensure CAKE Orderpad functions correctly, setting up a CAKE Access Point is essential. This device extends your Wi-Fi range, ensuring seamless connectivity throughout your restaurant.
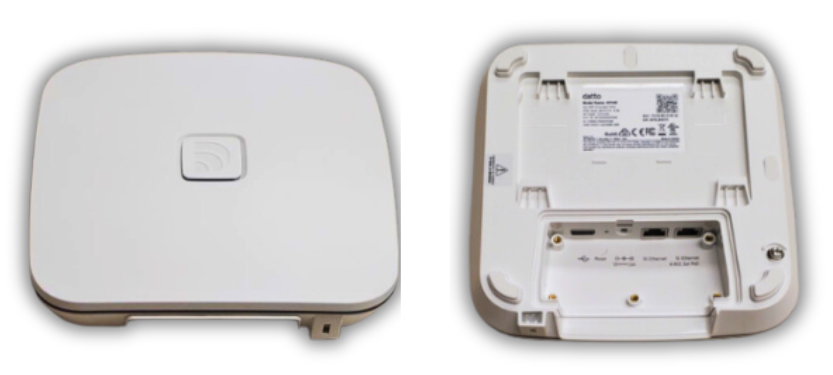
What You'll Need:
- CAKE Access Point
- Power-over-Ethernet (PoE) Injector
- Ethernet/Network Cable (appropriate length, not included)
Step-by-Step Guide for Access Point Setup:
-
Determine a Mounting Scheme:
-
Choose a central location in your restaurant.
-
Wi-Fi Range: Approximately 100-200 feet indoors (3-4 walls) or 300-400 feet outdoors.
-
Additional access points can be purchased in the CAKE shop for larger coverage areas.
-
Unbox the PoE Injector and CAKE Access Point.
-
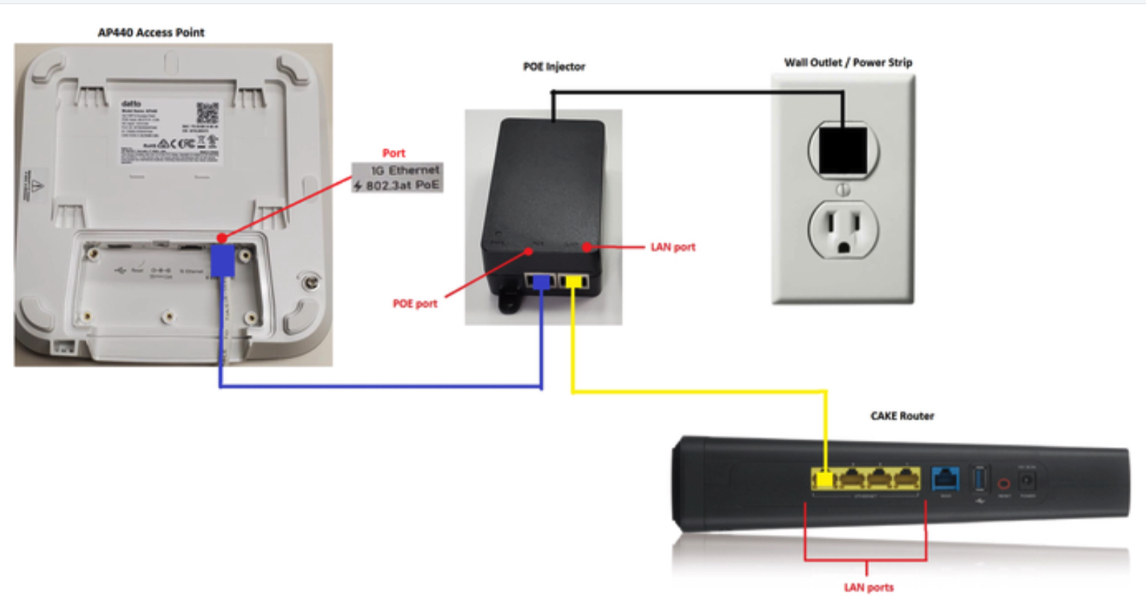
Connect the PoE Injector:
-
Plug one end of the power cable into the PoE injector and the other end into a power socket.
-
Connect the first network cable from the CAKE router to the PoE injector's "LAN" port. For the initial setup, ensure the Access Point is directly connected to the CAKE Router. Once the setup is complete, you can move the Access Point to a network switch if necessary.
-
Connect the second network cable from the PoE injector’s "PoE" port to the CAKE Access Point.
-
Power On and Configure:
-
The Access Point will power on and show a yellow color while configuring.
-
The light will turn teal/green once the configuration is successful, which may take up to 10 minutes.
Note: The device will perform an initial firmware upgrade between 1-2 am, during which Wi-Fi will be unavailable for 5-10 minutes. Future updates will occur during this time. Contact CAKE support at (855)696-2253 to change this schedule if necessary.
After setting up the CAKE Access Point, you can onboard the CAKE OrderPad.
Step-by-Step Guide for CAKE OrderPad Setup:
-
Unbox and Setup the iPad:
-
Connect to the CAKE Network:
-
Go to the iPad settings and select Wi-Fi.
-
Choose the CAKE network (you may need to input this manually by selecting 'Other' if hidden):
-
Network Name: CAKE ID (e.g., c0020-28191001)
-
Password: cake + CAKE PIN (e.g., cake1234)
-
Call or text CAKE Support at (855)696-2253 for this information.
-
Forget all other networks to ensure the iPad connects only to the CAKE network.
-
Download the CAKE OrderPad App:
-
Activate OrderPad:
-
Open the app and select Activate on the home page.
-
A screen asking for a PIN and Token will appear. Call or text CAKE Support at (855)696-2253 for this information.
-
Once the PIN and Token are entered, your restaurant database will be onboarded to the OrderPad.
-
Using CAKE OrderPad is seamless and requires no additional staff training. If you're familiar with the POS, you'll easily be able to use CAKE OrderPad.
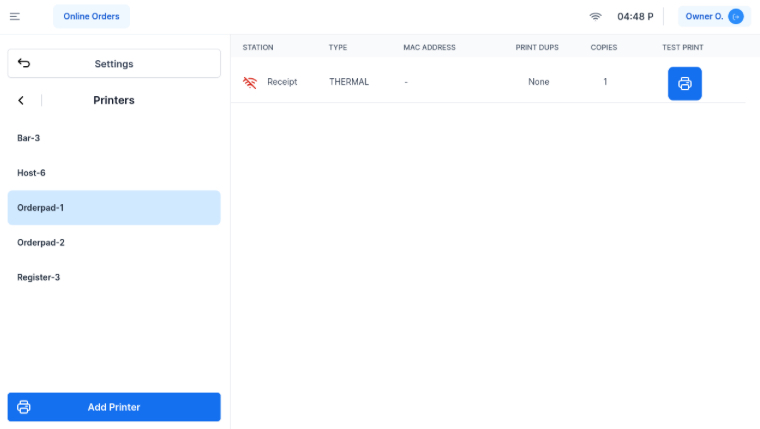
Printers need to be configured on any POS in your setup for OrderPads. To set up printers for OrderPads, follow these steps:
-
Access Device Manager:
- On a POS, navigate to Main Menu > Settings > Device Manager > Printers.
-
Retrieve Printer(s) IP Addresses:
- Before setting up printers for your OrderPads, you'll need to retrieve their IP addresses. Here's how:
- Retrieving IP Address from a Printer Set Up on the POS:
- On the left-hand side of the printer's screen, you'll see a list of all your POS and OrderPads.
- Select a register from the left-side menu to view the configured printers for that POS.
- Click on the printer you want to use for the OrderPad to display its IP address.
- Write down the name of the printer and the IP address.
- Repeat these steps for each printer you want to set up for OrderPad.
- Retrieving an IP address from the Printer:
- If necessary, you can print the printer's IP address by simply turning it off and back on.
- Write down the name of the printer and the IP address.
- Repeat this step for each printer you want to set up for OrderPad.
- For detailed guidance on printing the IP address, click here.
-
Configure Printers:
- Select an OrderPad on the left-hand side of the Printers screen to set up the printers as you normally would.
- Setting Up the Receipt Printer:
- To set up the receipt printer for the OrderPad, select the default receipt printer listed.
- The printer edit menu will be displayed.
- Select the Printer field to enter the retrieved IP address.
- Then, configure the rest of the printer settings.
- Setting Up Additional Printers (Kitchen, Bar, etc.):
- Select the Add Printer button on the left side of the screen.
- Select the Printer field to enter the retrieved IP address.
- Then, configure the rest of the printer settings.
- For detailed instructions on how to set up printers, visit the Configuring Printers on the CAKE POS article.
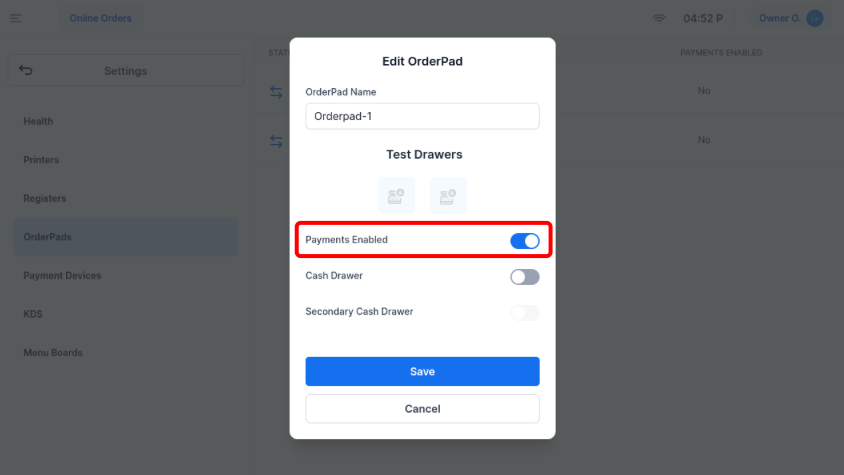
To enable payment processing on OrderPads, follow these steps:
-
Access Device Manager:
- On a POS, go to Main Menu > Settings > Device Manager > OrderPads.
-
Enable Payments:
- Select an OrderPad from the device list and toggle on 'Payments Enabled'.
- Repeat for all OrderPads.
-
Configure System Options:
Review your System Options to ensure proper payment flow on the OrderPad.
- eReceipts: Enable text, email, print, or no receipt options from OrderPads.
- On a POS go to Main Menu > Settings > System Options > Select the Payments tab > Toggle on e-Receipts.
- Sign By Finger: Enable electronic signatures without a receipt.
- On a POS go to Main Menu > Settings > System Options > Select the Customer Display tab > Toggle on Sign by Finger.
- Tips: Enable tipping flow on OrderPads.
- On a POS go to Main Menu > Settings > System Options > Select the Customer Display tab > Toggle on Tips and set the desired tip percentages.
- Pair a CAKE Bluetooth Payment Reader:
Integrating CAKE Orderpad into your restaurant is a seamless process that enhances your operations without the need for additional staff training. Since CAKE Orderpad operates similarly to the POS system, your team can quickly adapt and start using it right away. This ease of integration allows you to focus on providing excellent table-side service, ensuring faster order taking and improved customer satisfaction. Enjoy the sweet simplicity of CAKE Orderpad!


