Managing your team is a critical part of running your business, and the CAKE Admin Portal makes this task easier by allowing you to add, edit, and control employee access. This guide walks you through how to access User Management and manage users effectively.
Table of Contents
- Accessing User Management
- Users
- Jobs
- Log into the CAKE Admin Portal via dashboard.cake.net.
- Select the Staff icon from the menu on the left.
- In the Staff section, you’ll find the following tabs:
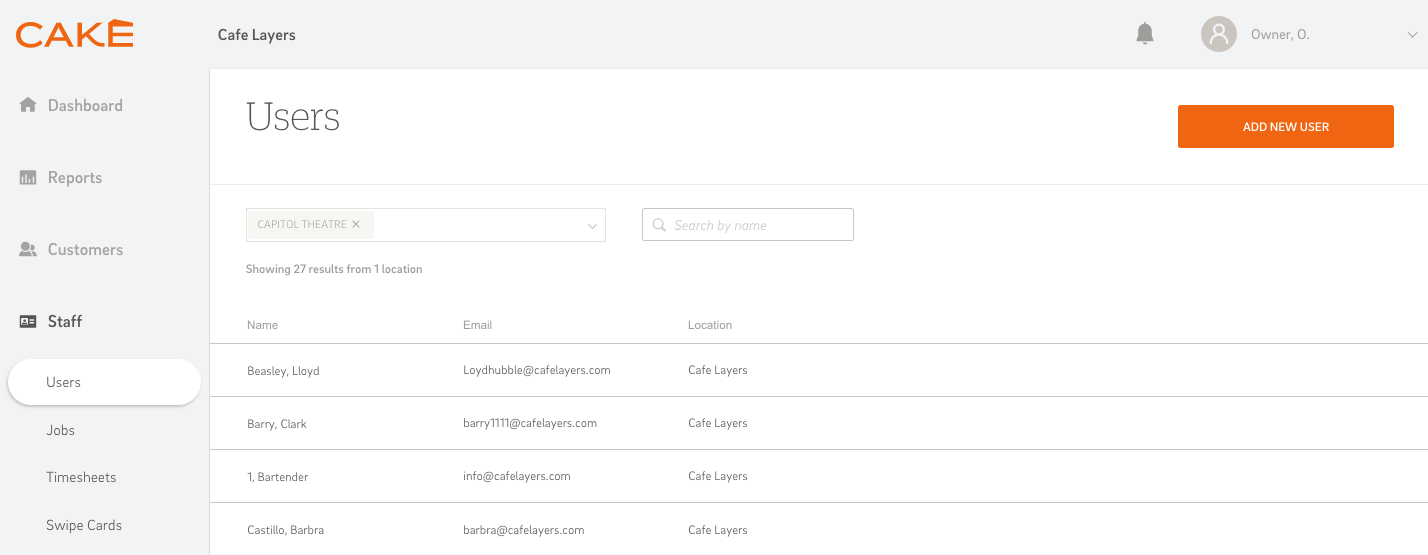
In the Users tab, you will find all employees listed by last name, first name, along with their email (if provided) and the location they are registered at. You can toggle between locations (if applicable) and search by employee name to find a specific user.
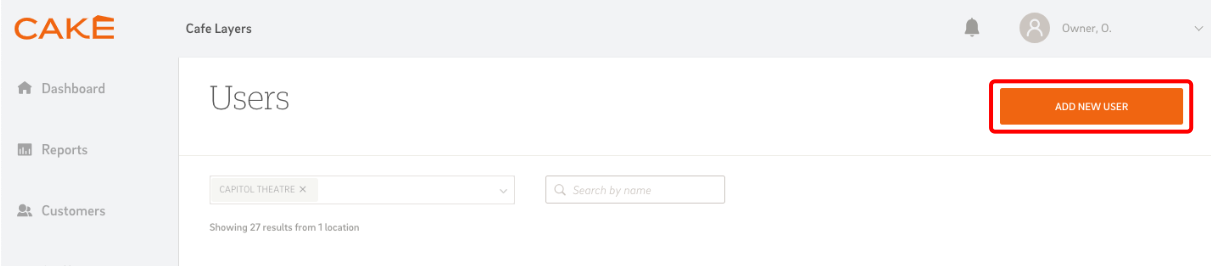
To add a new user:
- Click Add New User at the top right corner of the Users page.
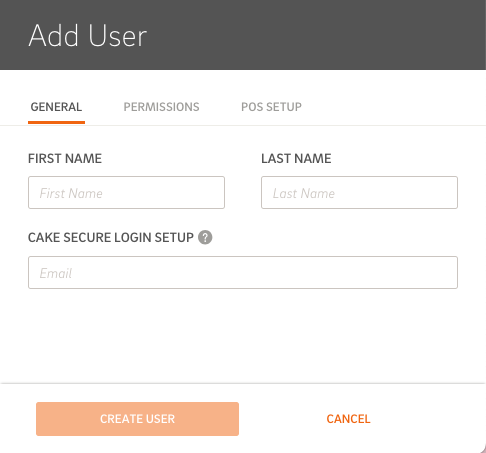
- You will be taken to the user setup page, which contains three tabs to fill out: General, Permissions, and POS Setup.
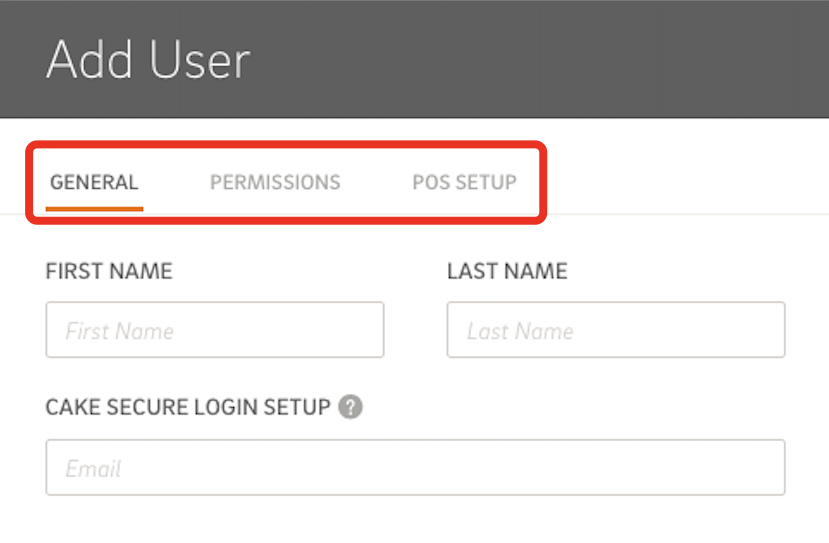
- First Name & Last Name: Enter the employee's full name.
- CAKE Secure Login Setup: Enter the user's email address, which is required for access to the Admin Portal and certain manager functions on the POS. If the user doesn’t need Admin Portal access, you can skip this, but it’s best practice to have an email on file.
- Important: Once the user is saved, they will receive an email to set up their CAKE secure login for the Admin Portal.
The Permissions Tab allows administrators to assign roles and access levels to users. This is where you define what each user can do within the CAKE system, such as access to reports, manage menus, or use the POS system.
- Copy From Feature: You can easily copy permissions from another user or a preset role (like Owner, Manager, or Employee) by using the Copy From dropdown at the top.
- Permission Descriptions: You can hover over the question mark icon next to each permission to get more details on what that specific permission does.
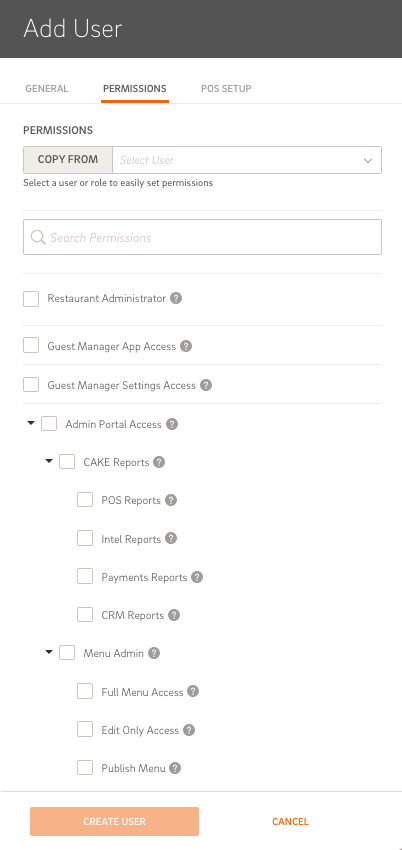

Below is a full list of available permissions:
Main / Owner Permissions:
- Restaurant Administrator: Grants all permissions to the user. This role is designed for the owner(s) of the establishment.
- Note: Once this is checked, all other permissions are automatically checked, and none of the sub-permissions can be unchecked.
- Guest Manager App Access: Allows login access to the Guest Manager app.
- Guest Manager Settings Access: Grants access to control center settings in the Guest Manager app.
Admin Permissions:
- Admin Portal Access: Grants access to the Admin Portal.
- CAKE Reports: Grants access to reporting features:
- POS Reports: Access to Point-of-Sale specific reports.
- Intel Reports: Access to intelligence reports.
- Payments Reports: Access to reports related to payments.
- CRM Reports: Access to Customer Relationship Management reports.
- Menu Admin: Full access to menu settings.
- Full Menu Access: Full access to make quick edits on the POS.
- Edit Only Access: Ability to edit menu categories, items, and modifiers.
- Publish Menu: Ability to publish menu changes.
- Read Only Access: View-only access to menu categories, items, and modifiers.
- Stations Management: Manage stations and assign stations to menu items.
- Tax Management: Full access to manage taxes on the menu.
- Time Session Management: Assign time sessions to menu categories.
- Sales Category Management: Assign sales categories to menu items.
- Featured Items Management: Edit featured items on the menu.
- Item Image Management: Edit images of menu items.
- User Admin: Manage users.
- Full User Admin Access: Create, edit, remove users, and assign permissions.
- Read Only Access: View-only access to the staff page.
- Timesheet: Access employee timesheets.
- Customer Management: Manage customer data and profiles.
- Email Marketing Access: Manage email campaigns and marketing settings.
- Billing & Payment: Access billing and payment configurations.
- System Options Access (POS): Access system options related to the POS.
- Revenue Center Configurations (POS): Configure revenue centers on the POS.
- Dashboard Settings: Access and manage universal admin settings.
- Restaurant Info: Manage restaurant details and dayparts.
- Group Management: Manage multiple restaurant locations if applicable.
- Labels Management: Manage labels within the restaurant settings.
POS Permissions:
- POS Access: Allows the user to log in to the POS as a back-of-house worker.
- POS Order Access: Grants permission to place orders on the POS (for servers, bartenders, etc.).
- POS Manager Approval: Grants approval for managerial actions on the POS, including:
- Item Void: Void specific items on orders.
- Order Void: Void entire orders before payment is processed.
- Item Edits Approval: Edit names, prices, and taxes of items.
- Sent Item Edits: Adjust quantities, prices, modifiers, and discounts after items have been sent.
- Refund: Issue refunds for orders and gift cards.
- Cash Drawer (No Sale) Button: Use the cash drawer.
- Register Actions (Cash In/Out): Manage cash-ins and cash-outs at the register.
- Cash Redemption: Process redemptions for cash.
- Reopen Order: Void and reopen paid orders if necessary.
- Resend Item: Resend items to the kitchen or bar.
- Edit Table Layout: Adjust the layout and zones of tables in the restaurant.
- POS Service Charge: Apply service charges to orders.
- POS Custom Items and Menus: Add custom items and access inactive menus.
- POS Close Cash: Close the cash drawer at the end of a shift.
- Close Cash Records: View records of closed cash reports.
- POS Declare Tips: Declare tips at the end of a shift.
- POS Tips Entry: View others' tips but edit only your own.
- POS All Tips Access: Edit tips for any order.
- POS All Orders Access: View and edit orders belonging to other users.
- POS Discount Approval: Apply discounts and comps to orders.
- Custom Discount Approval: Create custom discounts.
- POS Assign Drawer: Assign cash drawers to other users.
- POS Server Change: Transfer orders between users.
- POS Clock Out with Open Orders: Clock out even with open orders.
- POS Deny Online Orders: Deny or decline online orders.
- POS Card Not Present Approval: Process card-not-present transactions.
- POS 3rd Party Payments: Access 3rd-party payment options.
- POS Split Check: Split checks on the POS.
- POS Item Notes: Add notes to specific items.
- POS Item/Order Transfer: Transfer items or entire orders between users.
- POS Stock Counts: Manage stock and mark items as unavailable.
- POS Self Clock-In: Allows the user to clock in at the start of their shift.
- POS Self Clock-Out: Allows the user to clock out at the end of their shift.
- POS End of Shift Report: Print a report at the end of the user's shift.
- POS Break Override Approval: End breaks early if needed.
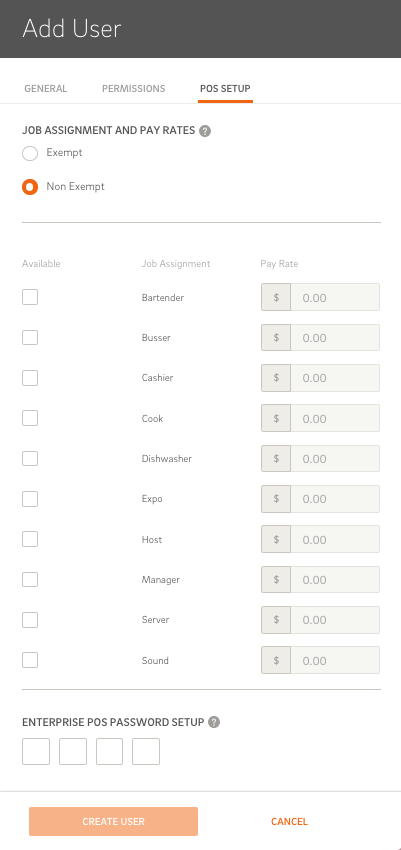
In the POS Setup tab, you can assign job roles and set pay rates for each user. Here's how it works:
- Job Assignment: Choose the job roles (e.g., Server, Manager) from the available list.
- Pay Rate: Enter the pay rate for each selected job.
- POS Password Setup: Assign an initial 4-digit password for the user. When the user logs into the POS for the first time, they will be prompted to set their own password.
If the user forgets their PIN, click Reset in this tab to set a new one.
Once all three tabs are filled out, click Create User to save the user. If they have POS permissions, they will automatically appear on the POS screen.
- Deleting a User: If a user is deleted, their history will remain in reports, allowing you to maintain accurate data.
- Disabling User Access: If you want to keep a user in the system but revoke access, simply remove all their permissions. They will no longer appear on the POS or have Admin Portal access.
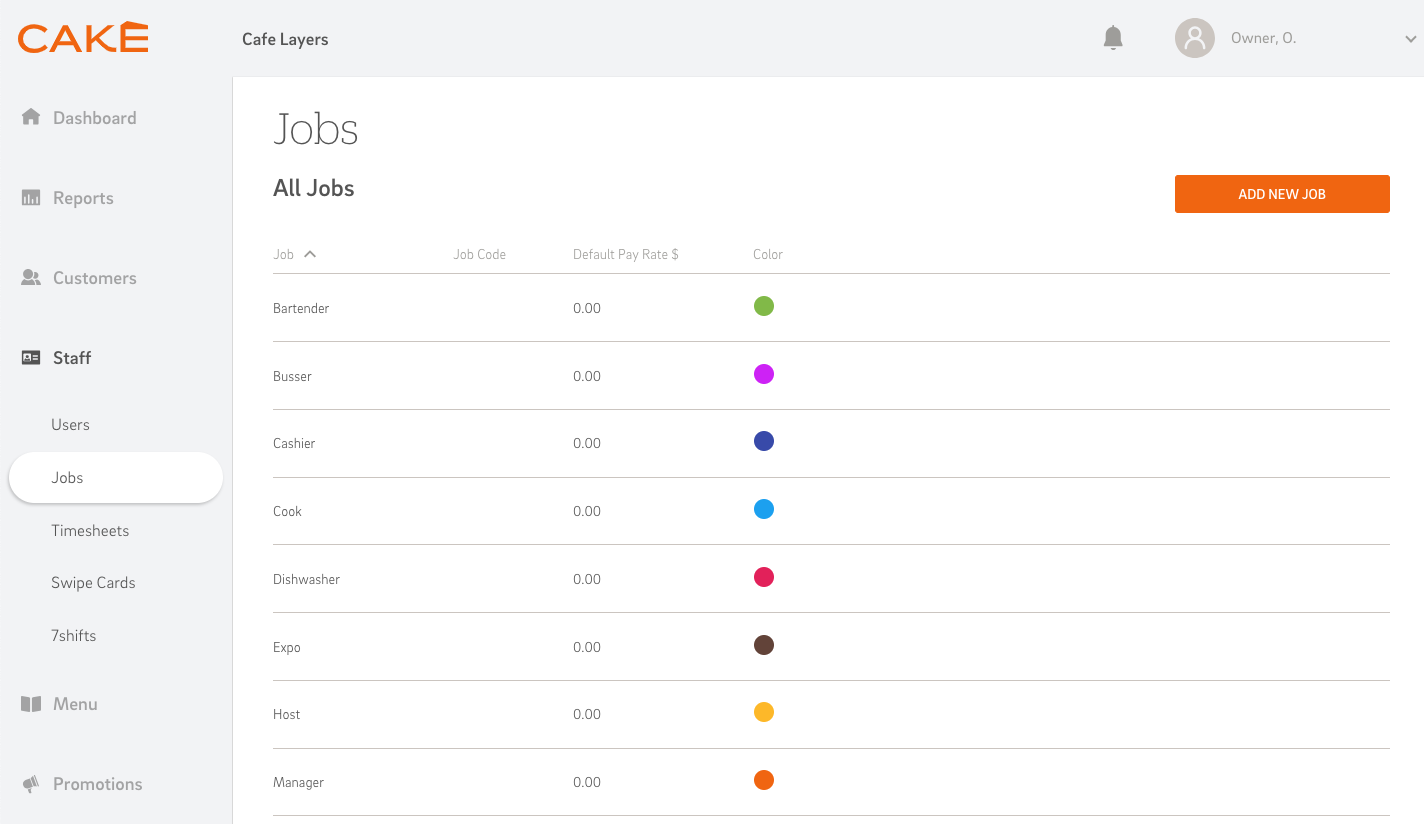
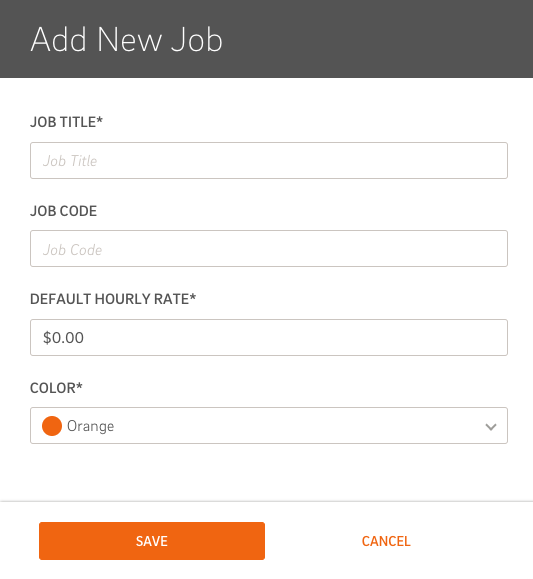
In the Jobs tab, you can set up specific job roles for your staff by selecting Add New Job.
You will be prompted to fill out the following information for each job entered:
- Job Title
- Job Code
- Default Hourly Rate
- Color
By following these steps, you can efficiently manage your staff's roles, access levels, and pay within the CAKE Admin Portal.
Suggested Articles:
Timesheets: Tracking and Editing Employee Work Hours
Swipe Cards