Thank you for choosing CAKE! This guide will help you set up your CAKE POS system and its network hardware. If you encounter any issues, please contact our Support Team at 855-696-2253 or visit CAKE University at university.cake.net for additional resources.
Table of Contents:
Let's get started with installing the CAKE hardware! You can download the installation guide with this link.
1. Network Unboxing and Setup: Connecting the CAKE Network to your existing network.
Identify where you are going to install your Network Equipment, unbox hardware, and set it into position. This should be placed near your ISP provided modem.
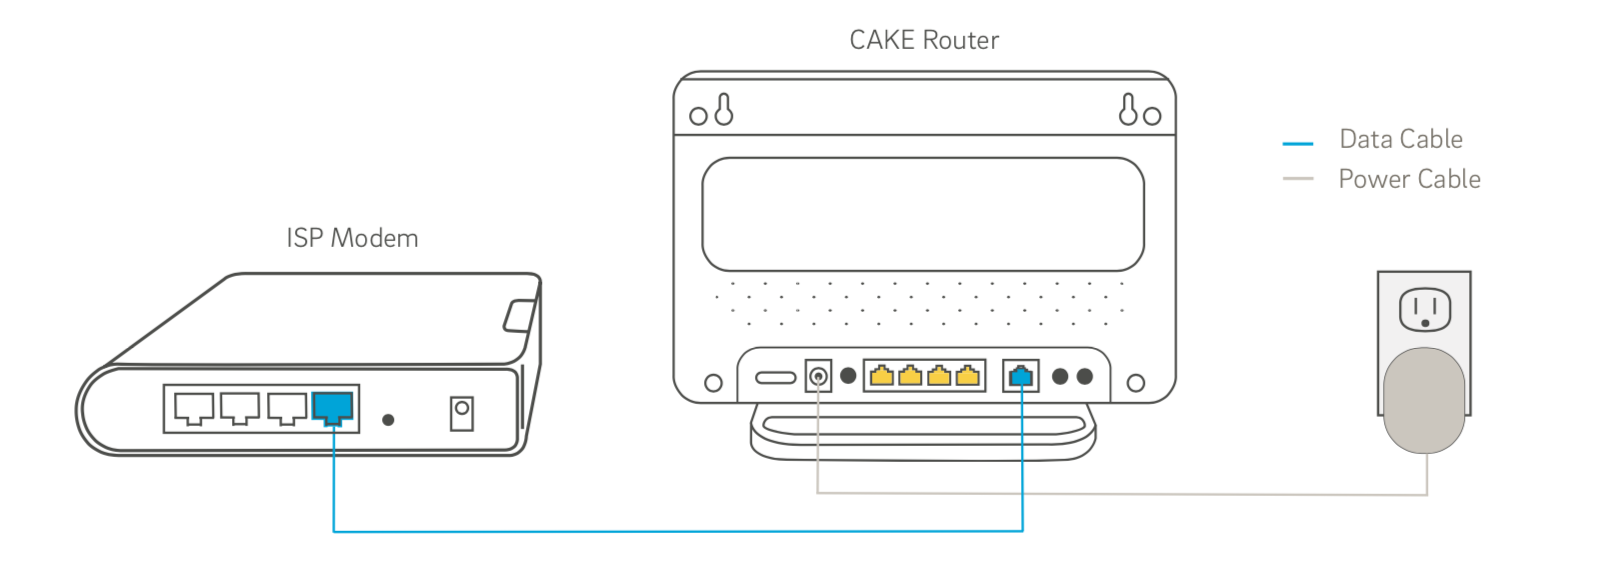
CAKE Router Setup
The CAKE Router enables communication between CAKE hardware devices and provides internet connectivity to the network. Please note that only one CAKE Router is permitted in a network setup.
Plug the Ethernet cable provided with your CAKE Router into an available LAN port on your ISP provided modem. Plug the other end into the blue port on the CAKE Router, plug in the provided power supply, and turn it on. There will be a series of blinking lights on the front indicating the router is being configured. When the white globe (icon) lights up you can continue with installation. If the white globe stays off, please check your network connections.
*The is a one-time setup that can take several minutes (including restarting multiple times). Make sure to leave it plugged in and turned on during installation of the POS system.
If your network has a switch that’s plugged into your ISP modem, or if you are using the optional Network Switch provided by CAKE, please refer to the Multi-Device Network Configuration section.
2. Station Unboxing, Placement, and Setup
Identify where you are going to install your POS Terminal(s) and Printer(s), unbox the hardware, and set it into position.
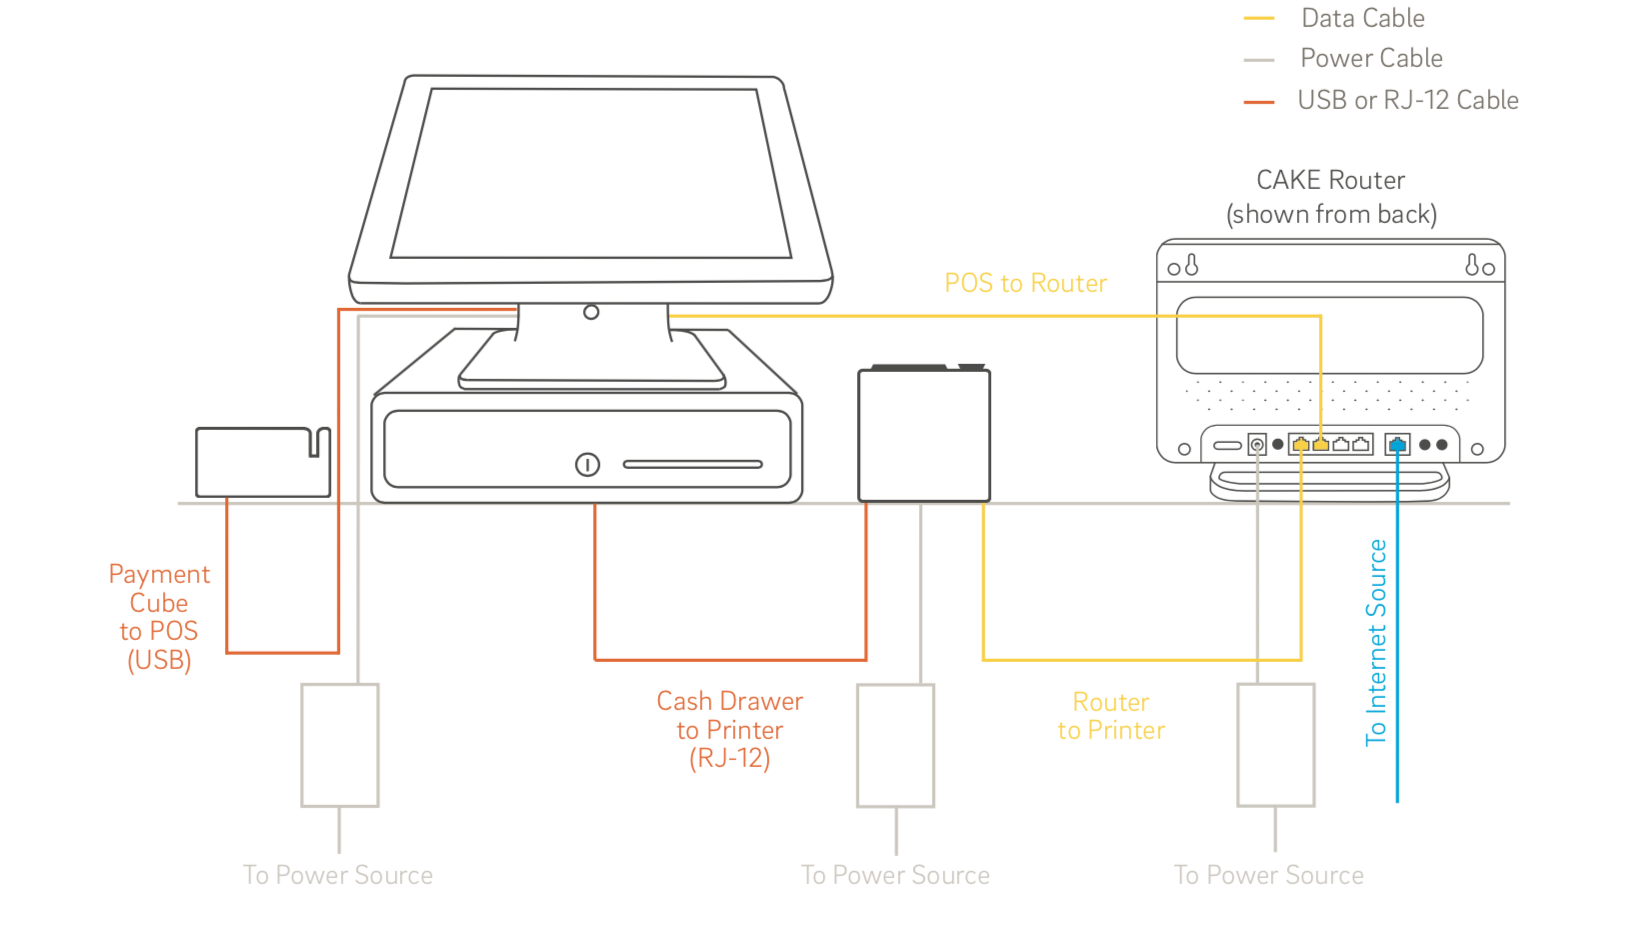
Typical System Setup
We recommended you place the POS Terminal on top of the Cash Drawer, and the primary Receipt Printer nearby. One outlet is needed per device, and additional Ethernet cables for peripheral printers are not included.
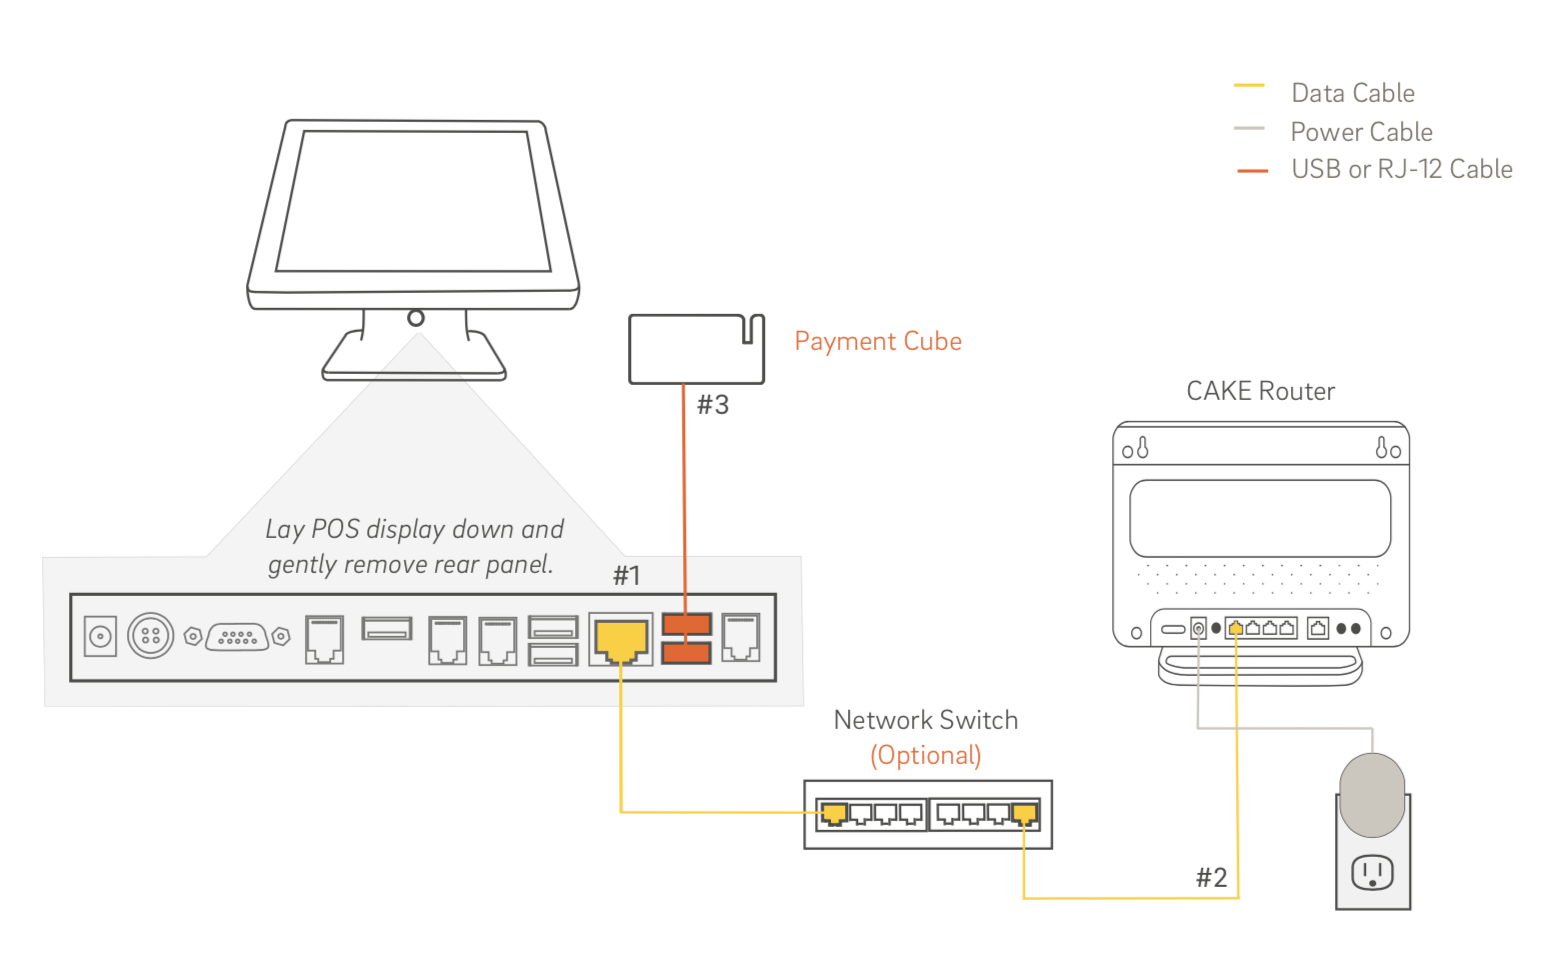
3. Connect POS Terminal To CAKE Network
Connect the provided Ethernet Cable to the LAN Port on the bottom of the POS (#1). Connect the other end to any yellow port on the back of the CAKE Router, or to any available port on a Network Switch that is connected directly to the CAKE Router (#2). Connect the Payment Cube (using the included cable) to two open USB ports on the POS terminal (#3).
NOTE: If a longer Ethernet (Cat5 patch) cable is required for your application, they can be purchased at your local technology retailer.
4. Connect Thermal Printer to CAKE Network
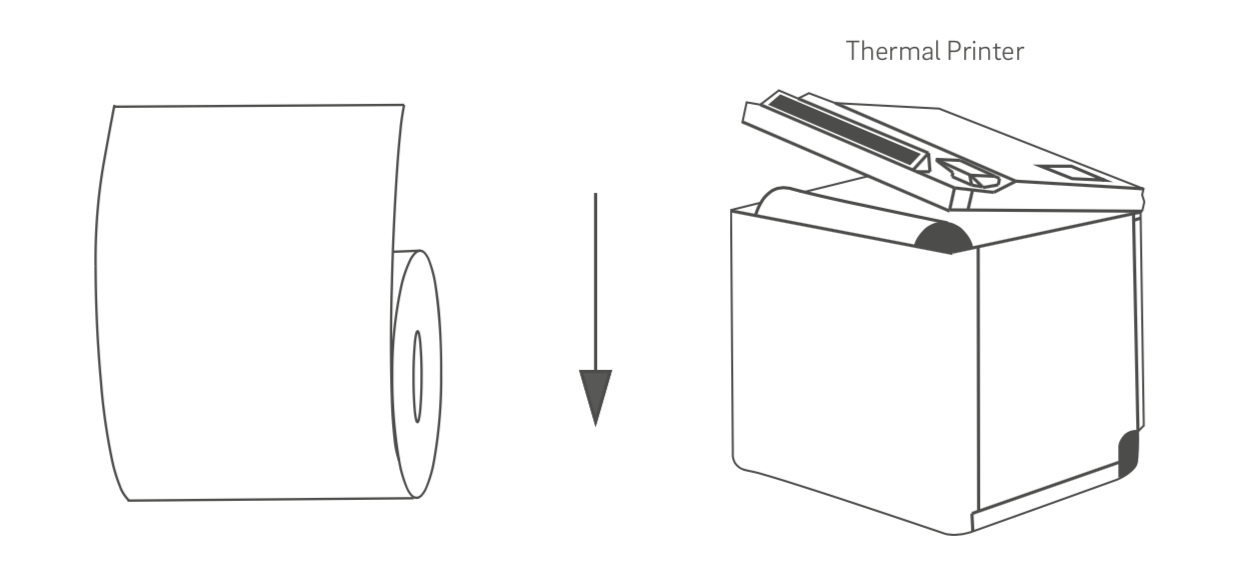
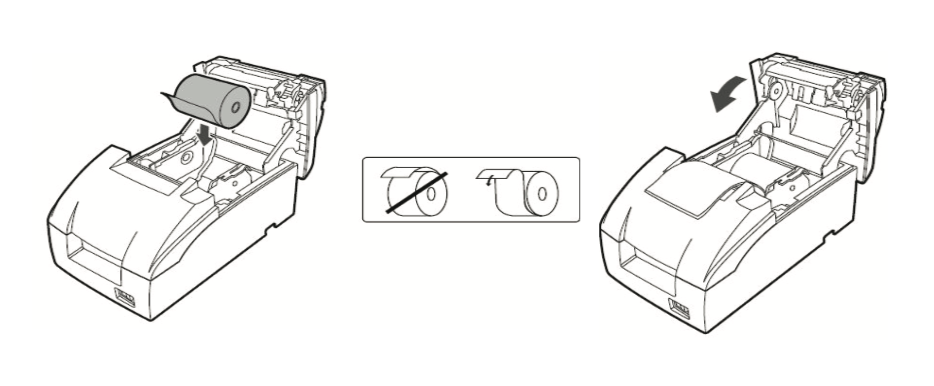
Epson Thermal Printer Configuration
Open the printer and position the thermal paper roll so the paper is coming up from the bottom. Close the lid, allowing for a few inches of paper to stick out of the top. CAKE supplies a sample of thermal printer paper to help get your printer setup and configured. We recommend once you purchase your CAKE POS, you also purchase thermal printer paper to make sure you have it on hand.
NOTE: Additional printer paper (thermal or impact) is not supplied by CAKE. You can find information on ordering in this article: Ordering Printer Paper.
Remove the base and connect the provided Ethernet cable to the LAN port on the bottom of the Printer. Connect the other end to any yellow port on the CAKE Router (or Network Switch, if using one, that is connected directly to the CAKE Router). Then, plug the power supply into the printer and turn on the printer using the power button.
Repeat this process for each thermal printer. Review our Epson Thermal Printer Configuration article to learn how to configure your printers once you've completed your installation.
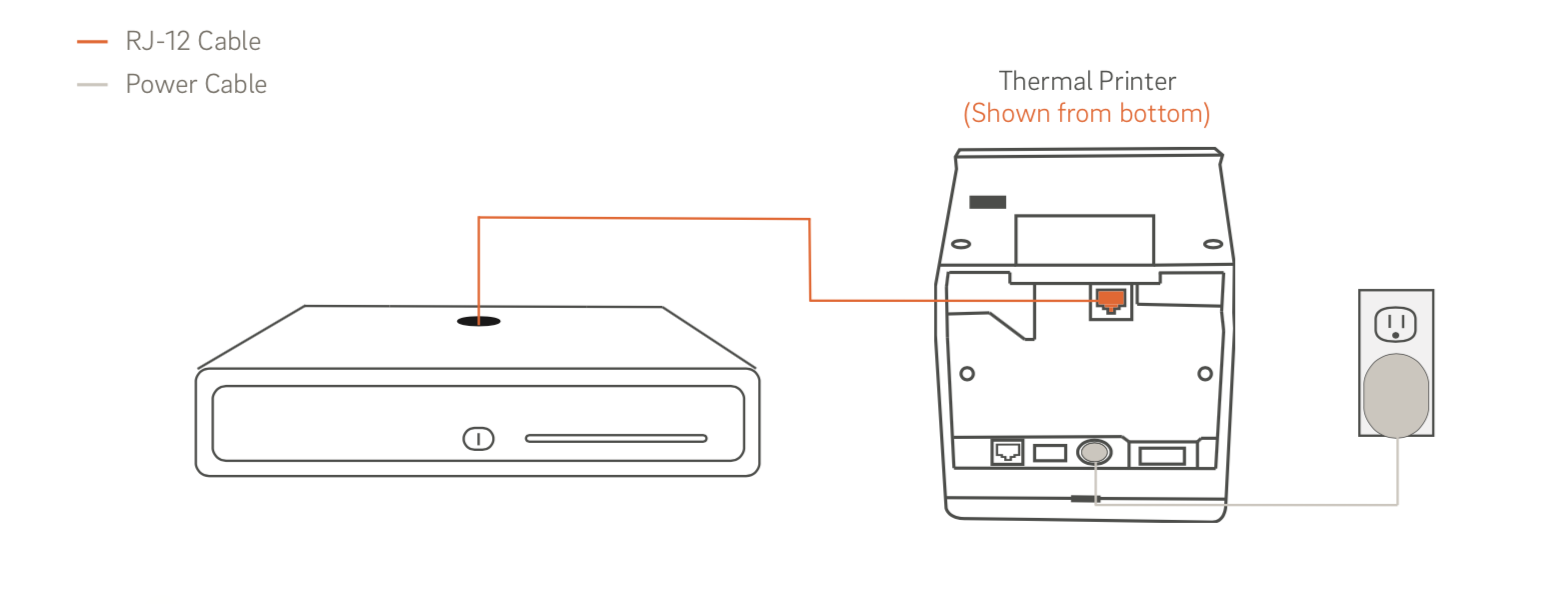
5. Connect the Cash Drawer to the Receipt Printer
Using the cable attached to the Cash Drawer, connect it to the back of the Receipt Printer of the POS station. If you’ve chosen to use multiple Cash Drawers in your station, please this article for additional instructions: Secondary Cash Drawer Setup.
Note: Make sure to keep the provided cash drawer keys in a safe place. Leave the cash drawer in the unlocked position for regular, daily use. Replacement keys are NOT available from CAKE. Copies should be made from originals at your local hardware store.
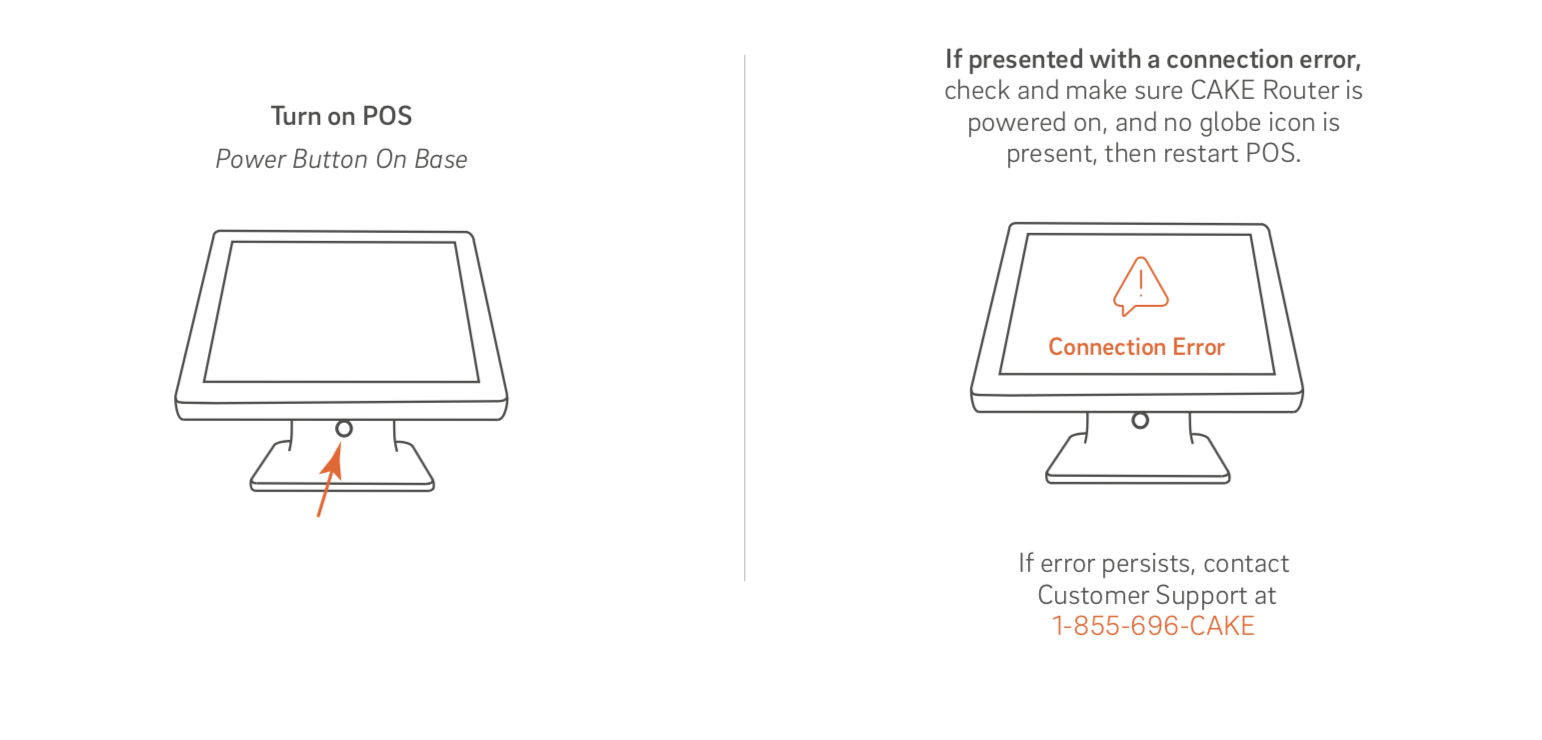
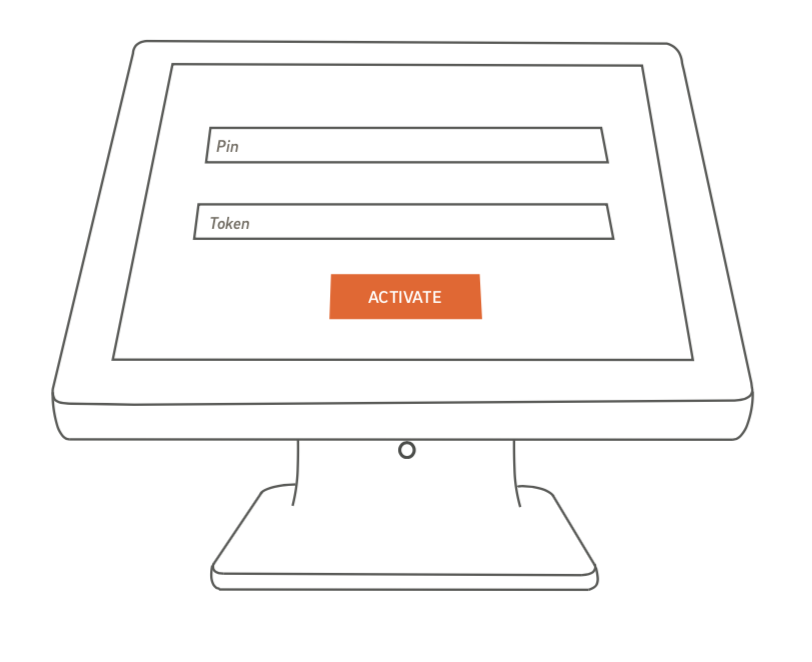
6. Activate Your Account
The main contact on your account should have received an email titled “The CAKE you ordered is on its way”. Turn on the POS. Enter the Merchant PIN and Token provided in this email to activate your new system. If you’ve purchased more than one station, wait until the first has completed its activation process prior to activating the second.
If you have only 1 POS terminal and no optional hardware (OrderPad, Impact Printers, Access Point), you have completed the install and onboarding (activation) process.
7. Multi-Device Network Configuration
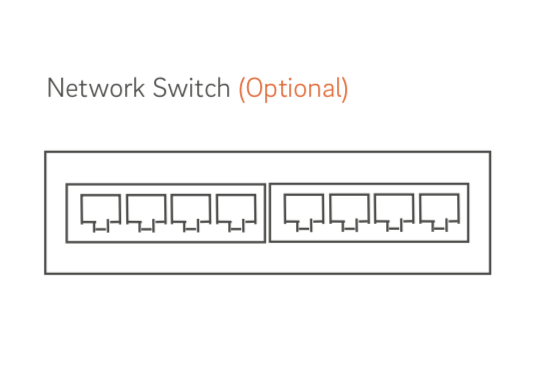
If you are installing multiple stations and printers you may need to use a Network Switch. Think of it like a power strip, this enables you to have additional ports available for use with additional CAKE devices.
To install a Network Switch, connect one Ethernet cable from a yellow port on the CAKE Router to any port on the Network Switch, and plug in the power supply. Additional devices can now be plugged into the switch.
* Only CAKE equipment is permitted on the CAKE network. Do not connect non-CAKE devices to the CAKE Router or any Network Switch connected to the CAKE Router. Non-CAKE devices on this network may cause system outages.
Two Terminal Station Configuration
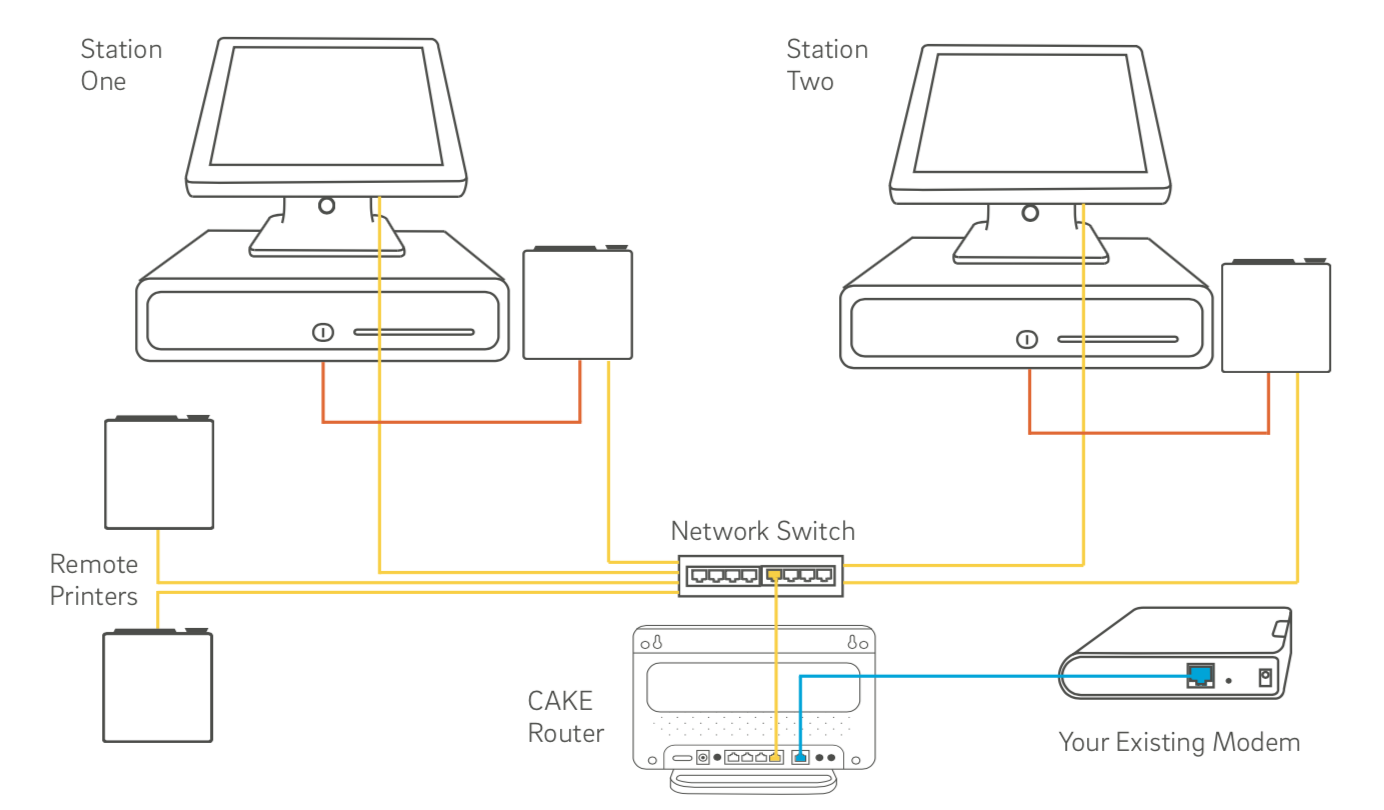
NOTE: When installing multiple terminals you will use the same Token and PIN for each. The token will only be valid for 12 hours after first use.
Optional Equipment
Connect Impact Printer to CAKE Network
Unbox the Impact Printer and begin by loading the provided ink ribbon cassette into the front of the printer by lifting the lid, tightening the ribbon prior to install, and pushing in the ink ribbon cassette until is clicks. Then, tighten the ribbon again to ensure is taut and close the front lid.
Install a roll of regular (non-thermal) printer paper by opening the rear lid and dropping the roll of paper in so that it rolls toward the rear of the printer. Then, close the lid.
Connect an Ethernet cable to the LAN port on the back of the Printer. Connect the other end to any yellow-orange port on the CAKE Router, or to any port on a Network Switch (if using one) that is connected to the CAKE Router. Then, plug the power supply into the printer and turn on.
CAKE Access Point for OrderPad
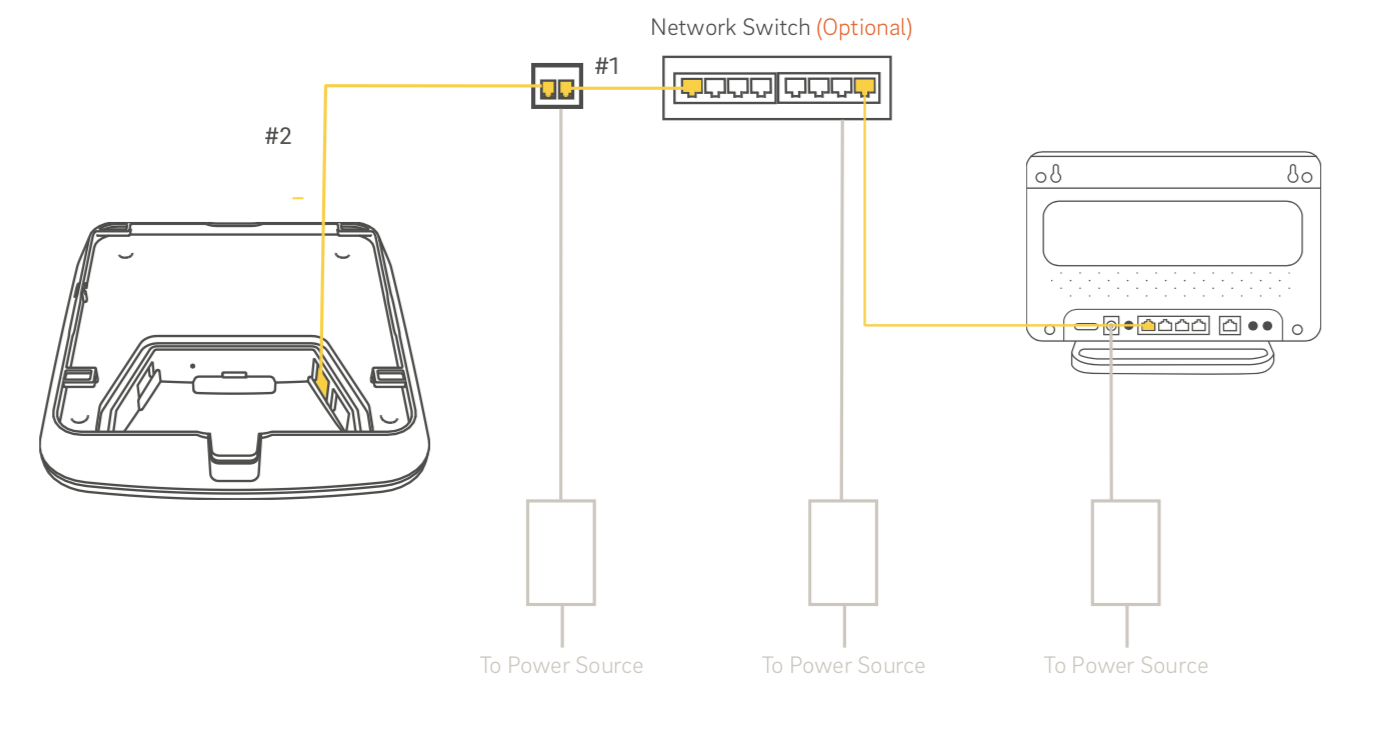
Unbox the CAKE Access Point and determine the best location and mounting method for your restaurant. You will need 2 Ethernet cables of appropriate length (based on placement and distance from your CAKE router or network switch). Images are representations only, actual models may differ.
Plug one end of the power cable into the PoE (Power over Ethernet) Injector and the other end into an available outlet. Connect the first network cable to an open yellow port in your CAKE Router (or network switch), connect the other end to the “Data/In” port (#1) on your PoE Injector. Plug one end of the second network cable into the “P+D/OUT” port (#2) of your PoE Injector, and the other end into the CAKE Access Point.
The Access Point will power on and configure itself (this process could take up to 10 minutes).
Connect OrderPad to CAKE Network
If you signed up for the CAKE OrderPad service you will need to obtain an Apple iPad Air / iPad Mini 2 (or above) running iOS 8 or later to utilize the OrderPad application.

To connect your Orderpad:
- On the iPad, go to Settings > WiFi > Other
- Name = Your CAKE Merchant ID* (e.g. c0010-12345678 provided in your “What to Expect” email)
- Security = WPA2
- Password = cake + Your CAKE PIN (e.g. cake12345 provided in your “What to Expect” email)
- Tap “Join” (this will connect your iPad to the CAKE Router’s WiFi network)
Important! Connecting any other device to the CAKE WiFi network compromises your system’s credit card security, is a violation of PCI Compliance and will void the CAKE warranty.
WiFi range is subject to environmental conditions. CAKE cannot guarantee WiFi coverage to all areas of your restaurant. Make sure to test the range of the CAKE WiFi network before actual use.
Launch the CAKE OrderPad app and press Activate. Enter the PIN and Token you used to activate the CAKE terminal(s). OrderPad will begin to sync with your main terminal immediately.
Note: You must first activate your CAKE POS terminal(s) before you activate any OrderPad(s).
Success!
You have completed the installation and onboarding (activation) process. If you haven't already, you should enroll in one of our trainings or you may also be interested in our Webinars.
The next article we recommend for Managers is: POS Onboarding (Activation)