Zones in the CAKE POS system represent seating areas within your restaurant, such as the bar, patio, or dining room. Configuring Zones is essential for managing table service effectively and organizing your restaurant layout. This guide walks you through setting up, managing, and optimizing Zones.
Table of Contents
- Accessing Zone Settings
- What Are Zones?
- How to Configure Zones
- Best Practices
- Quick Reference Table
To access Zone settings:
- Navigate to Main Menu > Settings > System Options.
- Scroll down on the left side and click Zones.
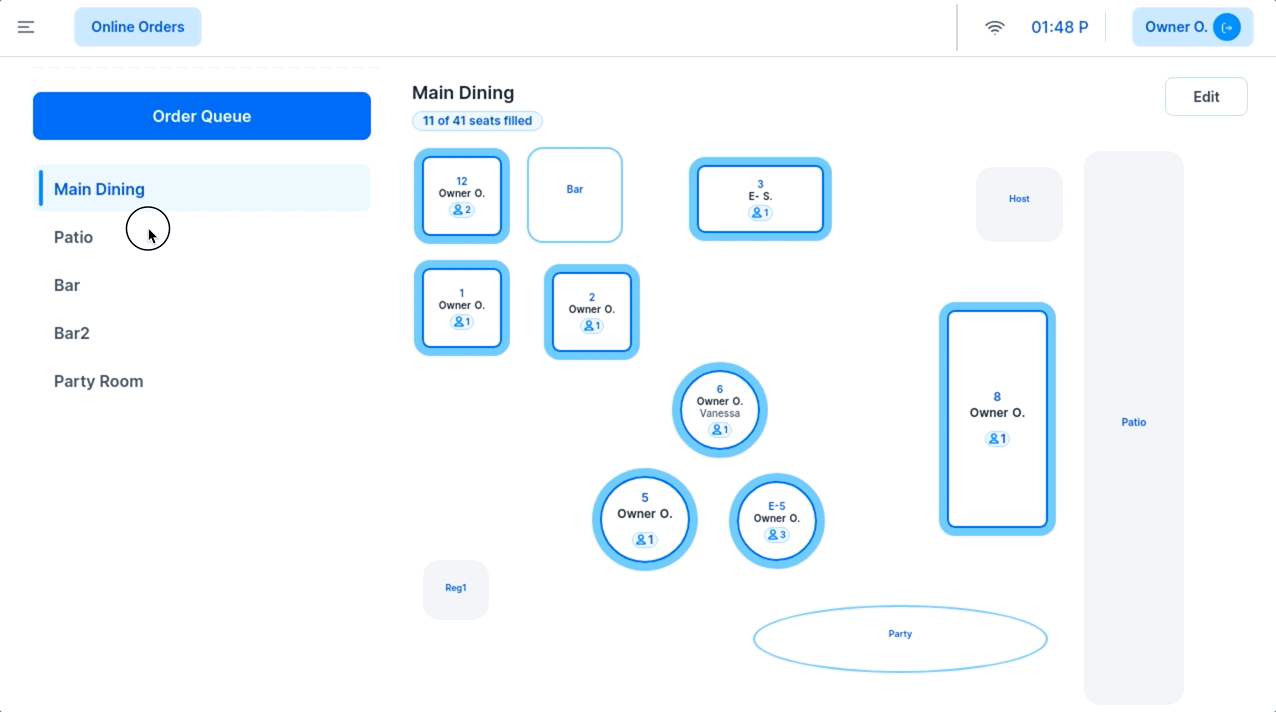
- Definition: Zones are large areas in your restaurant, such as the dining room, patio, or private room.
- Purpose: They help organize tables and streamline table service operations.
- When Needed:
- Required: If you use the Table Service option.
- Not Needed: If you manage orders solely through the Order Queue.
Note: Zones are not server sections. They represent broad areas of your restaurant layout.
1. Adding a New Zone
- Steps:
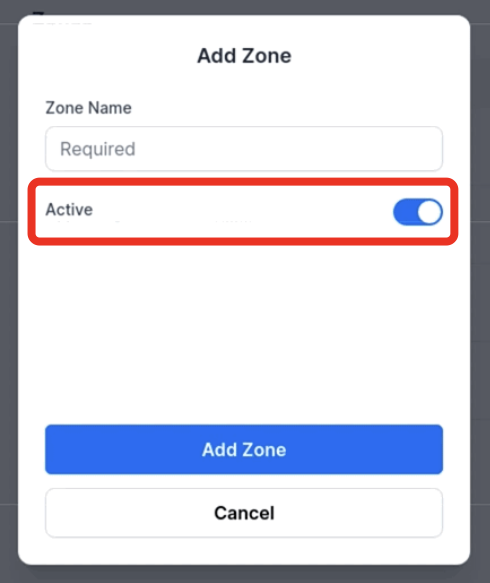
- Click + New Zone.
- Enter the name of the new Zone (e.g., "Patio" or "Dining Room").
- Toggle Active to enable the Zone immediately if needed.
- Click Save to add the Zone.
- Result:
- The new Zone will appear in the Zones list.
- Use the up/down arrows to reorder Zones based on usage frequency.

- Steps:
- Click the name of the Zone you wish to delete.
- Click Delete.
- Important Notes:
- Deleting a Zone removes it and any tables within it from your POS floor chart.
- Ensure all tables are moved to a different Zone before deleting.
- Why Use This Option:
- Instead of deleting a Zone, you can make it inactive to retain its configuration for future use.
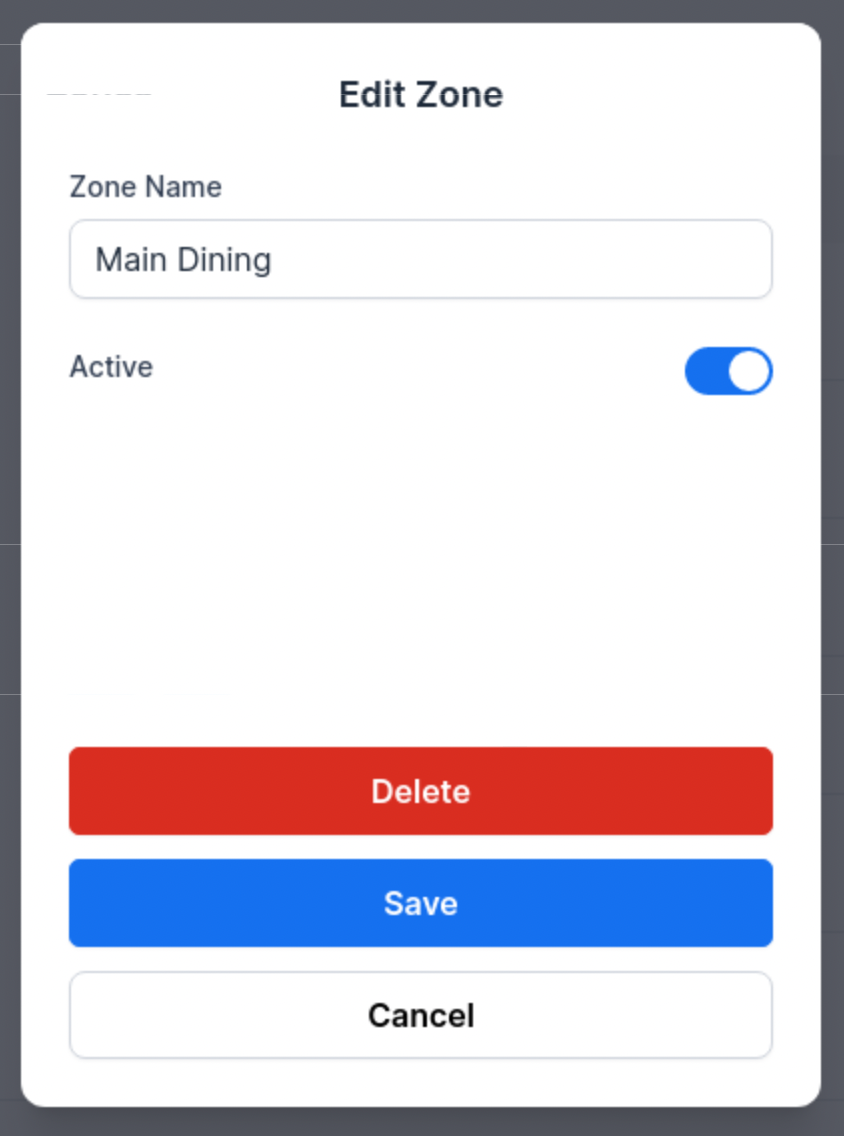
- Steps:
- Click the Zone name.
- Toggle Active off to make it inactive.
- Click Save Changes.
- Start with One Zone:
- Create one Zone (e.g., "Dining Room") if your restaurant layout doesn’t require multiple areas.
- Organize Zones by Usage:
- Use the up/down arrows to prioritize frequently used Zones at the top.
- Avoid Deleting Zones:
- Use the inactive option instead of deleting to retain flexibility for future use.
- Test Before Activation:
- Set up Zones during off-hours to ensure proper functionality before active use.
| Action | Description | Recommendation |
|---|
| Add New Zone | Creates a new seating area for table service. | Create only the Zones necessary for your layout. |
| Delete a Zone | Removes a Zone and its associated tables from the POS. | Move tables to another Zone before deletion. |
| Make Zone Inactive | Disables a Zone without deleting its configuration. | Use this option to retain flexibility. |
| Reorder Zones | Adjust the display order of Zones for convenience. | Place frequently used Zones at the top. |
Zones are a vital component of managing table service in your restaurant. Proper configuration ensures efficient table management and smooth service operations. Always click Save Changes after making updates. For further assistance, contact CAKE Support via call or text at (352)722-2253.
Return to System Options Overview
Suggested Articles:
Adding and Adjusting Table Layout on CAKE POS