This article is designed to guide you through the steps to make a menu for your CAKE Online Ordering (OLO) platform. Whether you are setting up a new menu or updating an existing one, this guide will ensure your menu is optimized for display and functionality on OLO.
Table of Contents
- Steps to Set Up a Menu for CAKE Online Ordering
- Managing Components Not Showing on Online Ordering
- Setting Up an Online Ordering Menu for an Enterprise Group
Follow these steps to configure and finalize a menu for OLO:
- Go to admin.cake.net and log in to your Admin Portal.
- Navigate to Menu Admin to manage your menu settings.
Create a new menu for Online Ordering by following these steps:
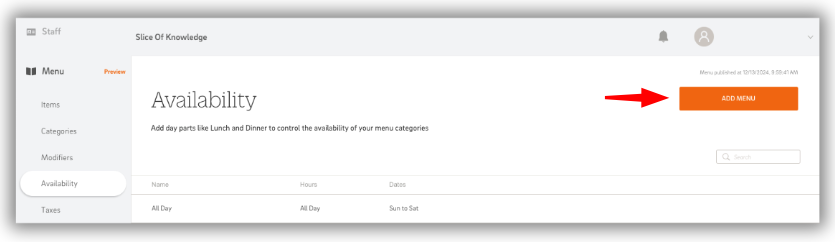
- In Menu Admin, go to the Availability tab.
- Click Add Menu and fill out the required fields:
- Enter a Menu Name (e.g., “OLO”).
- Set the days and hours the menu will be available.
- Use the Add Hours button for different timeframes.
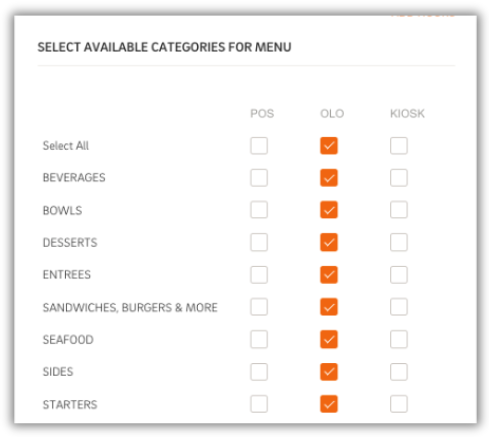
- Under Select Available Categories for Menu, check the boxes in the OLO column for the categories you want to display on your menu.
- Click Save, then Publish to make the menu live.

Once your menu has been created and published, it will be live on your Online Ordering (OLO) platform. Make sure to review the menu for accuracy to ensure all items, categories, and modifiers display correctly for customers.
Checking for Missing Components
If you notice that certain components—like items, modifier groups, or subcategories—are missing from your OLO menu:
- Navigate to Menu Admin in the Admin Portal.
- Go to the specific section (Items, Modifier Groups, or Categories).
- Open the component that isn’t displaying.
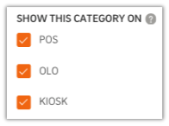
- Look for the "Show this ___ on" field and ensure the Online Ordering checkbox is selected.
- Click Save and Publish to update the menu.
By thoroughly reviewing your menu and addressing any missing components, you can ensure a seamless and accurate ordering experience for your customers.
If components such as items, modifiers, or subcategories are not displaying, it’s likely they have not been enabled for Online Ordering. Here’s how to troubleshoot and resolve this:
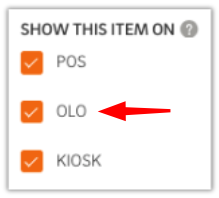
- In Menu Admin, go to the Items tab.
- Select the item that isn’t showing to open the Edit Menu.
- Scroll to the "Show this item on" field.
- Ensure the OLO checkbox is selected.
- Click Save and Publish, then verify the item is now visible.

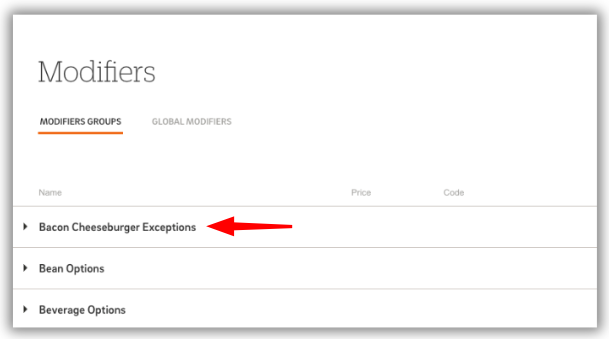
- In Menu Admin, go to the Modifier Groups tab.
- Select the modifier group that isn’t appearing to open the Edit Menu.
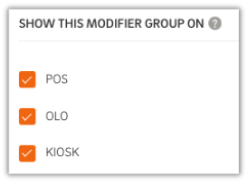
- Scroll to the "Show this modifier group on" field.
- Confirm the OLO checkbox is selected.
- Click Save and Publish, then verify the modifier group displays.
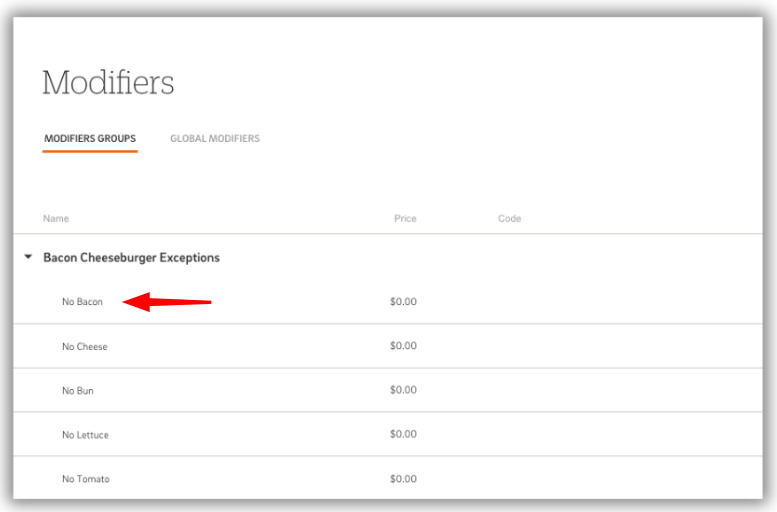
- In Menu Admin, go to the Modifier Options section.
- Click the arrow next to the modifier group name to reveal the options.
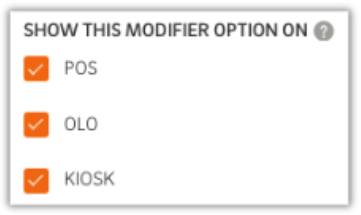
- Select the missing modifier option to open the Edit Menu.
- Check the box for "Show this modifier option on Online Ordering."
- Click Save and Publish, then confirm the modifier option is visible.
Categories Not Displaying on OLO
- In Menu Admin, go to the Availability tab.
- Select the menu set up for Online Ordering.
- Scroll down to the 'Select Available Categories For Menu' section.
- All your categories will be listed. Confirm the OLO column is checked for the desired categories.
- Click Save and Publish, then verify the category appears.
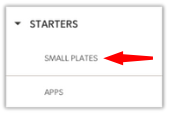
- In Menu Admin, go to the Categories tab.
- Click the arrow next to the category name to reveal the subcategories.
- Select the missing subcategory to open the Edit Menu.
- Scroll to the "Show this subcategory on" field.
- Ensure the Online Ordering checkbox is selected.
- Click Save and Publish, then verify the subcategory appears.
If you manage multiple locations with CAKE, here’s how to configure Online Ordering menus for enterprise groups:
- Set all components (items, categories, etc.) to show on OLO at the enterprise level.
- Create a new menu (Menu Admin > Availability) for OLO at the location levels.
This method keeps your menus organized while allowing flexibility for location-specific needs.
Setting up and managing an Online Ordering menu with CAKE is simple and efficient. Whether you’re configuring menus for a single location or managing an enterprise group, the Admin Portal gives you full control over which items, modifiers, and categories display on your OLO platform.
By following these steps, you’ll ensure a smooth, seamless ordering experience for your customers and optimized menu visibility for your restaurant.
Online Ordering with CAKE: Navigation Page
Configuring Online Ordering (OLO) Settings in Admin Portal
Configuring Online Ordering Settings on the POS