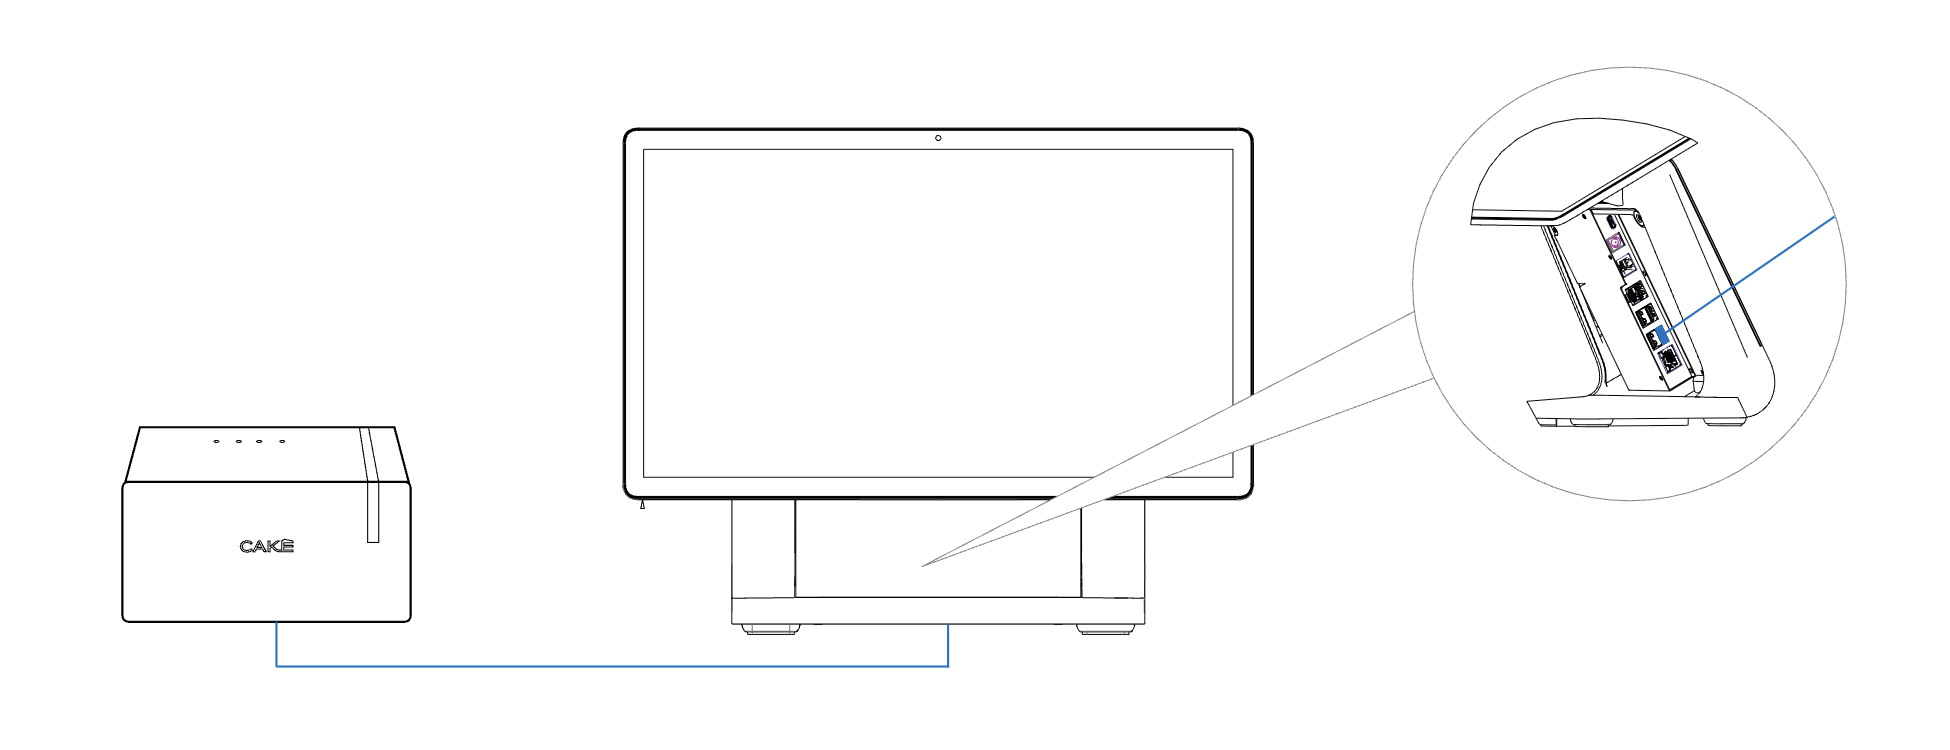
If your setup includes additional CAKE products, follow the linked articles below for detailed setup instructions:
Refer to these resources for specific setup steps and ensure all devices are fully integrated into your CAKE network.
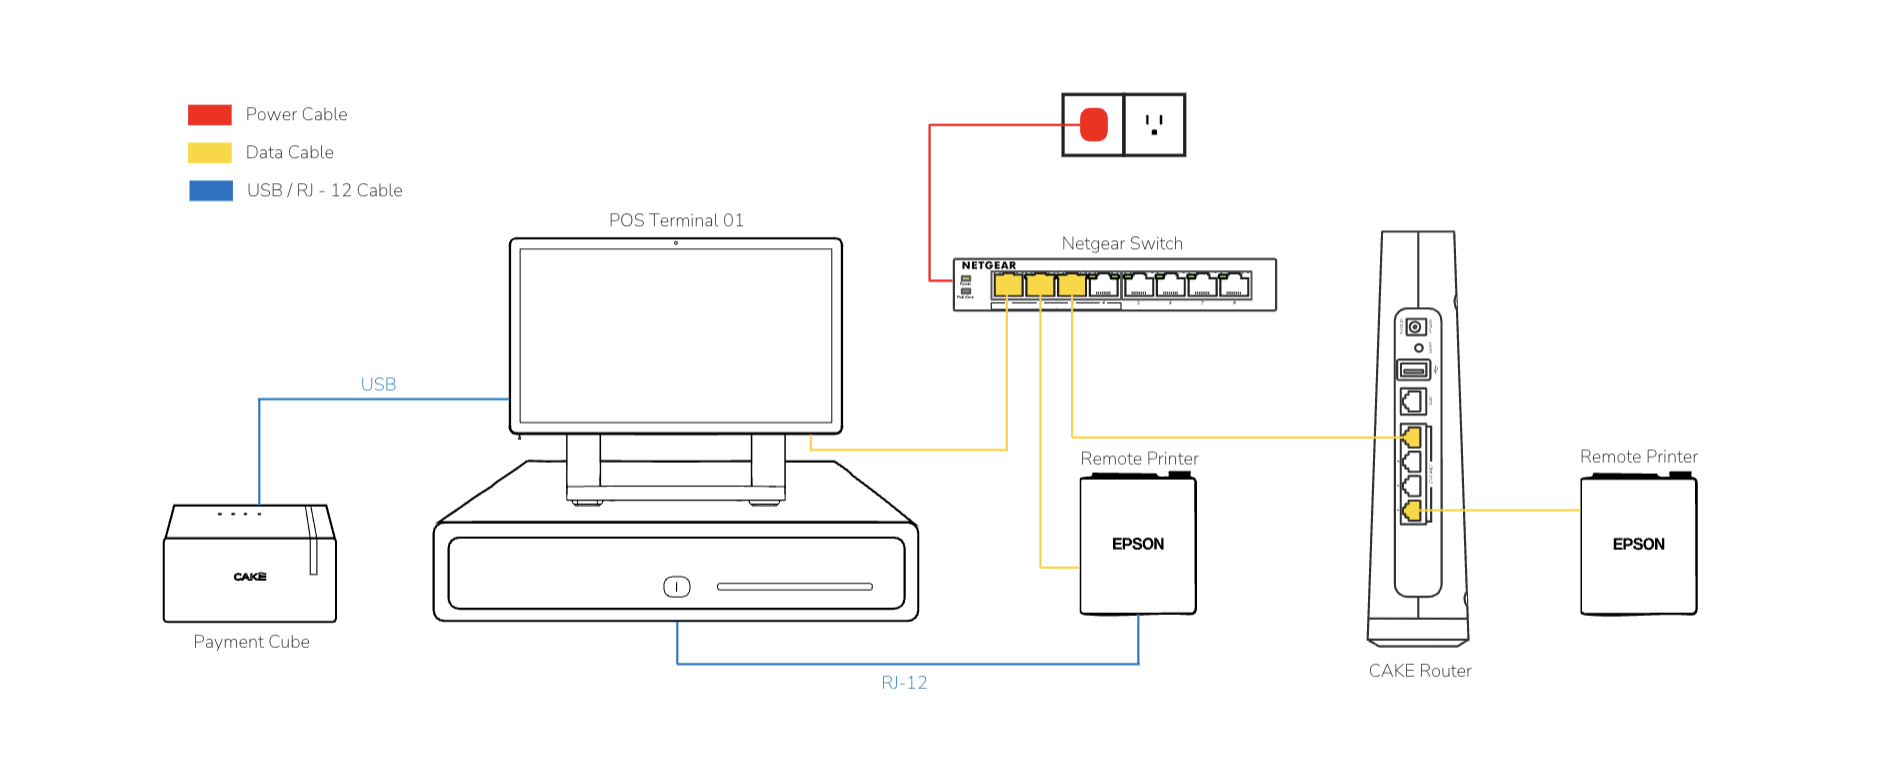
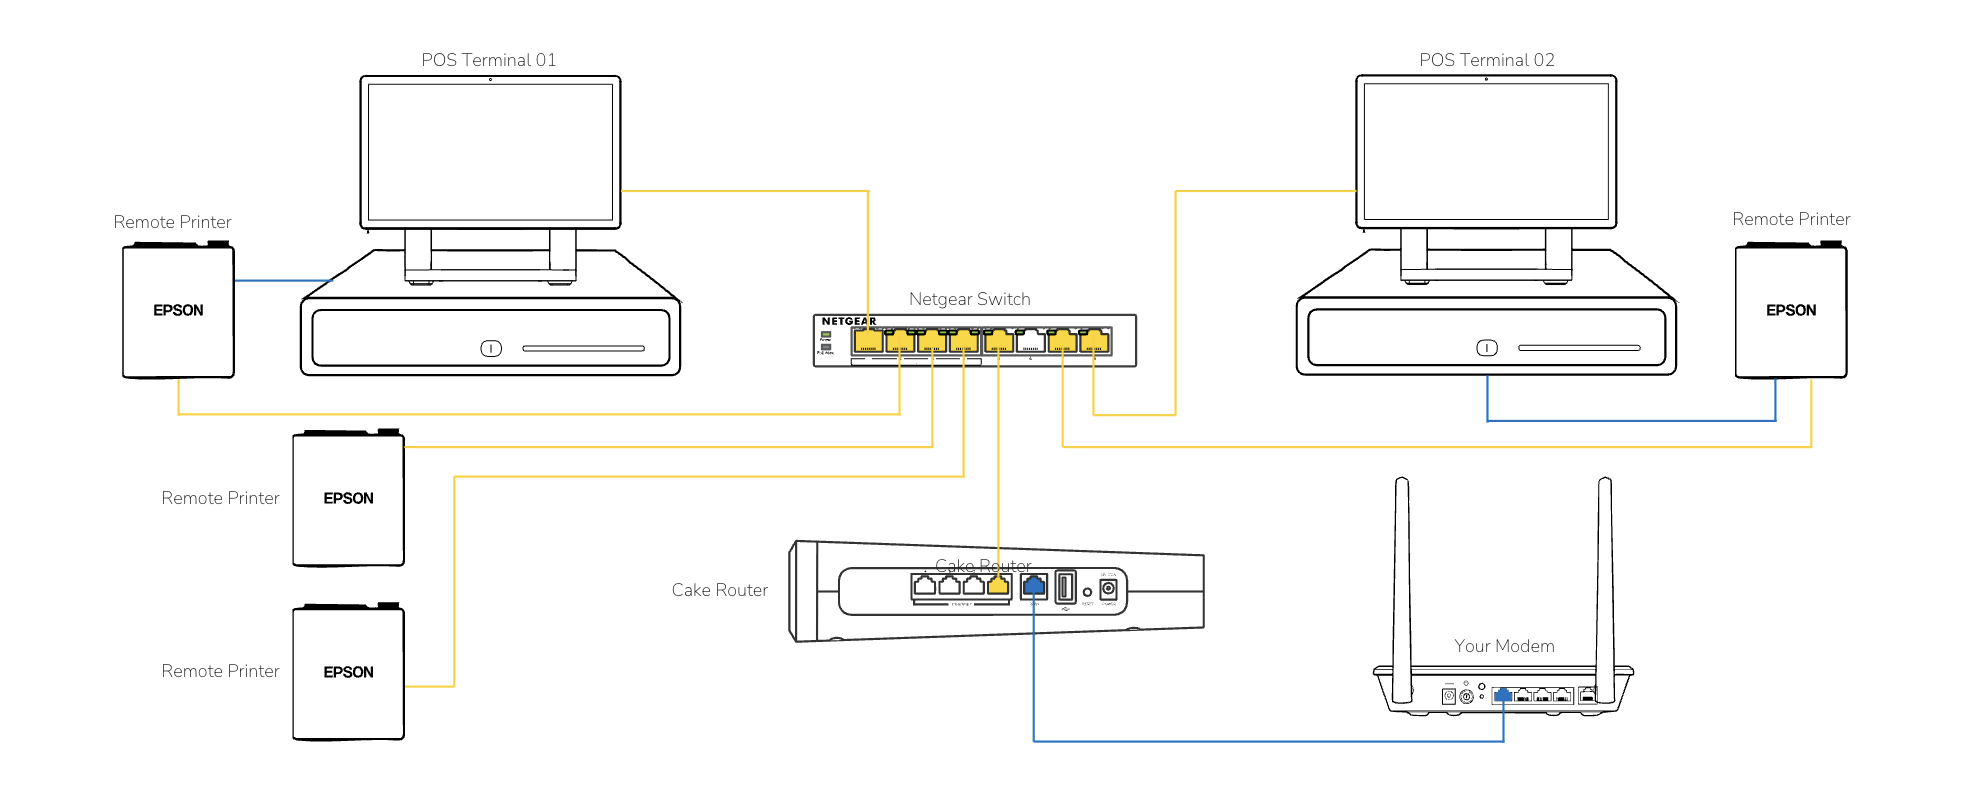
Now that you’ve completed setting up your POS system, network, and supporting hardware, here’s a visual reference of what your CAKE network should look like once everything is connected correctly. These simple diagrams show typical setups for both single and dual POS terminal configurations.
These examples can help you double-check your setup and are useful tools when working with CAKE Support for any future troubleshooting.
One Terminal Setup

Two Terminal Setup

Pro Tip:
Creating a physical or digital version of your setup map (with labeled ports and cables) is highly recommended. This will make it easier to troubleshoot, expand your setup in the future, or provide quick context when working with CAKE Support.
Once all your supporting hardware and additional CAKE devices are configured, you’re ready to configure printers on your CAKE POS for seamless printing.
Head to the Configuring Printers on the CAKE POS article for detailed instructions.
Return to Getting Started With CAKE: V4 Installation Guide


