Welcome to your guide on creating orders in the CAKE POS system! By mastering this process, you’ll ensure accurate order entry and smooth operations. Follow these detailed steps to confidently navigate the system and provide an exceptional customer experience.
Table of Contents
- How to Start an Order
- Understanding the Order Screen
- Step-by-Step: Creating an Order
- Paying for the Order
You can begin creating an order in two ways, depending on the setup of your CAKE POS system:
Via Order Queue
- Go to Main Menu > Orders.
- From the Order Queue, select New Order.
- Depending on the POS settings, you may be prompted to select an Order Type (e.g. Dine In, Take Out) and guest count.
- If you are not prompted to select an Order Type this means there is a default order type set.
- Then, you will be taken to the order screen.
Via Tables
- Go to Main Menu > Tables.
- From the Tables screen, select an unoccupied table (table with no glow).
- Upon selection, you will be taken directly to the order screen.
Once you’re on the order screen, you’ll notice several key features designed to simplify the process of adding items and managing orders.
Key Features and Icons
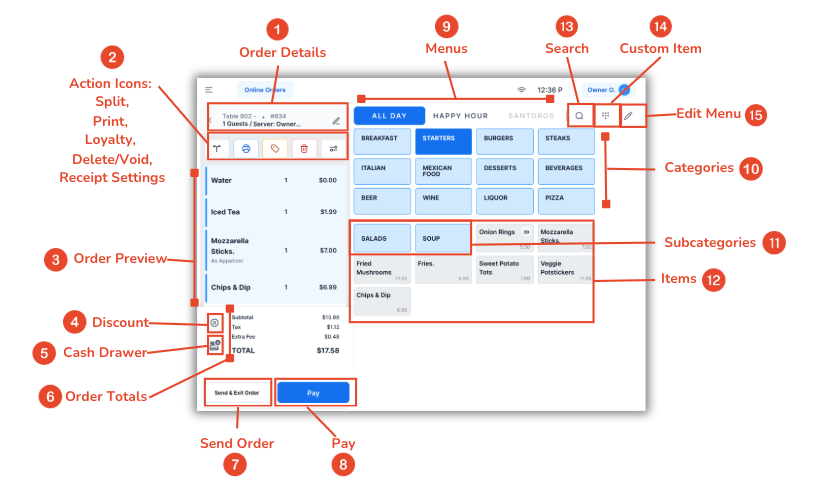
This guide outlines the key features and icons of the Order Screen, matching the layout shown in the image.
1. Order Details
- Found at the top-left of the screen.
- Displays critical information about the order, including:
- Order Type
- Order Number
- Guest Count
- Server Name
- Use the Pencil icon to edit these details.
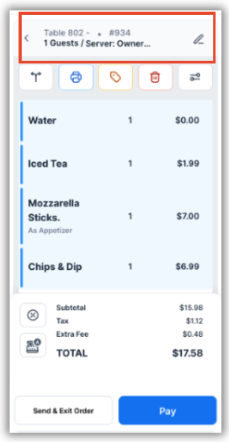
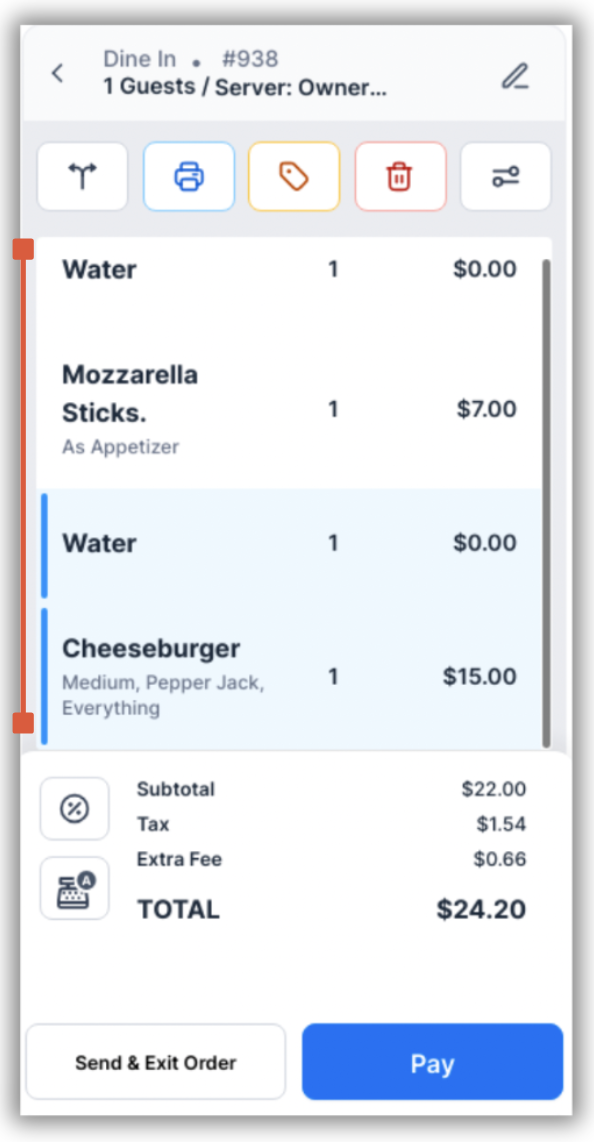
2. Action Icons
- Located below the Order Details section.
- Split Icon -
 : Split checks or move items to another table.
 - Print Icon -
 : Print the receipt.
 - Loyalty Icon -
 : A loyalty icon appears if CAKE Loyalty is active. Add customer loyalty details here.
 - Delete/Void Icon -
 :
:
- Delete: Before items are sent to the kitchen.
- Void: After items are sent to the kitchen (manager approval required).
- Settings Icon -
 : Manage Service Charge and Extra Fee settings (manager approval required).
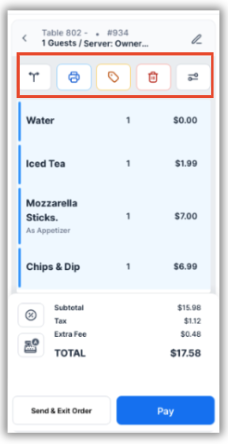
3. Order Preview
- Located to the left of the screen, below the Action Icons.
- Displays the current order, including all added items.
- Unsent Items: Items that have not been sent to the kitchen will be highlighted in blue.
- Sent Items: Items that have been sent to the kitchen will not be highlighted.
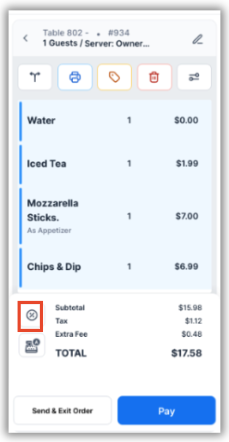
4. Discount
- Found below the Order Preview section.
- Use this button to apply discounts (user permissions required).
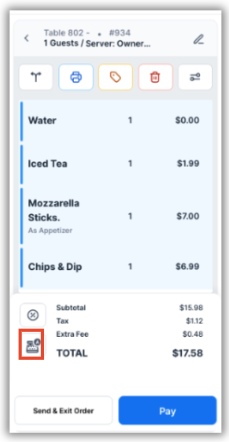
5. Cash Drawer Icon
- Found near the bottom-left of the Order Preview section.
- Use this button to access the cash drawer (user permissions required).
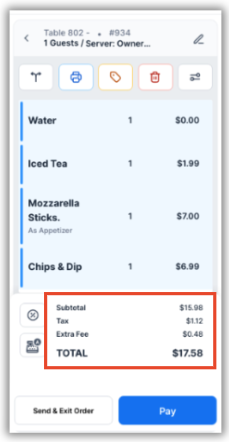
6. Order Totals
- Displayed beneath the Order Preview section.
- Shows the Subtotal, Tax, POS Extra Fee (if applicable), and Total for the order.
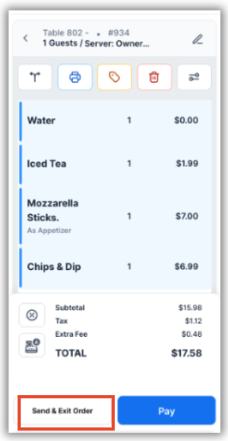
7. Send Order
- Located at the bottom-left of the screen.
- Sends the order to the kitchen. Depending on the POS settings, the button may display:
- Send Order
- Send & Exit Order
- Send & Sign Out
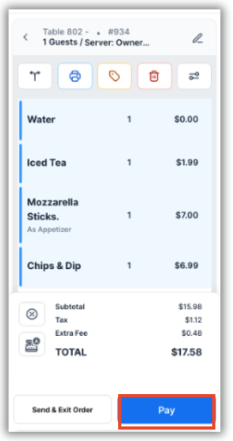
8. Pay
- Found at the bottom-right of the screen.
- Brings you to the payment screen to finalize the transaction.
- Learn how to pay an order here.
9. Menus
- Located at the top center of the screen.
- Choose from menus like All Day, Happy Hour, or other available options.
- Only menus that are set to be available can be selected.
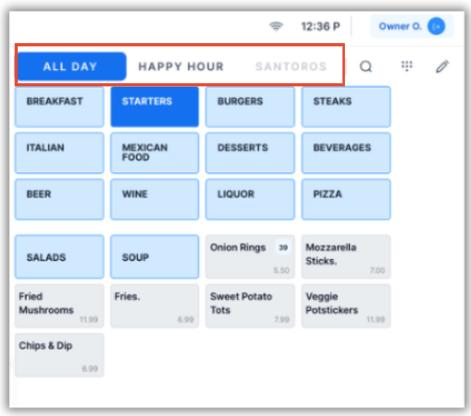
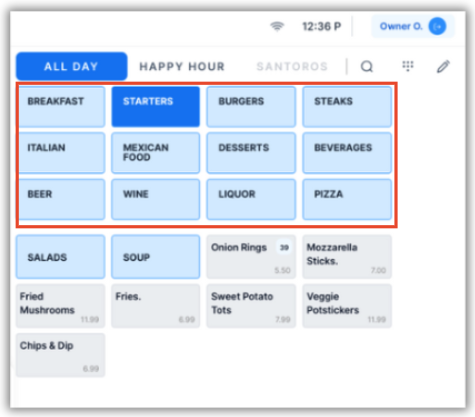
10. Categories
- Displayed along the right side of the screen.
- Select a category (e.g., Starters, Beverages) to view its corresponding subcategories and items.
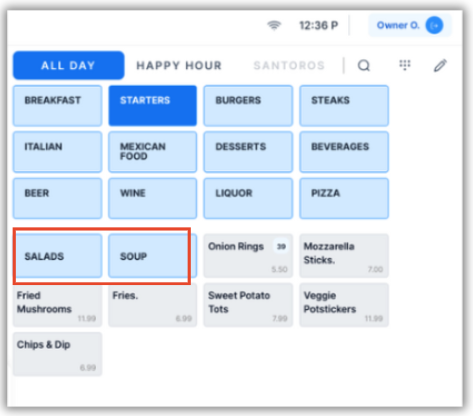
11. Subcategories
- Located beneath their parent categories.
- Subcategories group related menu items, making navigation easier.
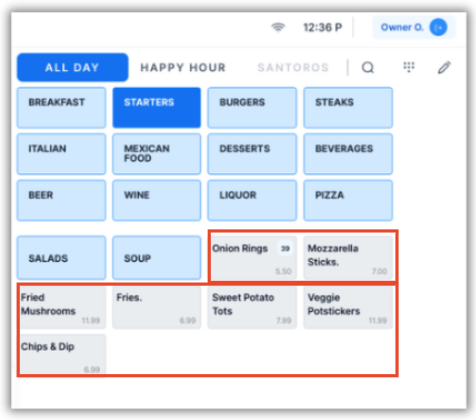
12. Items
- Found beneath categories and subcategories.
- Select an item to add it to the order.
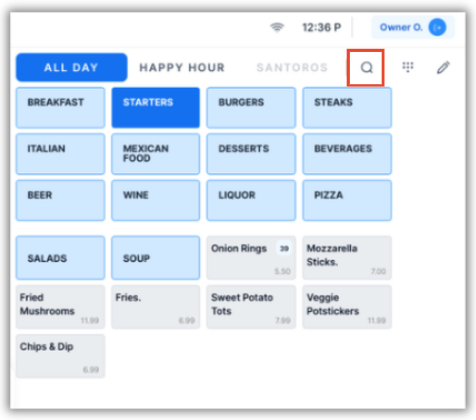
13. Search
- Use the magnifying glass icon at the top-right of the screen to quickly search for specific items.
14. Custom Item
- Click the calculator icon at the top-right of the screen to create a custom item.
- Note: Manager approval may be required if you lack the necessary permissions.
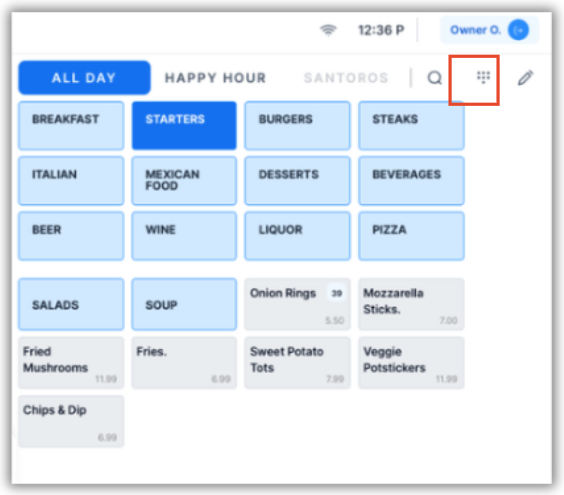
15. Edit Menu
- Click the Pencil icon in the top-right corner to enter editing mode.
- In Editing Mode, you can:
- Add or edit items and categories.
- Apply stock counts to items.
- Note: Editing permissions are required.

1. Adding Items to the Order
- Select an Item: Tap an item from the menu.
- Customize the Item with Modifiers (if applicable): If modifier groups are assigned to the item, a modifier screen will appear with the following options.
-
- Required and Optional Modifiers: Select the customers desired modifier options from the available modifier groups.
- Add Global Modifiers: If the assigned modifier groups don't meet the customer's customization request, you can add Global Modifiers. These are universal options that apply to all items (e.g., "Extra Cheese").
- Mark as To-Go: Check the “To Go” box to indicate the item is for takeout. This will appear on the kitchen prep ticket.
- Add Item Notes: Type any special instructions in the Item Notes text box. These notes will print on the kitchen ticket.
- Save the Item: Once you’ve made your selections, tap Save to add the item to the order.
- Editing Items After Saving: To make changes to an item after saving, simply tap the item in the order preview. This will reopen the edit menu, allowing you to adjust as needed.
Repeat as Needed: Continue adding items and customizing them until the order is complete.
- Once all items are added, tap the Send button at the bottom of the screen.
- The order will now display in the Order Queue or Tables screen, where it can be viewed or edited if needed.
When the customer is ready to pay:
- Tap the Pay button on the order screen.
- Learn about the Payment process in our Accepting Payments article.
By following these steps, you’ll quickly become confident in creating and managing orders on the CAKE POS system. Practice regularly to perfect your skills and ensure smooth service every time!